
I decided to revisit my very first blog post and do another galaxy nails manicure. Now that I think about it, they really ought to be called nebula nails considering how they look more like nebulae. Oh well, whatever you call them, they are a gorgeous look to sport on your digits. Don’t you agree?

I’ve done a tutorial for you so that you too can have some stellar nails (Pun absolutely intended!!). This is my first tutorial, and I did these while my hubby was snoozing in the room where my light box is so the step by step pictures aren’t that great but I think they are sufficient.
Supplies you will need:
- Tape (if you want to tape around your cuticles for easier cleanup)
- Makeup sponge
- Tweezers (for holding the bits of sponge and dabbing)
- Surface to dab excess polish on (I used a piece of plastic)
- Dotting tools (for stars)
- Tiny brush (for crisscross stars)
- Brush and polish remover for cleanup
- Assorted polishes – I recommend a light, medium and dark color for each different color nebula. I used 3 purples, 3 greens and 3 blues plus a few others I’ll mention as I go
- Prepped nails with basecoat and black polish completely dried
Let’s get started!

Take your sponge and tear off several pieces no bigger than a pea.
They should be oddly shaped and not cut flat otherwise your sponging won’t look right. When you load your sponge, you can apply the polish directly onto the sponge or place a drop on your work surface and dip the sponge into that. As you sponge onto the nail just add a little bit at a time and always dab the sponge on a surface before dabbing onto the nail. This will help to make the gradient look smoother.
1. Start by sponging some white polish where you want your nebula to be to help the colors stand out against the black base.
2. Sponge the lightest shade of each color over the white. As you can see I chose blue, green and purple for this look. Leave a little bit of white peeking out.
3. Sponge your medium shades over the light shades leaving some of the light shade peeking out. Don’t forget to dab, dab, dab.
4. Sponge the darkest shade over the medium shade. You should end up with a nice gradient. Don’t be afraid to just add a tiny bit of the darkest color and have a random spot of it here and there. That looks more realistic in my opinion.
5. Next you are going to sponge a dark blue along the edge where the white is peeking out a bit to make the nebulas and black kind of fade into one another.
6. Now add your finishing touches, apply topcoat and clean up your cuticles. I sponged some holographic glitter (SC Hottie) in random places and then added stars with a dotting tool and even crisscrossed a few stars before adding my topcoat (Northern Lights).
Note: Don’t add too many stars. Just a band of them here and there.
Then sit back and enjoy! Don’t you just love these? Which color nebula is your favorite?
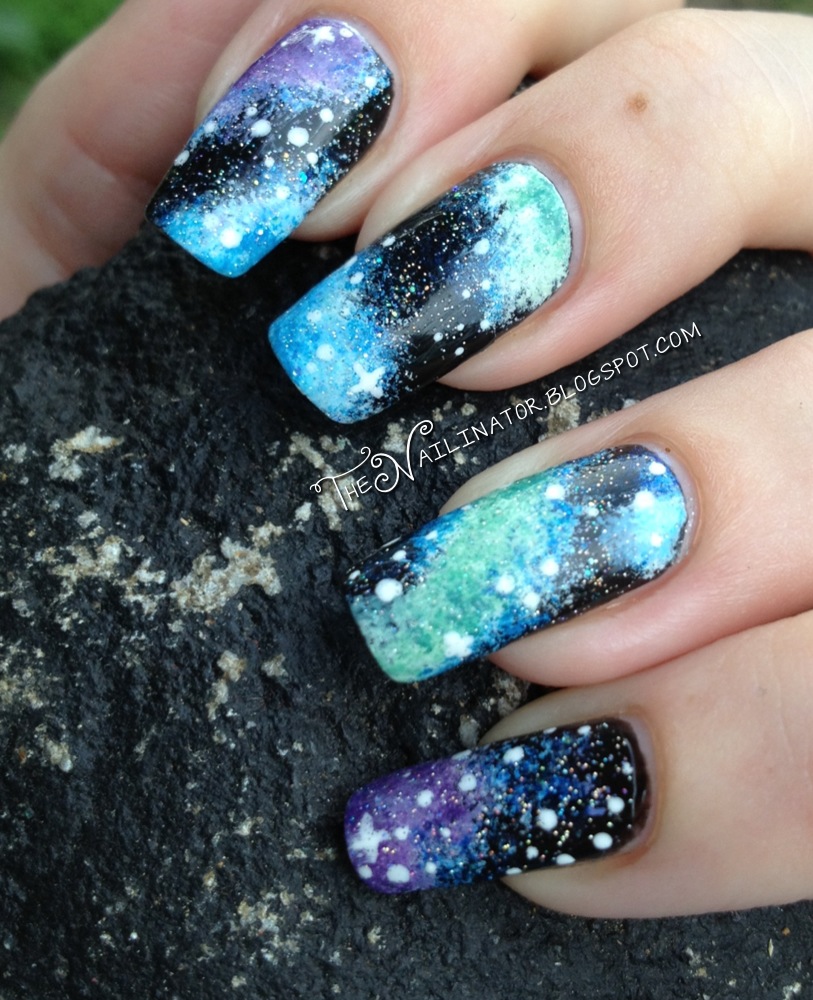

I included a fuzzy shot so you can get an idea of how glittery these babies were.

Here is the list of all the colors I used for my nails
- Chic Black Velvet and Jocarste White (56)
- Blues: Bichun Sky Blue (A65), Klik Baby Blue and Sinful Colors Why Not
- Greens: Sally Hansen Mint Sorbet, San San Sea Green, Caronia On The Go
- Purples: Caronia First Crush, Sinful colors Amethyst, Bobbie Purple Dazzle
- Bobbie Blue Flash
- Sinful Colors Hottie
- INM On the Go Northern Lights
- Oh My Golly Colorless (topcoat)
I hope you enjoyed my tutorial. If you have any questions, do feel free to ask. I’d love to see your nebula inspired nails if you decide to try this look too. So please share!
Pingback: CND Vinylux Weekly Polish Review | The Nailinator