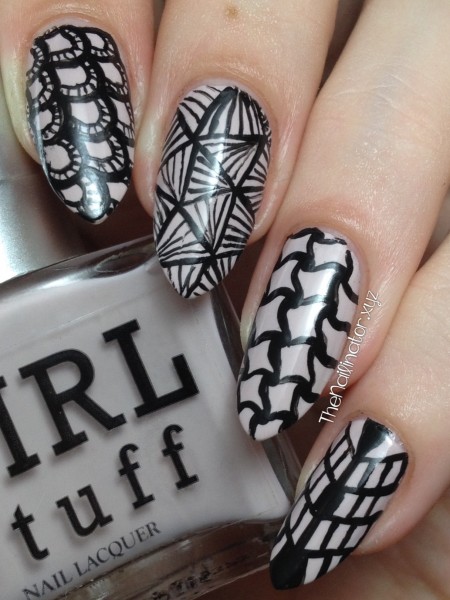
Two posts from me within a week? It’s like old times again! I’m sharing a look I wore a while back. I have recently been on a Zentangle kick and, after making cards and borders for projects, of course the next step was to bring the tangling to my nails!
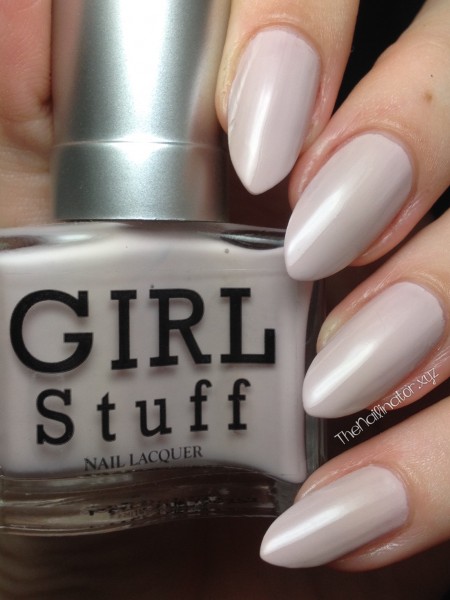
I started with two easy coats of Girlstuff Sophia. Sophia is a very pretty beige shade with pink undertones. Looking at the bottle, I honestly wasn’t 100% sure it would be very flattering on my skin tone but I was pleasantly surprised. I LOVE it! I was also happy to find that I only needed 2 coats for full opacity and it dried quickly. The Zentangled designs are done with black acrylic paint and a teeny tiny brush. Aren’t they awesome!?!? Here is a shot of Sophia on its own.
I love that I’ve been finding some neutral colors that I like on my skin tone. By looking at my polish collection I can see that I really favor dark colors. I find it very refreshing to have a clean neutral tone on my nails from time to time. Neutrals also make great base for nail art.
What is your favorite neutral shade to sport on your nails? And have you ever done any Zentangling? Please take a moment to share in the comments. I hope you have a zentastic day!
Happy New Year! I’ve got a scheduled post for you today as our plans to go out of town pushed through. Hopefully the weather will have cleared up and we have had the chance to soak up some sun while we are by the beach. If not, I’m sure we are having a grand time anyway.
I thought I would do a quick post sharing some of the nail art I have done for friends and family last month. I did a few designs that are seasonal and a few that would be great for any time of the year.
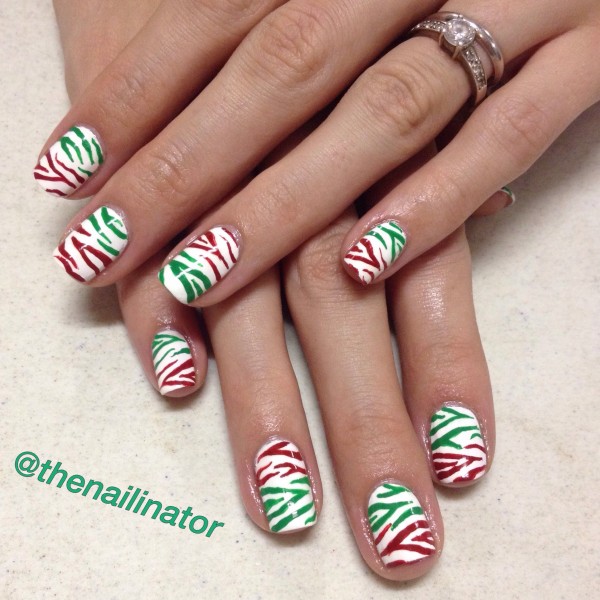
First up we have some fun zebra stripes in Christmas colors that I convinced The Shutterbug (my youngest sister) to let me try on her. If anyone can pull of this look, it’s her! I did the stripes with acrylic paint and a striper brush.
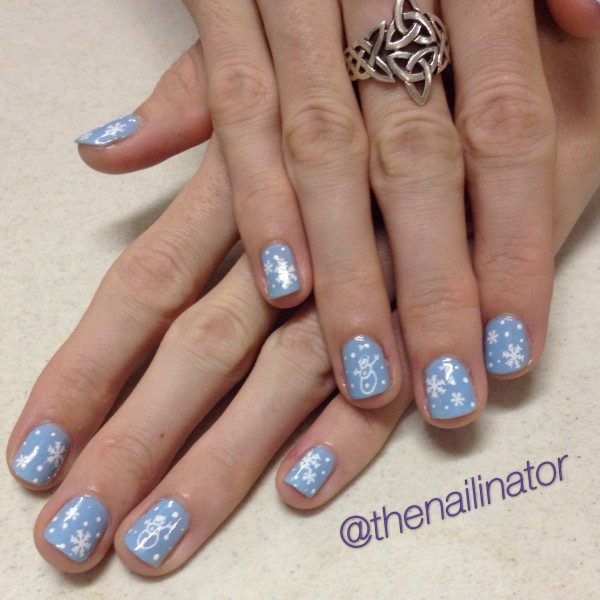
Next we have some super cute and easy winter wonderland nails I did for The Bookworm (my other younger sister). We started with a light blue base (Sansan Warm Blue), and I stamped snow flakes and an adorable snowman from my OB19 plate that I purchased last year from MyOnline Shop. I added a few tiny dots for a finishing touch.
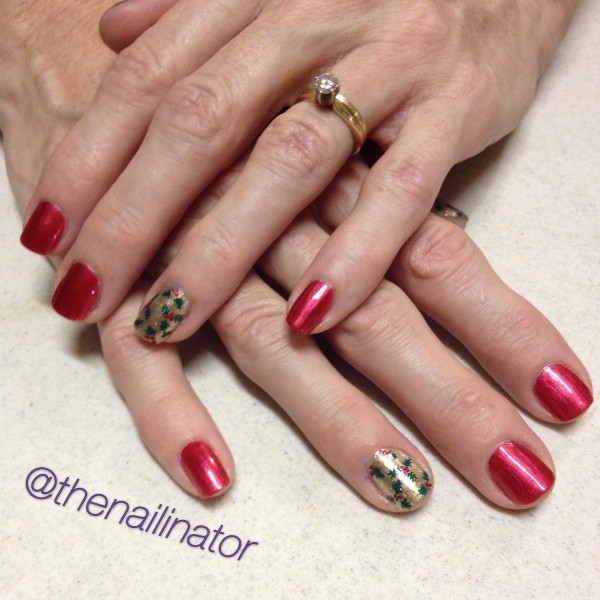
Next up is a look The Queen Mother requested after seeing my Holly Jolly nails. She wanted my holly stamped accent nail with all the other nails in red. I wish I could remember the name of the red she brought along. It is a stunner. I will check with her and update this (then I’ll probably go out and buy it!).
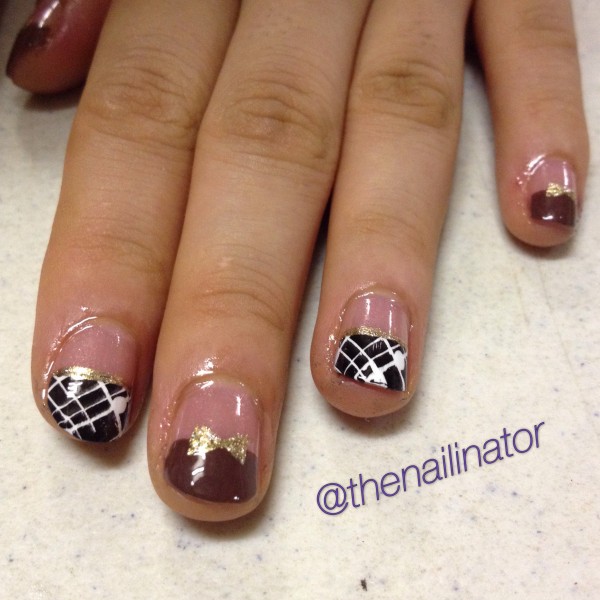
Next, I’m showing you a look that I was surprised to find I ended up really liking. A friend showed me a picture and I did my best to replicate what she was asking for. First I painted the whole nail in a very light jelly pink. Then I added color to just half of each nail (alternating brown and white). On each brown nail I painted a tiny gold bow. On each white nail I taped off the non-white part of the nail and stamped an image in black over the white. The tape kept the stamping on the white part I had painted before. I added a gold stripe across the nail and was finished. I had never tried a half nail design like this and had also never tried a stamping technique like this. It is always fun to try new things.
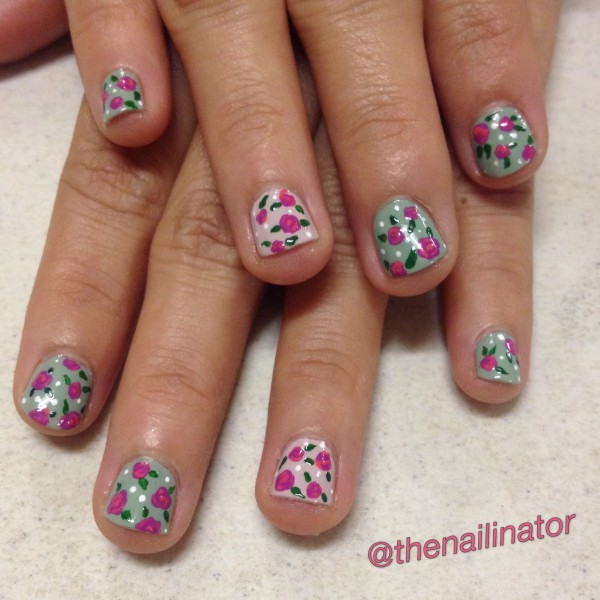
The next look is a floral design, something I’ve done several times before with different color combinations. This lovely lady picked mint green and off white as her base colors and wanted small roses and leaves. This was my first time painting such tiny roses which proved to be a challenge. I did my best, though, and she liked them so that is what counts after all.
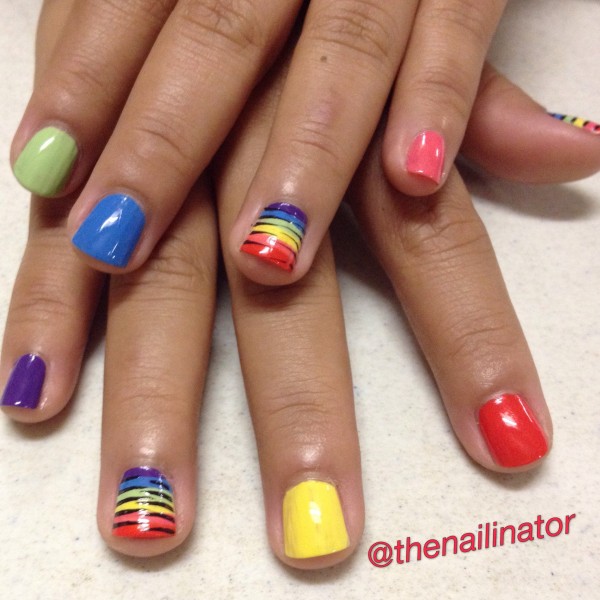
The last look I have to share with you is so fun and colorful! My friend wanted rainbow stripes with black strokes. I used a striping brush to paint each color in rows starting from the cuticle out toward the tip (purple, blue, green, yellow, pink and orange). I used black acrylic paint and added the black marks. We did this on her accent nails and thumbs. Since we used 6 colors I suggested we paint the other nails with those colors. They look suuuper cute!
I love doing nails for other people. It is fun to take on the challenge of suggesting things that will suit them and colors that will go with what they have in mind. Do you do nails for family and friends? If you follow me on Instagram you have probably already seen these as I share them there most of the time.
I hope you have had a wonderful holiday vacation so far. Mine has involved lots of food and laughs with my family which is just the way I like it. I’ve been under the weather with a crazy cold that won’t go away. But on the bright side, my hubby has been a darling taking care of me and the kids most of the time. I’m a lucky lady for sure! Whatever you ended up doing for the New Year, I hope you have had a great time and blessed year ahead!
I’m thrilled that one of my favorite polish brands is now available here in Cebu City, Philippines. Girlstuff Forever has just opened a kiosk at Ayala Center Cebu on the 2nd floor along Paseo Ciudad (near What A Girl Wants and Converse).
I was invited to attend the press event for the opening, and I wanted to share the nail art I wore for the event and to tell you more about Girlstuff and why I love it so much.
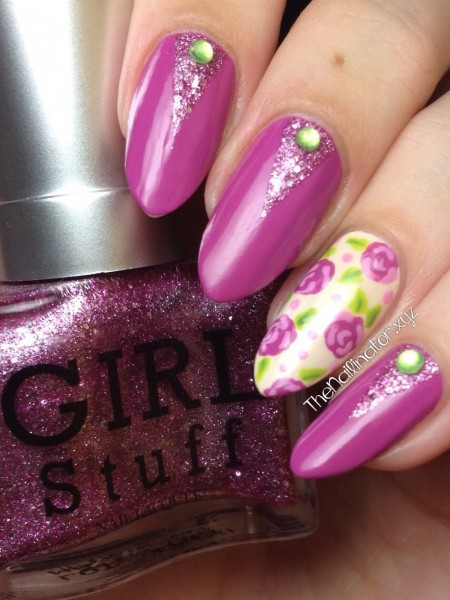
Aren’t these adorable? I started with Girlstuff Wild Berries as my base and used striping tape to tape off the triangles and filled them in with Girlstuff Enchantè. I added the rhinestones with a dab of nail glue and finished off with topcoat. For the accent nail, I used my biggest dotting tool with Wild Berries to make the big blob parts of the rose. Then I used a tiny dotting tool and some light pink for the swirly parts of the flower. I used a small nail art brush for the leaves and the tiny polka dots.
My little one wanted her nails done “like mommy’s”. It was fun to have matching nails.
About Girlstuff Forever
Girlstuff is the first 5-free nail polish brand in the Philippines. The polish is actually made in France but only sold here. I love this brand because, in addition to being safe for my little girl to wear (which she does quite often), there is a wide selection of colors and finishes to choose from.
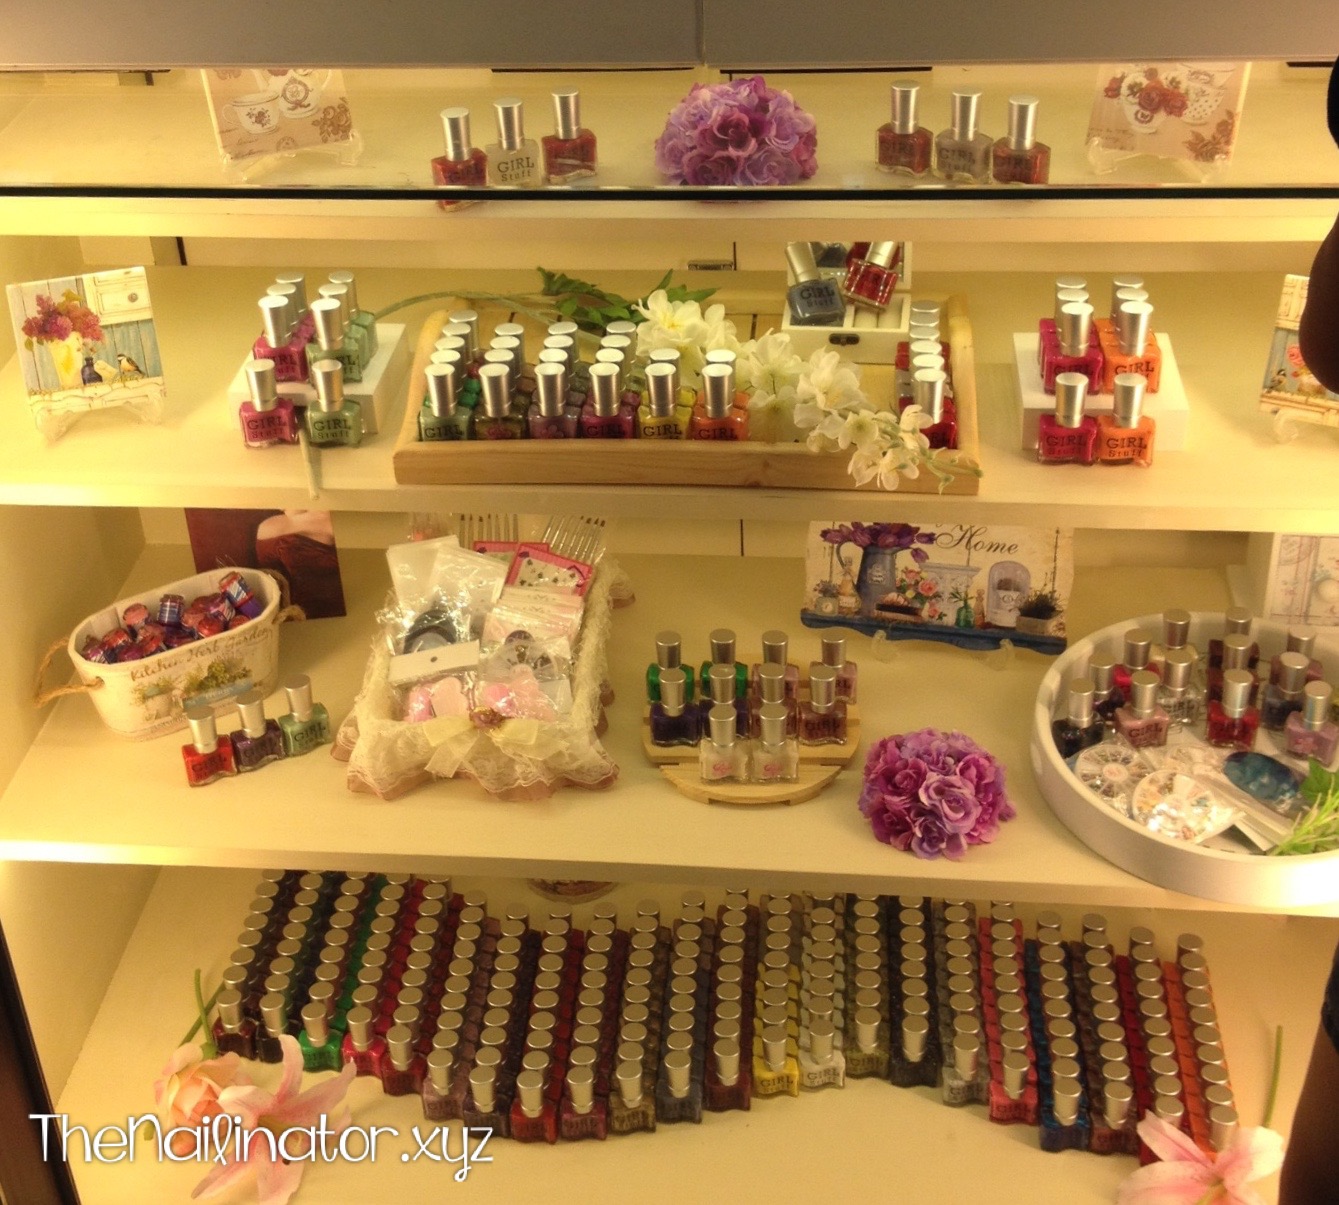
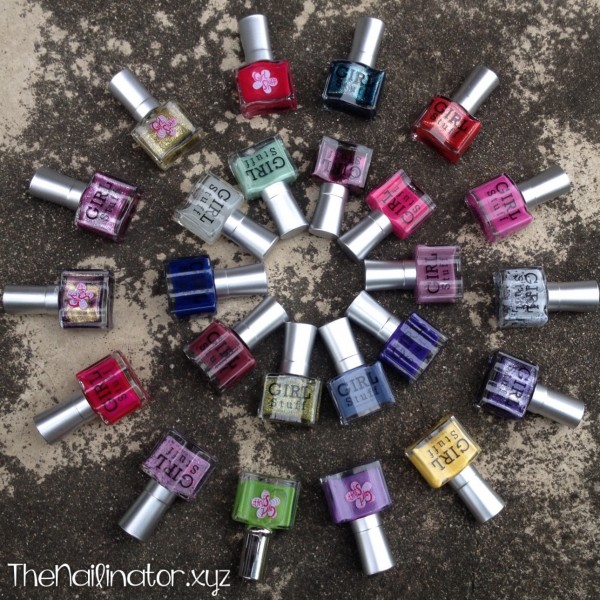
The selection includes textured and magnetic polishes, cremes, jellies, metallics, shimmers, duochromes, glitters, and an awesome matte topcoat! They are also quick-dry, kid-safe, and affordable (100-150 per bottle). This is a cruelty-free brand which means that they don’t test their products on animals. Here is my personal collection so far. ♥ (Check out my Girlstuff tag archive to see other blog posts I’ve made featuring Girlstuff polish.)
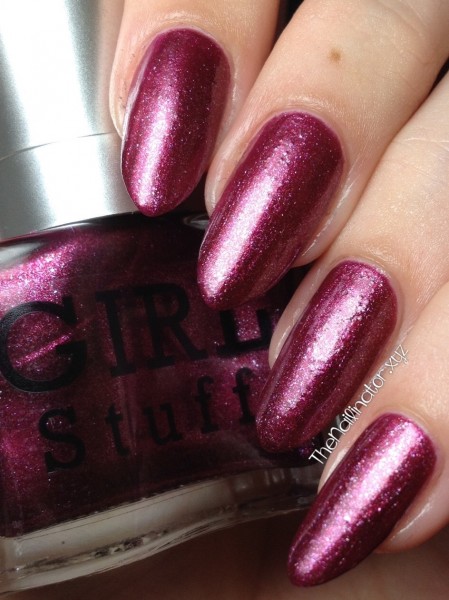
I’ve included a swatch shot of Red Velvet, which is part of their newest “Redilicious” fall collection. It’s so pretty and shimmery. I used 3 thin coats and no top coat for this shot. They will be releasing a Christmas collection soon so keep an eye out for that as well.
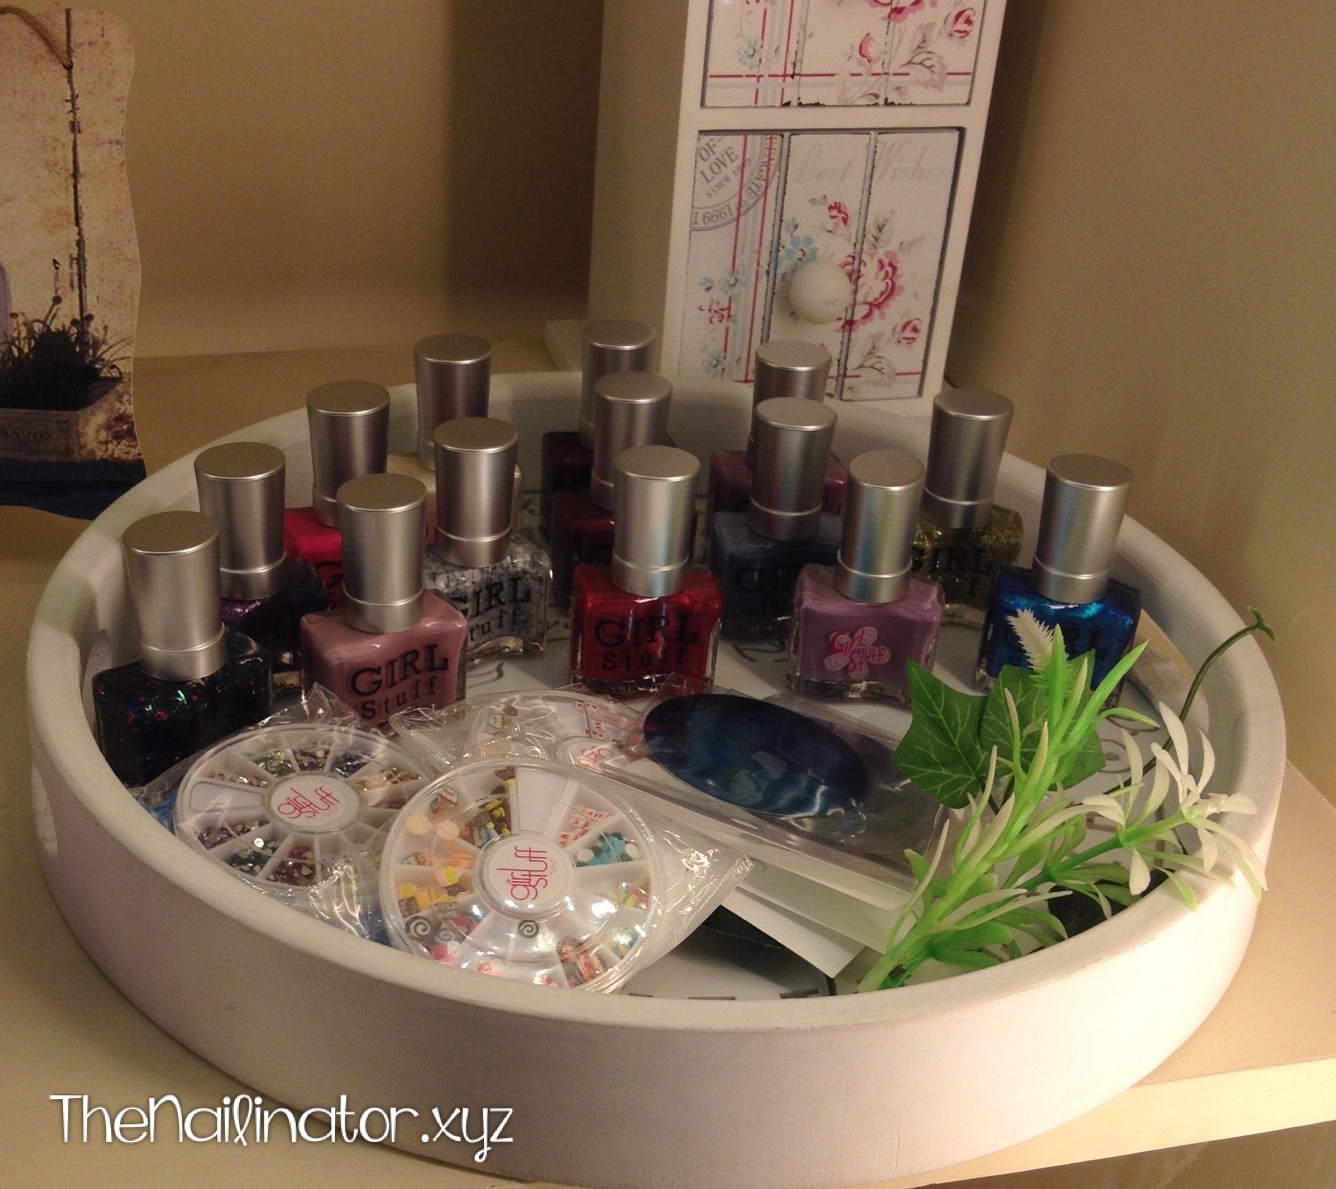
Girlstuff also carries a variety of nail art tools and accessories like rhinestones, dotting tools, brushes, stickers, and the like. They even have washable polishes which can be removed with soap and water. I will be getting my little girl some of those when she is a bit older and wants to do her own nails.
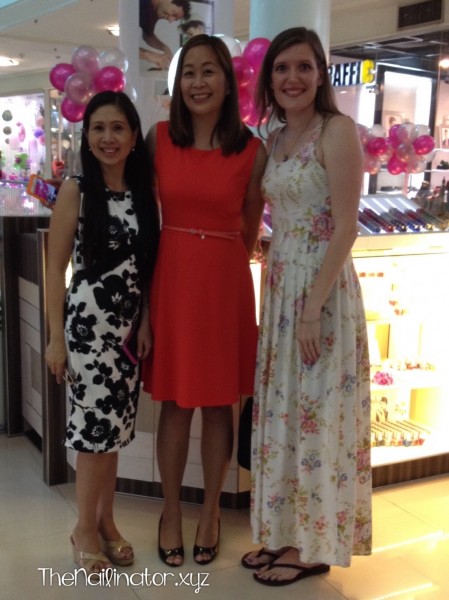
The owner and founder of the company, Janina, is a chemist-turned-SAHM. She started off making colognes and other products for little girls that are free of harmful chemicals. Eventually she started making nail polishes. Janina told me that each product is tested multiple times during production to ensure that the finished products are safe for us and especially for our little ones. Here’s a shot of me at the opening (on the right) with Janina (middle) and Ging, (on the left) who is the operator of the Cebu branch.
If you want to get your hands on some of this lovely polish for you or for the little girls in your life, you can find them here in Cebu on the 2nd level of Ayala. The other branches are located at SM Mall Of Asia, SM North Edsa, SM Megamall and SM San Lazaro. You can also contact them directly and they can ship to you.
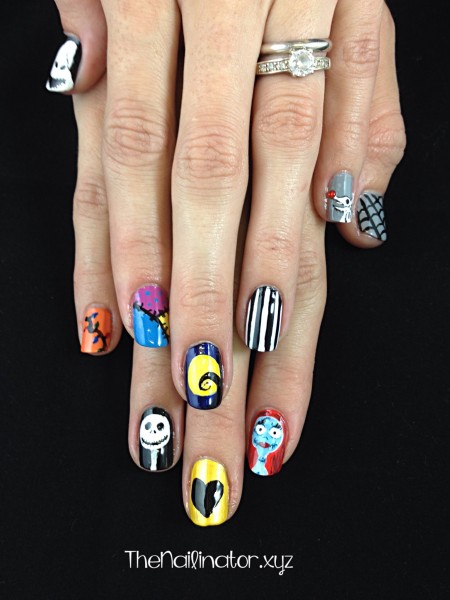
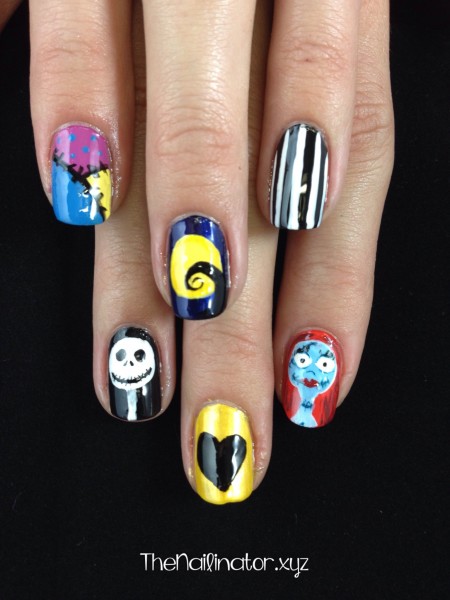
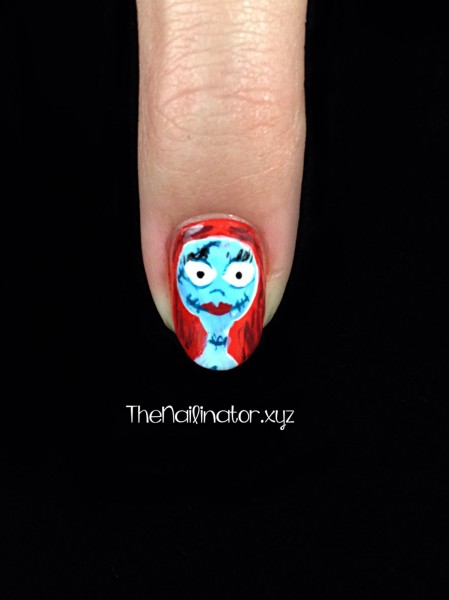
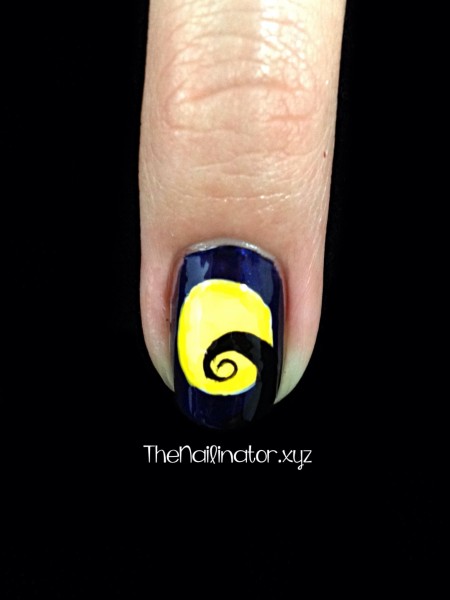
The kids were super cute in their costumes, and they had a blast trick-or-treating. As of today, there are a bunch of sales girls at Park Mall that have photos on their phones of an adorable Mario and Elsa. I had a lot of fun with them. I never did get around to doing any Halloween nail art for myself aside from my stamped spiderwebs from last week. My baby sister (aka The Shutterbug) asked me to do her nails last week though, so I do have another design to share. I knew she needed some Nightmare Before Christmas nail art for the season. I looked online for some screen shots from the movie and did some doodling and came up with a few nail ideas. I asked her for some input as well since I’ve never seen the movie, and this is what we came up with. To do these, I used brushes from the 8 pc. nail art brush set I reviewed yesterday. I did use a striping brush and one of my other brushes that I cut down to a teensy size (like 8 strands) to do the stitches and lashes on Sally. But everything else was done with those brushes from Born Pretty Store.
Cute huh? We got out the lightbox out to take pictures of these and Mr. Nailinator took the liberty of taking the photos for me since I wasn’t feeling well at the time. They turned out too bright and a bit fuzzy because he didn’t check them before he released sent The Shutterbug off to enjoy her nails. Anyway, he tried to sharpen the close up shots for me a bit so that they would be as clear as possible. Though the pictures don’t really do them justice (IMHO), I still wanted to share these with you as I’m pretty darn proud of them.
I’m not really into gory, bloody, and creepy stuff, and I don’t like scary movies. I’m a mom of two little ones who mostly watches Winnie the Pooh and The Magic School Bus, so don’t expect much nail art like that over the years. What you can expect are Christmas nails when it’s the season. Because I. LOVE. CHRISTMAS! Seriously though, it makes me ridiculously giddy.
Today I’m reviewing a brush set from Born Pretty Store. They sell all sorts of nail art supplies and products (plus makeup, jewelry, etc.) and ship internationally for free, which is great! If you live in the Philippines, you will have to pay customs and a parcel fee on the package when it arrives. So keep that in mind. It cost me about 150 pesos to claim a package with 3 items in it. Just something to consider when ordering online.
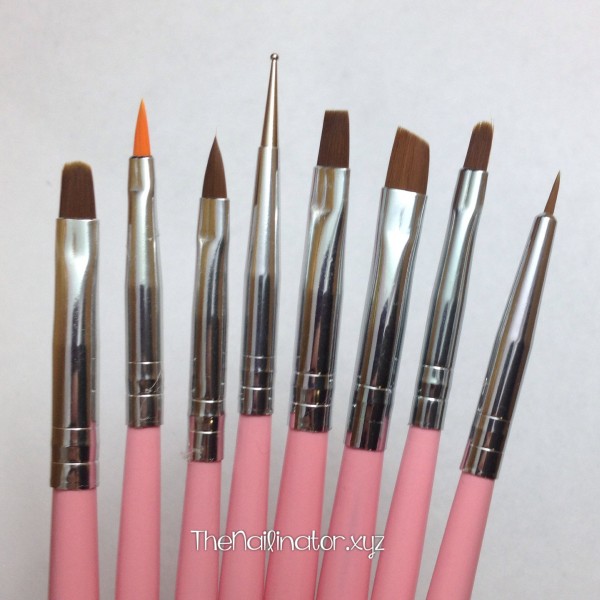
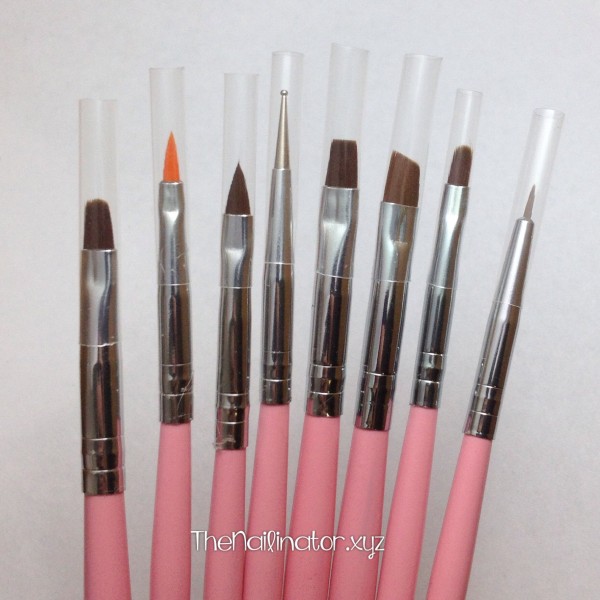
I am rather pleased with this affordable brush set. They cost USD$4.32 right now, which is about PHP 190. The set includes seven different brushes and one small dotting tool. The handles are pink, which I personally love.
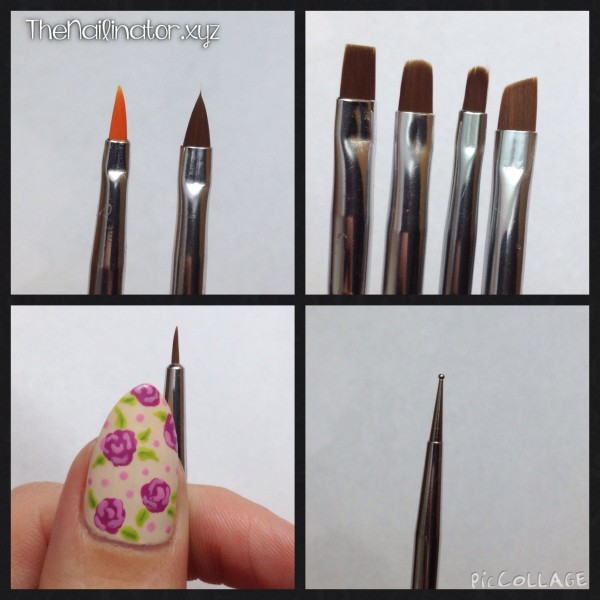
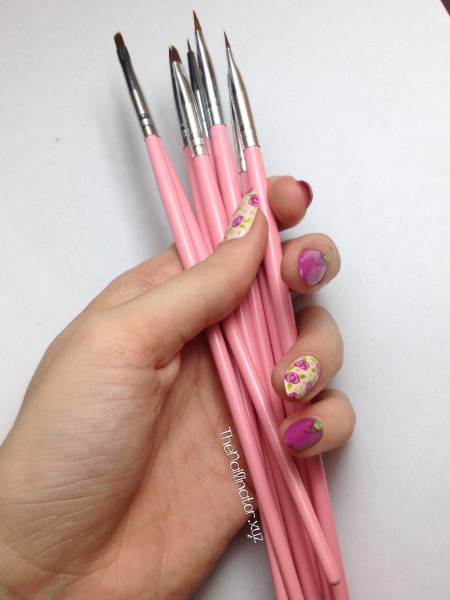
If you look at the close-ups of the brushes below, you will see two sizes of brushes that come to a point, one angled brush, one flat brush, and two sizes of flat brushes that are slightly rounded at the end. I love these flat brushes for cleanup around the cuticle or for making bigger shapes for nail designs. If I had any skills whatsoever with one-stroke flowers, I’m sure they would be perfect for that as well. The set also comes with a very small tip brush, which is great for detail work (like the leaves of my roses in the picture below). The dotting tool in this set is a very small one and it’s perfect for making tiny polka dots like you see below and for the swirly parts of these roses. I use this size of a dotting tool to do the markings of leopard print nail art.
The set is shipped with these protective covers (pictured below) to help keep them from being bent. It is best to store them with the covers on, just to be safe.
Overall, this is definitely a good set of brushes. The price is right, it has a decent variety of tools and uses. If you purchased this set, you would be able to do a lot of different designs with them. You could even cut some of the bristles off one of these brushes to make finer tip brushes if you want something smaller. I’ll be sharing some nail art I’ve done with these very soon.
Well, that’s my review of this 8 pc. Nail Art Brush Set. What do you think of this set? Do you want it? Already have it?
I’ve got a coupon code for you that will give you 10% off your entire order if you get the hankering to order this, or anything else, on BornPrettyStore.com.
I hope you have a great day. I’m off to bed so I can get up in the morning and take my two little ones (Super Mario and Queen Elsa) trick-or-treating at the mall. Yeah, we do things a bit differently here in the Philippines.
Hugs,
Rachael