10 Feb

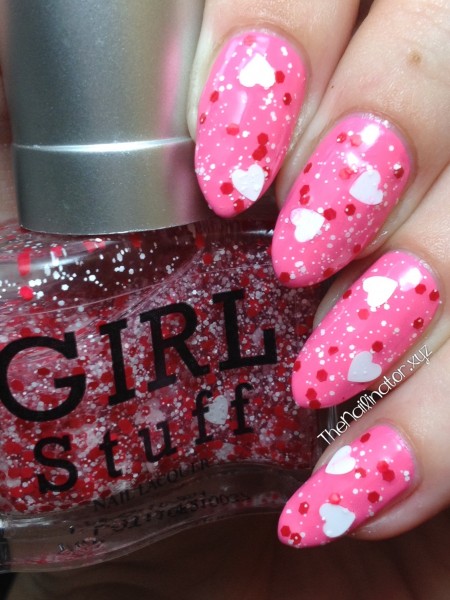
Barbie’s Ultimate Valentine’s Date Night Nails (Featuring Girlstuff I Love You)

Hey ladies!

Valentine’s Day is just around the corner and, while I’m not a sucker for the commercial side of the holiday, I do enjoy seeing the heart decorations, and I like to make my hubby a little something sweet to eat and maybe an extra nice dinner at home. He has hinted at a fun surprise in the works for me this year so I’m excited about that. I know there IS polish involved, so I am sure I’ll be pleased.

Do you like the title of this post? What I’m sharing with you tonight has to be the girliest of all the girly manicures my digits have ever sported! I can totally see Barbie showing these off at a Valentine’s date night with Ken. I have received a ton of compliments on these nails. They are very fun to wear.

Girlstuff I Love You

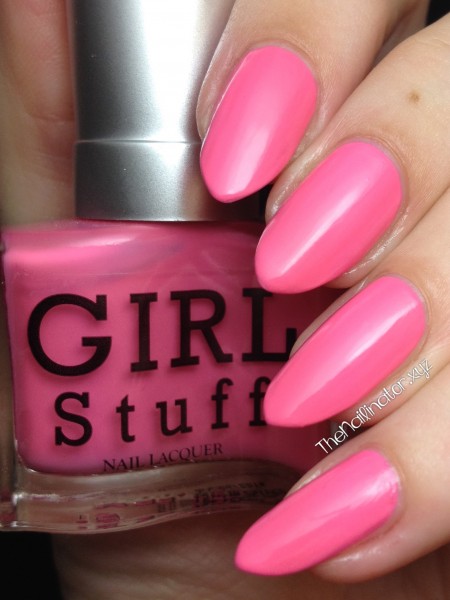
I started with two coats of Girlstuff Pink Lemonade, which is a hot pink creme from their Summer 2014 collection. It is a vibrant, eye catching color on its own. I added one coat of I ♥ U from their Confetti Collection. This is a perfect glitter topper for Valentine’s Day or any time you want something sweet and girly. The hearts took a bit of work to fish out, but it wasn’t difficult and the payoff with the rest of the glitter mix was great with just one coat. The hearts are small enough that they don’t stick out awkwardly on my very curved nails. I always hate it when I put glitter shapes on my nails and they stick out oddly and tempt me to pick them off my nails. One coat of Girlstuff Fast Dry Top Coat (more on this amazing new product later) and I was good to go. I have been sporting these for 5 days now and they still look fabulous. I love when polish wears well despite my daily chores and such.

Here is my swatch of Girl Stuff Pink Lemonade on its own. So pretty!

Girlstuff Pink Lemonade Swatch

Girlstuff is a cruelty free brand, and their polishes are all 5 free and safe for little ones and pregnant women as well. Check out their Website or find them on Facebook to find out how to get your own.

I hope you have a great week and that you get to make someone smile today. You are fabulous!

Hugs,
Rach

05 Jan

Pure Ice Spit Fire Sponging

Hi lovely ladies!

I hope you are having a great start to the year. While we enjoyed our holiday break, things got off to a bumpy start for us yesterday with getting back to work and back to doing school with the little ones.

I was originally planning on doing a glitter placement mani to ring in the new year. But since I was sick and preparing for a trip out-of-town, I wanted something that was quick and easy but didn’t skimp on the bling. I also wanted something that wouldn’t chip off while I was out-of-town.

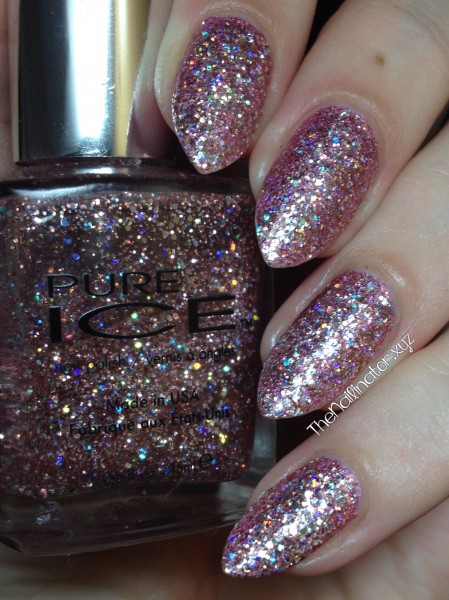
Pure Ice Spit Fire Sponging Swatch

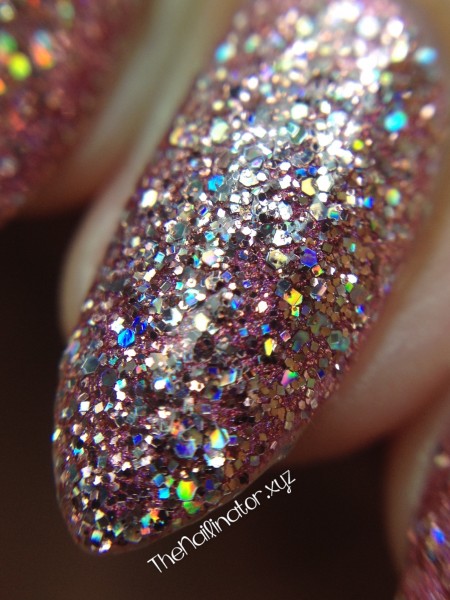
My hubby surprised me by bringing this beauty home one day while we were in Texas this past Summer. Pure Ice Spit Fire is a gorgeous glitter bomb with multi-sized hex and square glitters suspended in a clear base with a pinkish tint to it. The smallest glitters are light pink, but there are also some bigger silver holographic glitters that give this some major sparkle.

Pure Ice Spit Fire Out of Focus

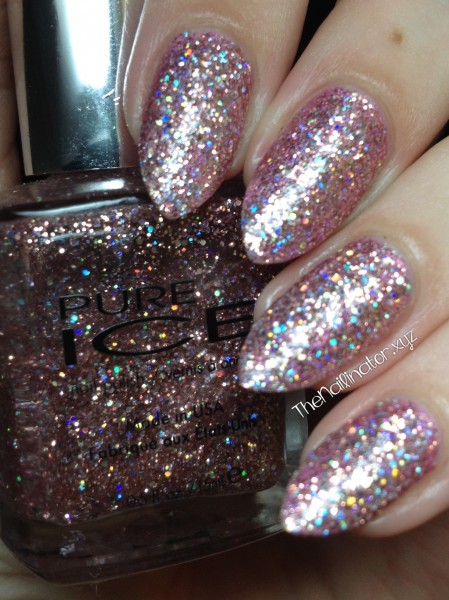
I started with a thin coat of Color Club Miss Bliss which is a holographic pink polish. After that dried, I put scotch tape around my nail and cuticle area to minimize cleanup time. Then I used the bottle crush to put a drop of Spit Fire on the sponge and then dabbed the glitter onto the nail. I kept working until I was satisfied with the coverage. I included the out-of-focus shot so you can see more of the holo sparkle. I received many compliments on this flashy mani.

Pure Ice Spit Fire Macro

Check out this macro shot! Oh so pretty!

Tip: Use an orange wood stick to help with glitter cleanup around the cuticle area. Just use your flat brush to brush some polish remover on the cuticle and then gently scrape off any glitter that is crampin’ your style!

What did you sport on your nails for the New Year? I hope you have a great day and fabulous year to come!

Hugs,
Rach

26 Dec

OPI Alcatraz Rocks with Snowflake Stickers

Hello Lovely  People!

I hope you all had a merry Christmas with your nearest and dearest. I’ve been so busy the past two weeks baking goodies to give away, doing nails for some friends and family, and finishing up school with my kiddos. We’ve also been dealing with some sniffles in the house so that slows things down a bit. There is my explanation for why is has been a bit quiet around here. We had a wonderful day with the family yesterday, though. We fixed Mexican food and had everyone over at our house. It was a lovely day for sure! God has blessed us so!

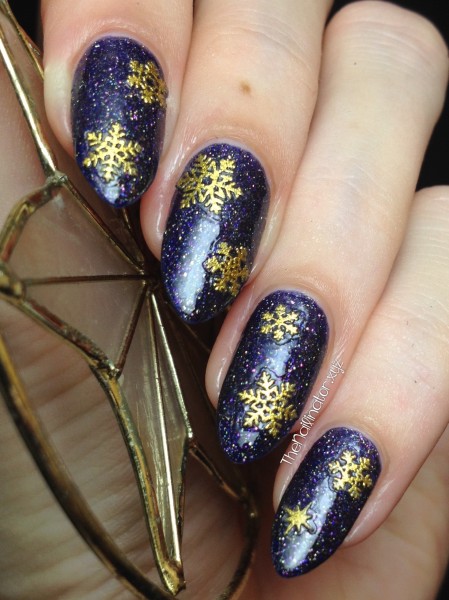
Today I’m showing you one of my favorites, OPI Alcatraz Rocks. This is another polish I saw swatched by Jemma of Eeeek! Nail Polish! and I just HAD to have it. The super sweet Jacqui of Crafty Nail sent me this in our nail swap last year and I have worn it before but I haven’t posted it with any nail art yet. So here it is in all its pretty glittery goodness. Thanks again Jax!

Alcatraz Rocks with snowflake stickers

I added some snowflake stickers to make the look more festive. The stickers are super cute but they peeled up a bit along the edges when I added topcoat. I really like having smooth nails so little bits sticking out really annoy me. I usually end up picking at stickers that peel up. So these didn’t last too long.  I do have a tip to share for using nail stickers. Do NOT apply them to wet polish thinking that they will stick better since they will dry with the polish. It doesn’t work. What I figure is that the solvent in the polish messes with the adhesive on the stickers and just makes them gooey and not stick properly. It is much better to wait until the polish is dry.

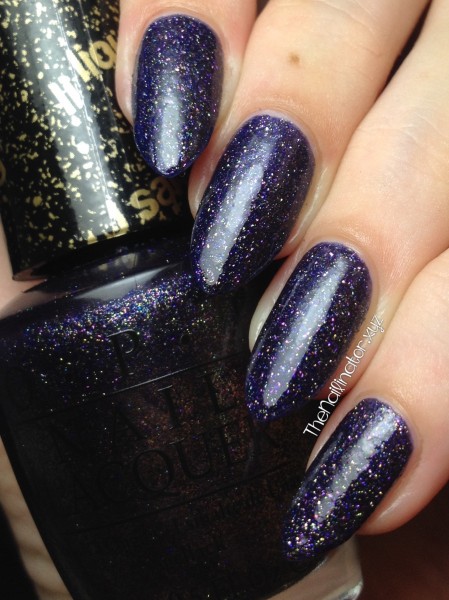
OPI Alcatraz Rocks

Alcatraz Rocks takes two coats for full coverage. It is a gorgeous blurple (bluish purple) liquid sand polish which means it dries  to a very textured finish. I added two coats of topcoat for this smooth finish. I prefer Alcatraz Rocks with topcoat as it really brings out the glitter. I’m ALL about the glitter y’all! That being said, since it is a glitter polish, this takes a bit of effort to remove. So worth it though!

Well, that’s all for me today. I’m off to play with the kids and I’ve still got a bit of cleaning up to do. I hope you are all having a great holiday and that you get to spend some quality time with those you love most.

Happy holidays from my family to yours!
Hugs,
Rachael

02 Dec

SanSan Warm Blue with Icy Ruffian

Hi ladies!

Just because it is Monday doesn’t mean we should feel blue. Of course, that is easy for me to say because Monday is my hubby’s day off, and we went out today, had a grand time with the kids, and got most of our Christmas shopping done. Win! Plus it is finally December 1, which means Christmas everything. Bring on the holiday nails!

Warm Blue Glitter Ruffian snowflake

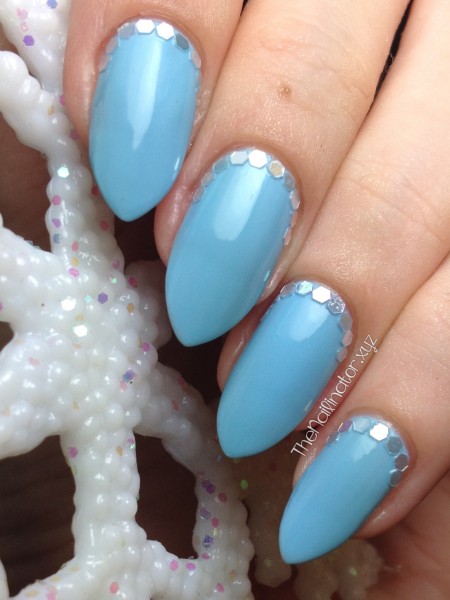
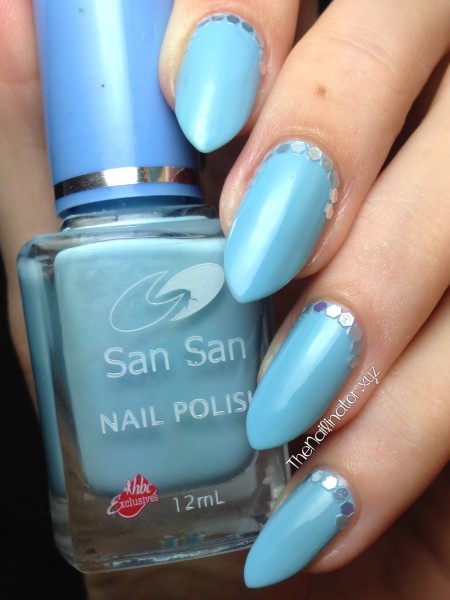
I’ve got a quick and easy look to share with you today. All it takes to do this is a pretty icy blue shade and some glitters. I started with couple coats of this lovely, light, icy blue polish, ironically named Warm Blue (by Sansan). I added a glitter ruffian flair with the pearly glitters from the hexagonal glitter set sent to me by Born Pretty Store. After applying the second coat of Warm Blue, I used a damp orange wood stick to pick up the glitters and place them where I wanted them. Then I finished with topcoat. Easy peasy!

Warm Blue Glitter Ruffian

This was easy to do and ended up looking so pretty! I will definitely be doing this type of look again. The glitter adds just the right amount of sparkle. The colors I chose are definitely winter appropriate. I had a couple of people tell me they looked like “Frozen” nails. I can totally see Elsa rocking these babies and singing, “Let it SNOOOOOW”! Haha!

Well, I hope you liked these. If you want to order the 12-color glitter set from Born Pretty Store (or anything else for that matter) you can use my coupon code for 10% off your entire order!

BornPrettySore Coupon Code TEAW10

I hope you have a great start to the week! Keep smiling!
Hugs,
Rach

22 Nov

Two-for-one Sparkly Accent Nail

Hi lovelies!

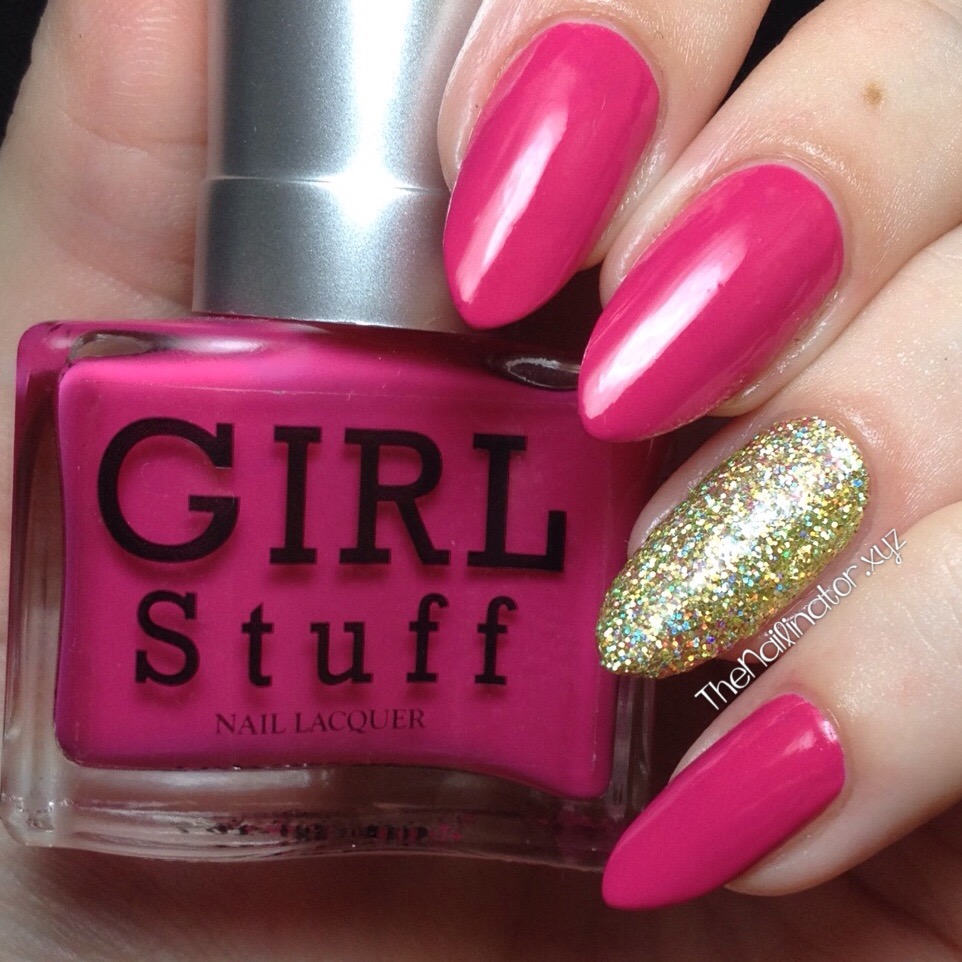
I’ve got  two-looks-in-one for you this evening. First up, I’ve paired this lovely hot pink with a gold glitter accent nail. I like to use glitter as an accent nail when I don’t have the time or inspiration for nail art but I still want something flashy and interesting. Do you do this too? This pink is Pretty In Pink by Girlstuff Forever. It is a two-coater creme polish that dries fast and is so bright and fun to wear. It cleans up easily too.

GirlStuff Pretty In Pink with 24K sponged accent nail

For my accent nail, I chose 24K which is also by Girlstuff. The bottle is packed with remarkably sparkly holographic gold glitter suspended in a clear base. You could paint it onto your nail for the typical coverage of any glitter top coat. But, if you want the coverage I have, you will need to grab a makeup sponge. I put tape around my cuticle (to minimize glitter sticking to my finger) and put a drop of 24K on the sponge. Then I sponged that directly onto my nail and repeated the process until I was happy with the coverage. The great thing about this method of application is that you can get all the glitter on the nail and most of the clear base will be left behind in the sponge. So you can have full coverage without having to use 14 coats of glitter. 😉 Make sense? Finish it off with topcoat to seal your glitter and enjoy the sparklies! The accent nail took a bit of elbow grease to clean up, but that’s typical for glitter.

Girlstuff Blues with 24K sponged accent nail

After wearing Pretty In Pink for a few days, I decided to try out Blues, another one of my new beauties from Girlstuff. This navy blue creme is another two-coater that dries quickly with a great shiny finish and also cleans up easily. ♥

The more Girlstuff polishes I try, the more I love them. I’ve heard they are good for stamping too, so that is on my “things to try” list. I’ll let you know.

I hope you are having a great weekend. Make someone smile today!
Hugs,
Rachael

%d bloggers like this: