18 Nov

Girlstuff Forever is in Cebu!

Hello Ladies!

I’m thrilled that one of my favorite polish brands is now available here in Cebu City, Philippines.  Girlstuff Forever has just opened a kiosk at Ayala Center Cebu on the 2nd floor along Paseo Ciudad (near What A Girl Wants and Converse).

I was invited to attend the press event for the opening, and I wanted to share the nail art I wore for the event and to tell you more about Girlstuff and why I love it so much.

Girlstuff Wild Berries with Floral Accent Nail

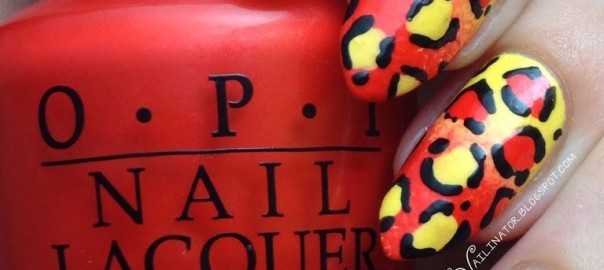
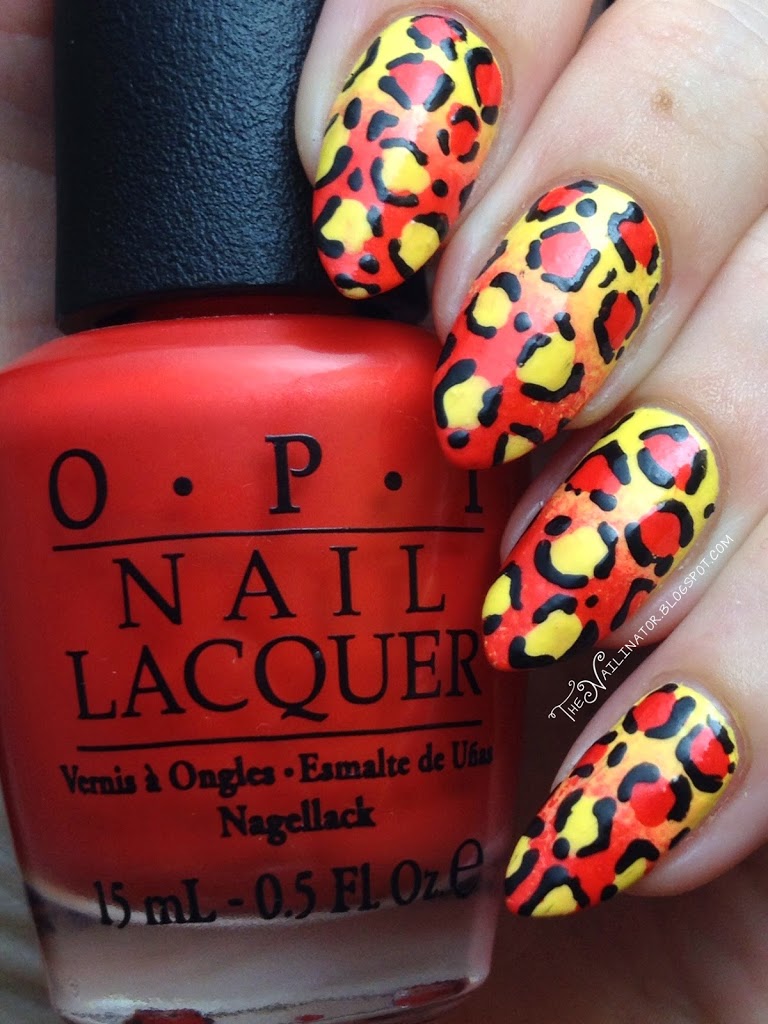
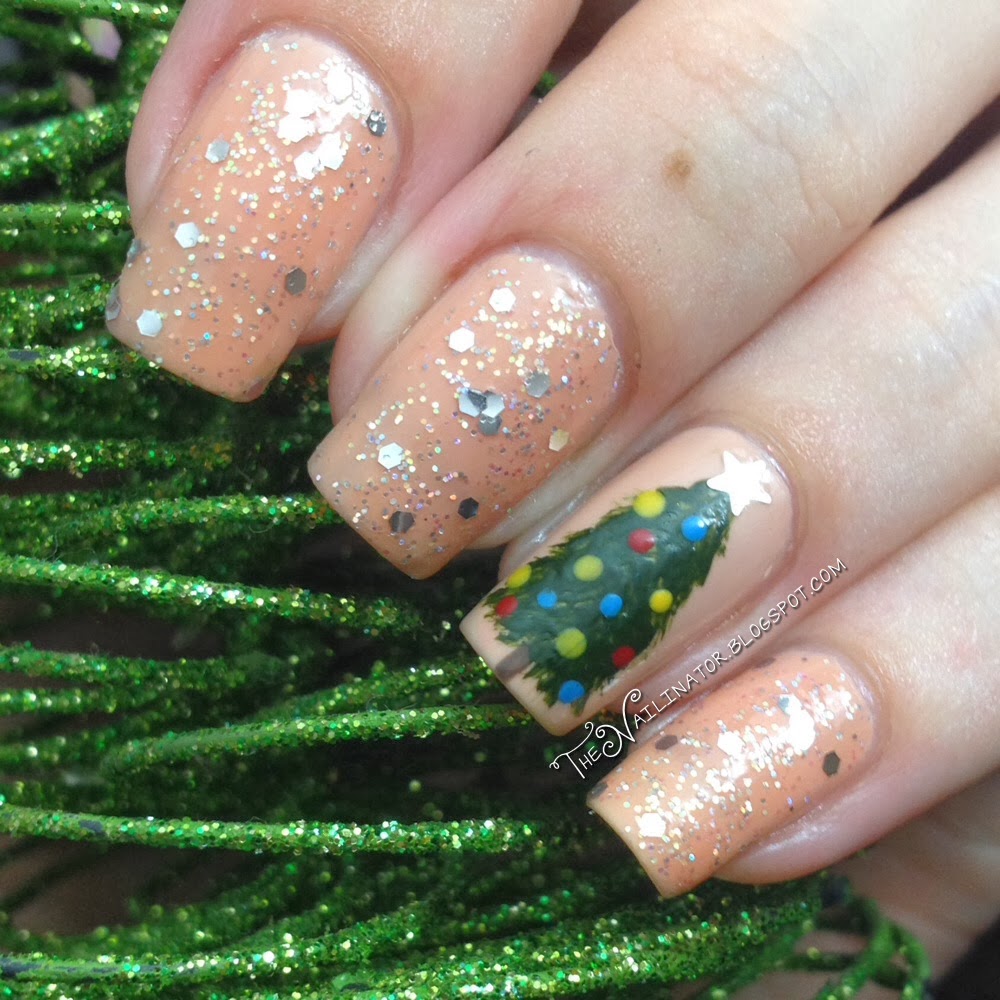
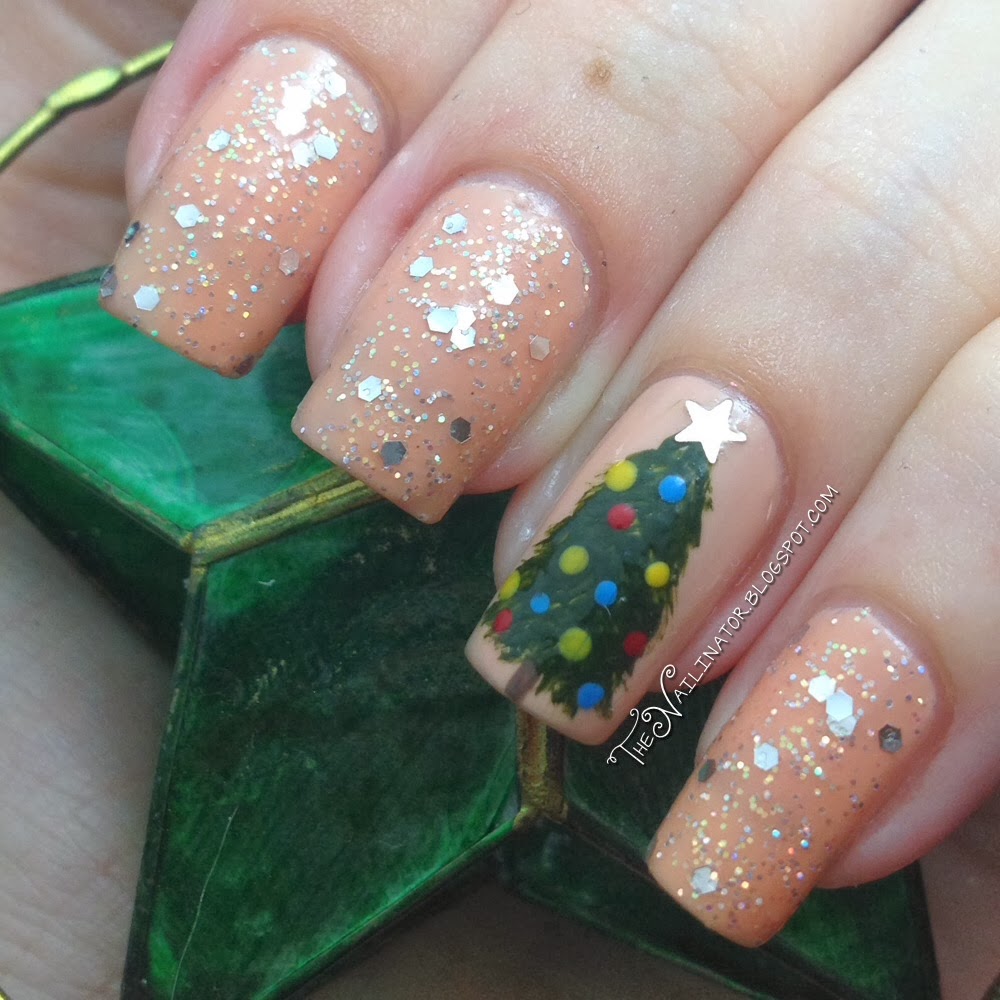
Aren’t these adorable? I started with Girlstuff Wild Berries as my base and used striping tape to tape off the triangles and filled them in with Girlstuff Enchantè. I added the rhinestones with a dab of nail glue and finished off with topcoat. For the accent nail, I used my biggest dotting tool with Wild Berries to make the big blob parts of the rose. Then I used a tiny dotting tool and some light pink for the swirly parts of the flower. I used a small nail art brush for the leaves and the tiny polka dots.

Mommy & Me manicure featuring Girlstuff Forever polishes

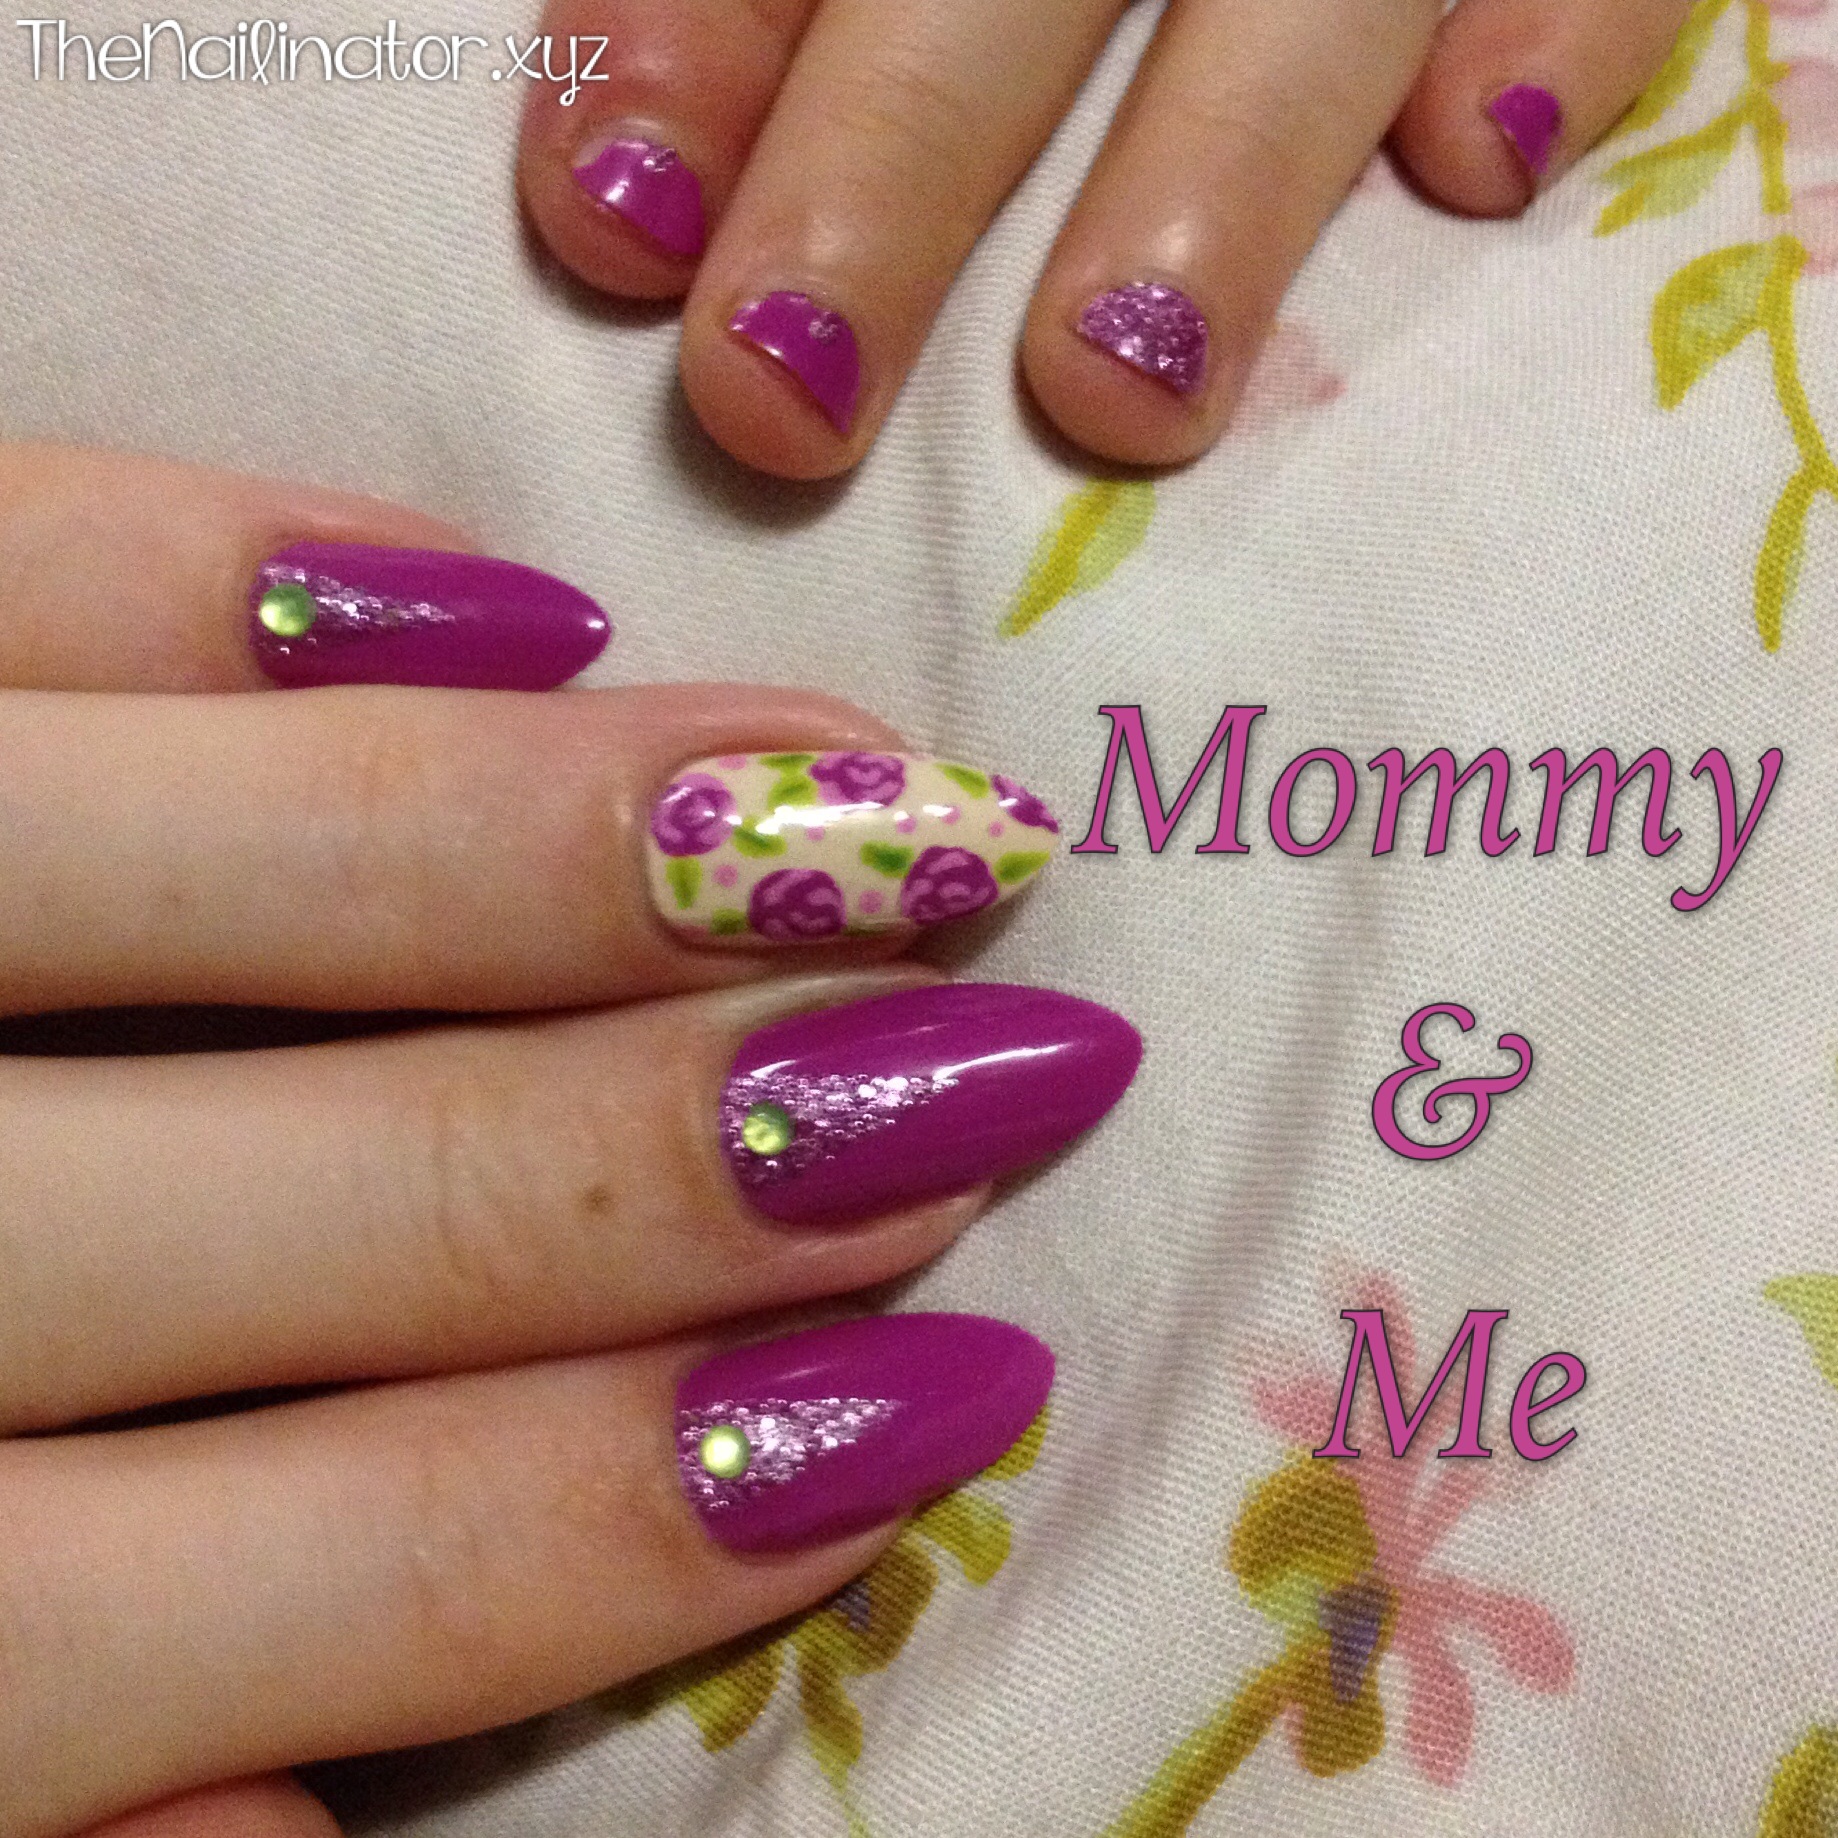
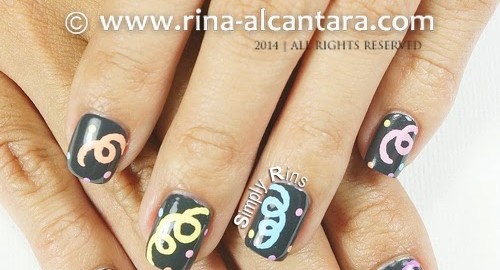
My little one wanted her nails done “like mommy’s”. It was fun to have matching nails.

About Girlstuff Forever

Girlstuff is the first 5-free nail polish brand in the Philippines. The polish is actually made in France but only sold here. I love this brand because, in addition to being safe for my little girl to wear (which she does quite often), there is a wide selection of colors and finishes to choose from.

Girlstuff Forever kiosk at Ayala Center Cebu

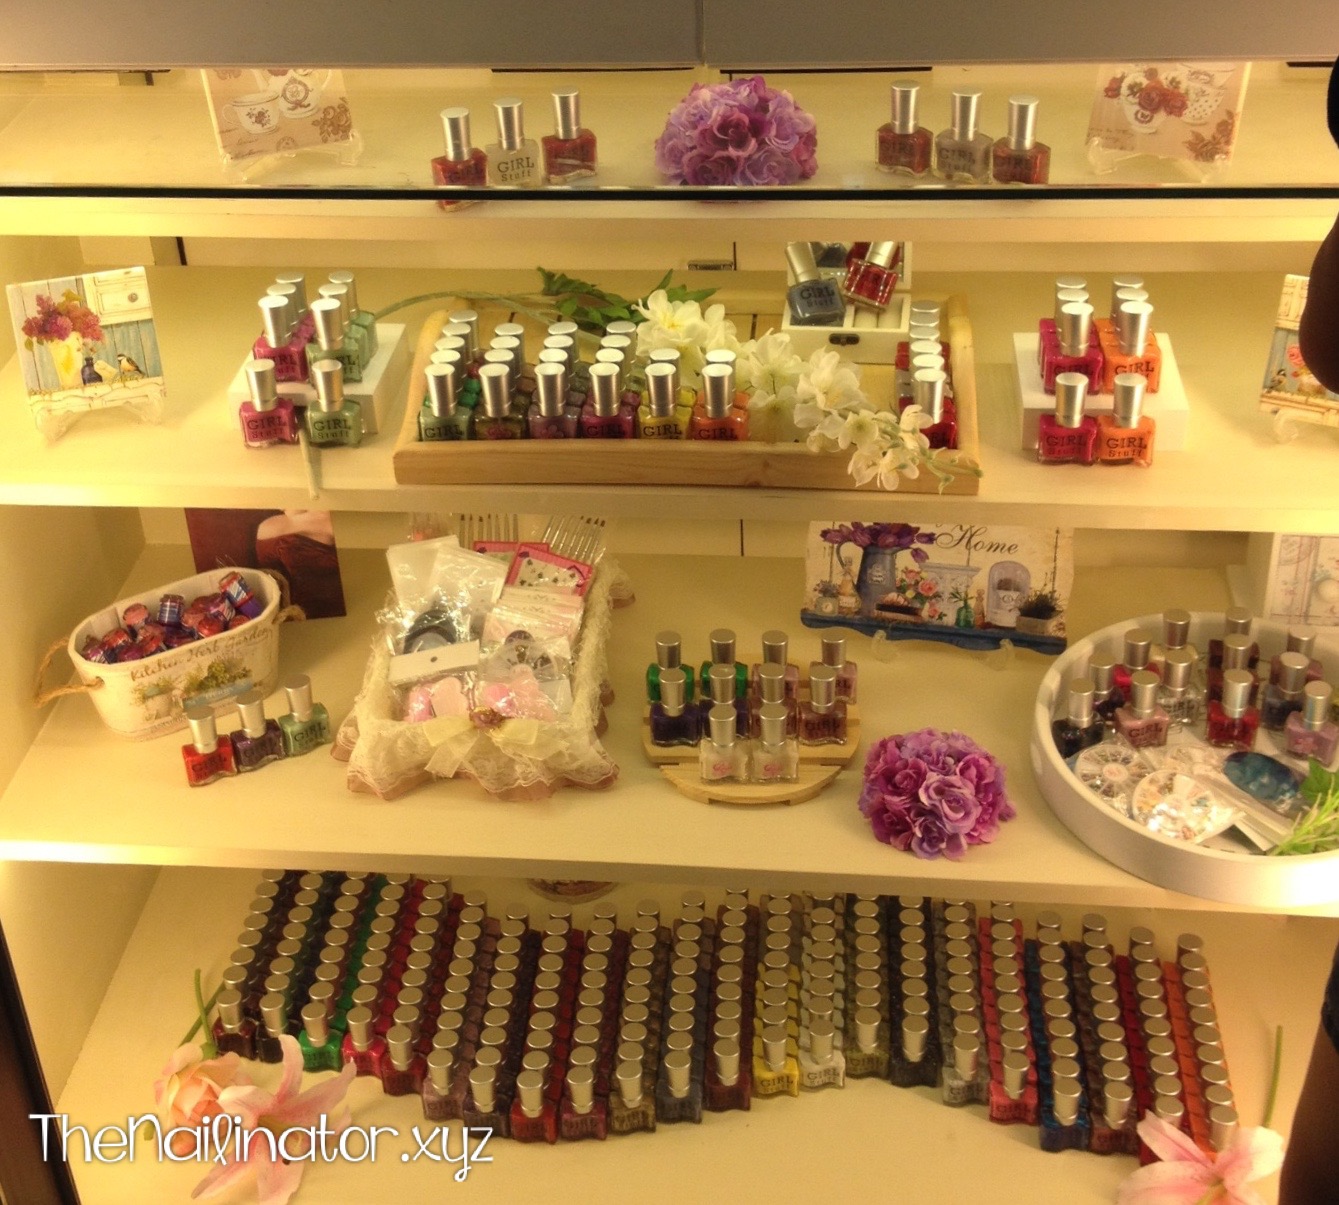
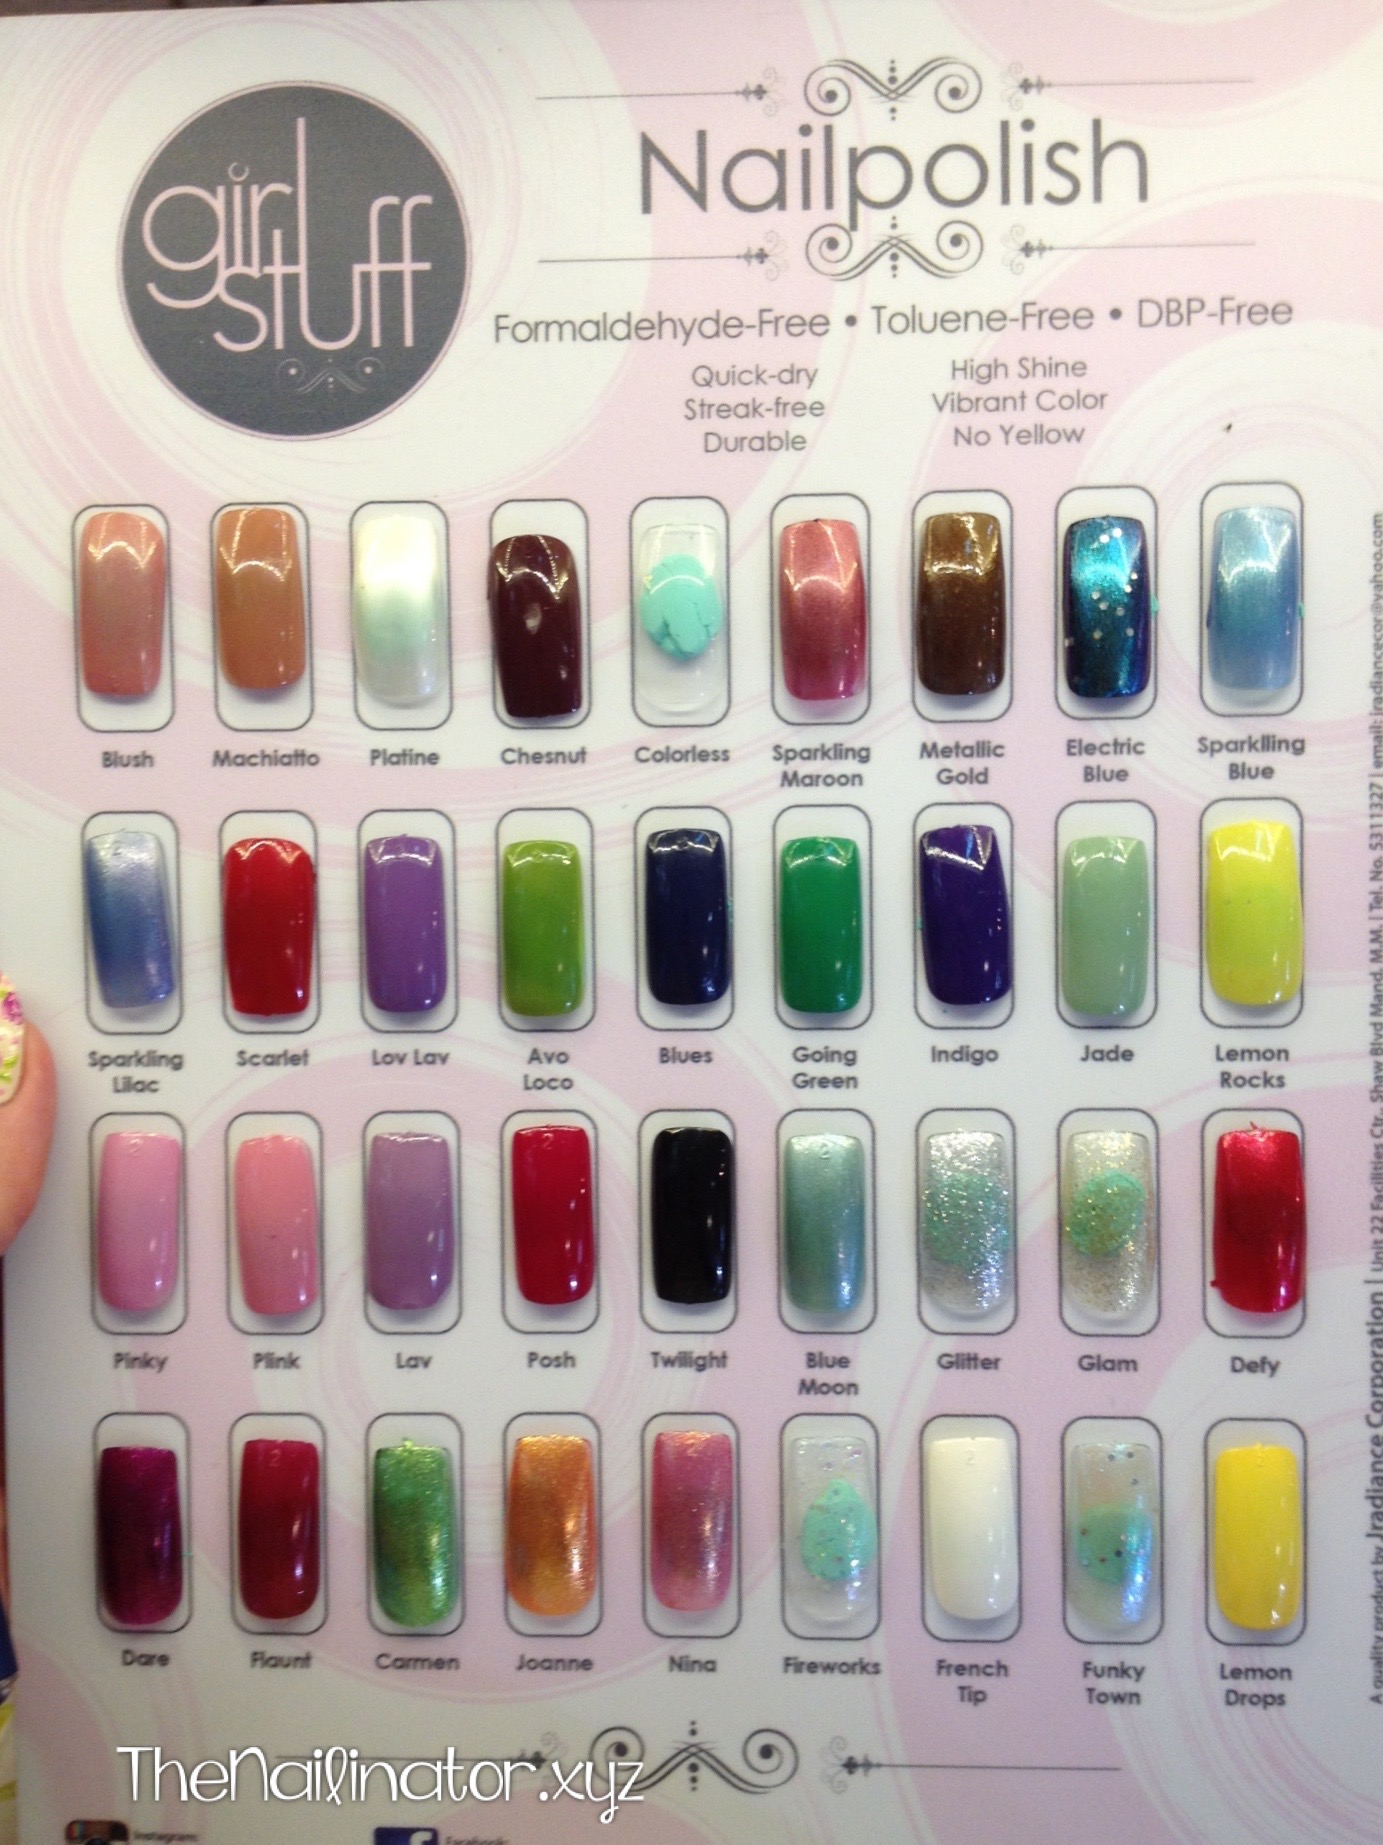
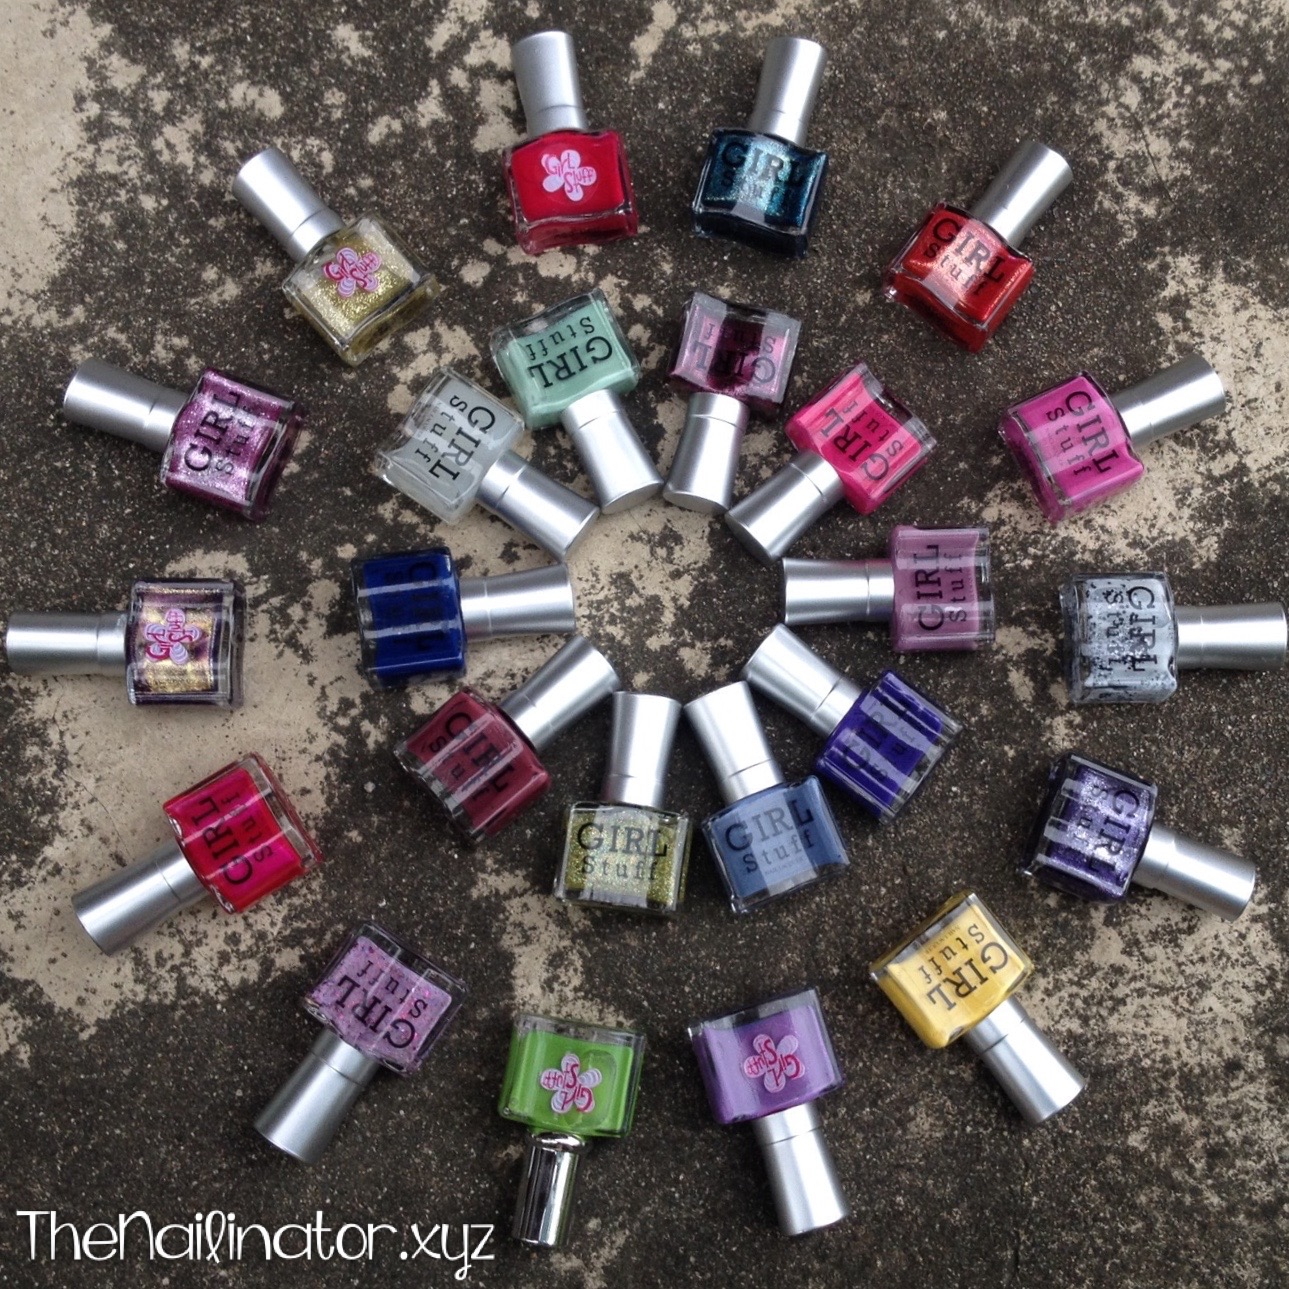
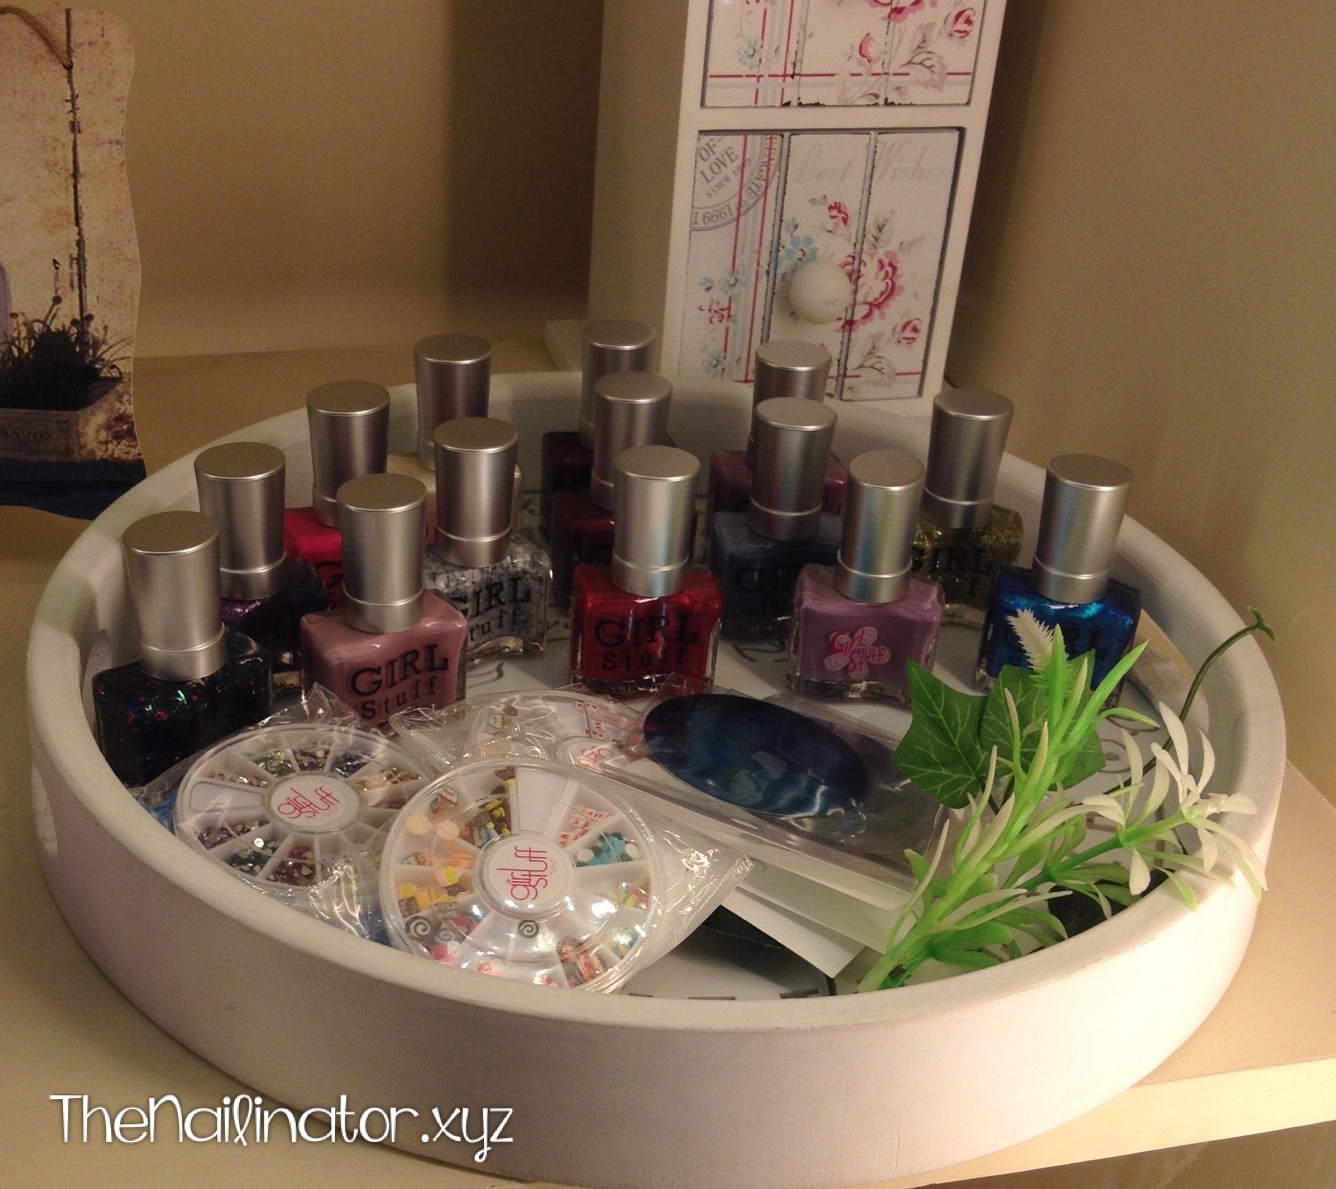
The selection includes textured and magnetic polishes, cremes, jellies, metallics, shimmers, duochromes, glitters, and an awesome matte topcoat! They are also quick-dry, kid-safe, and affordable (100-150 per bottle). This is a cruelty-free brand which means that they don’t test their products on animals. Here is my personal collection so far. ♥  (Check out my Girlstuff tag archive to see other blog posts I’ve made featuring Girlstuff polish.)

My Girlstuff Forever polish collection

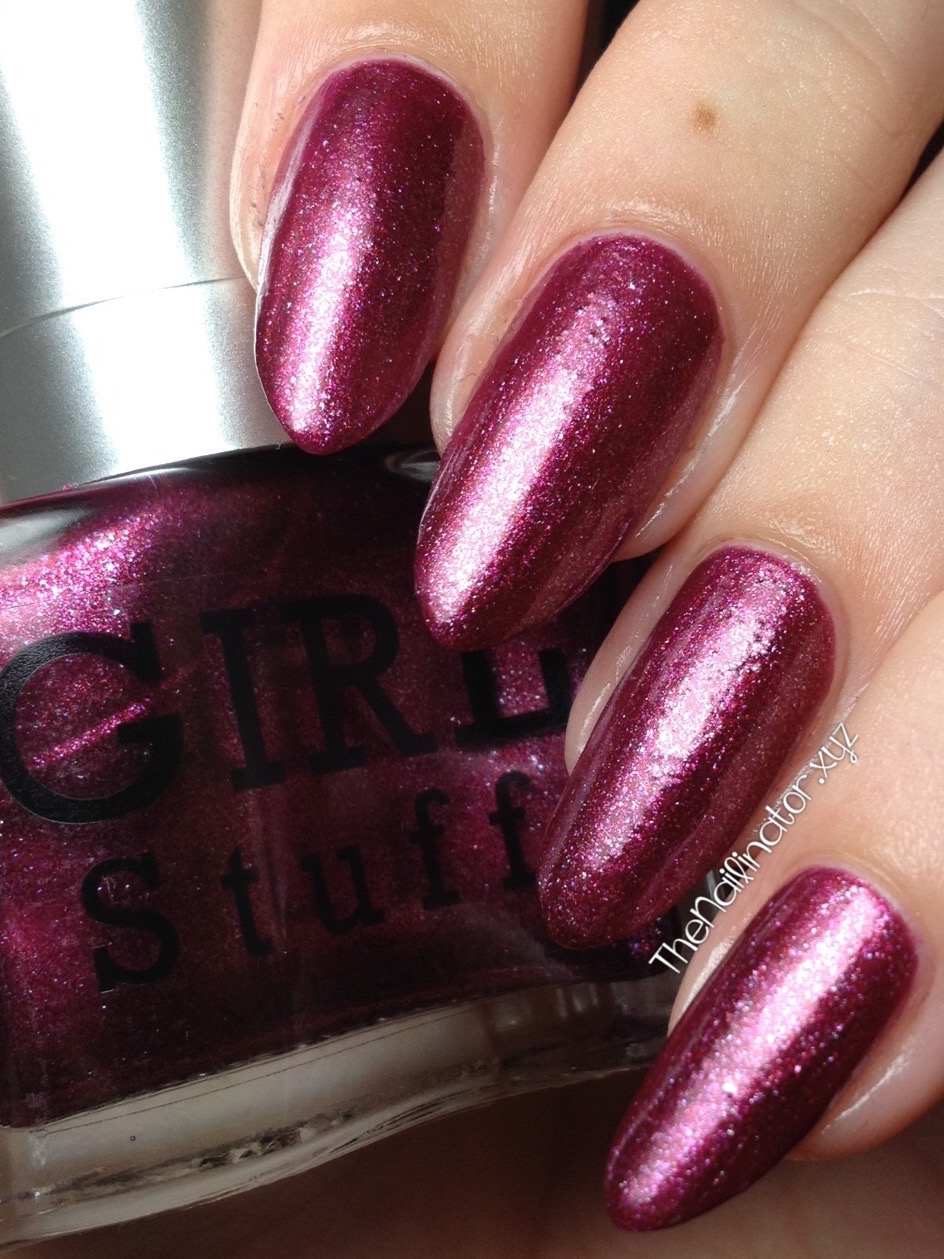
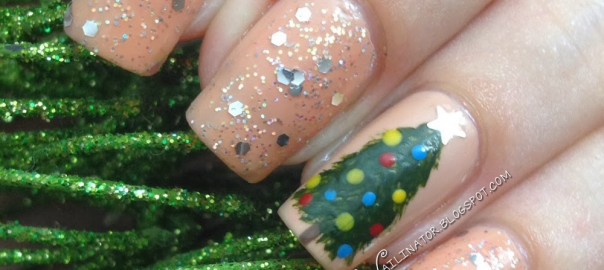
I’ve included a swatch shot of Red Velvet, which is part of their newest “Redilicious” fall collection. It’s so pretty and shimmery. I used 3 thin coats and no top coat for this shot. They will be releasing a Christmas collection soon so keep an eye out for that as well.

Girlstuff Forever Red Velvet swatch

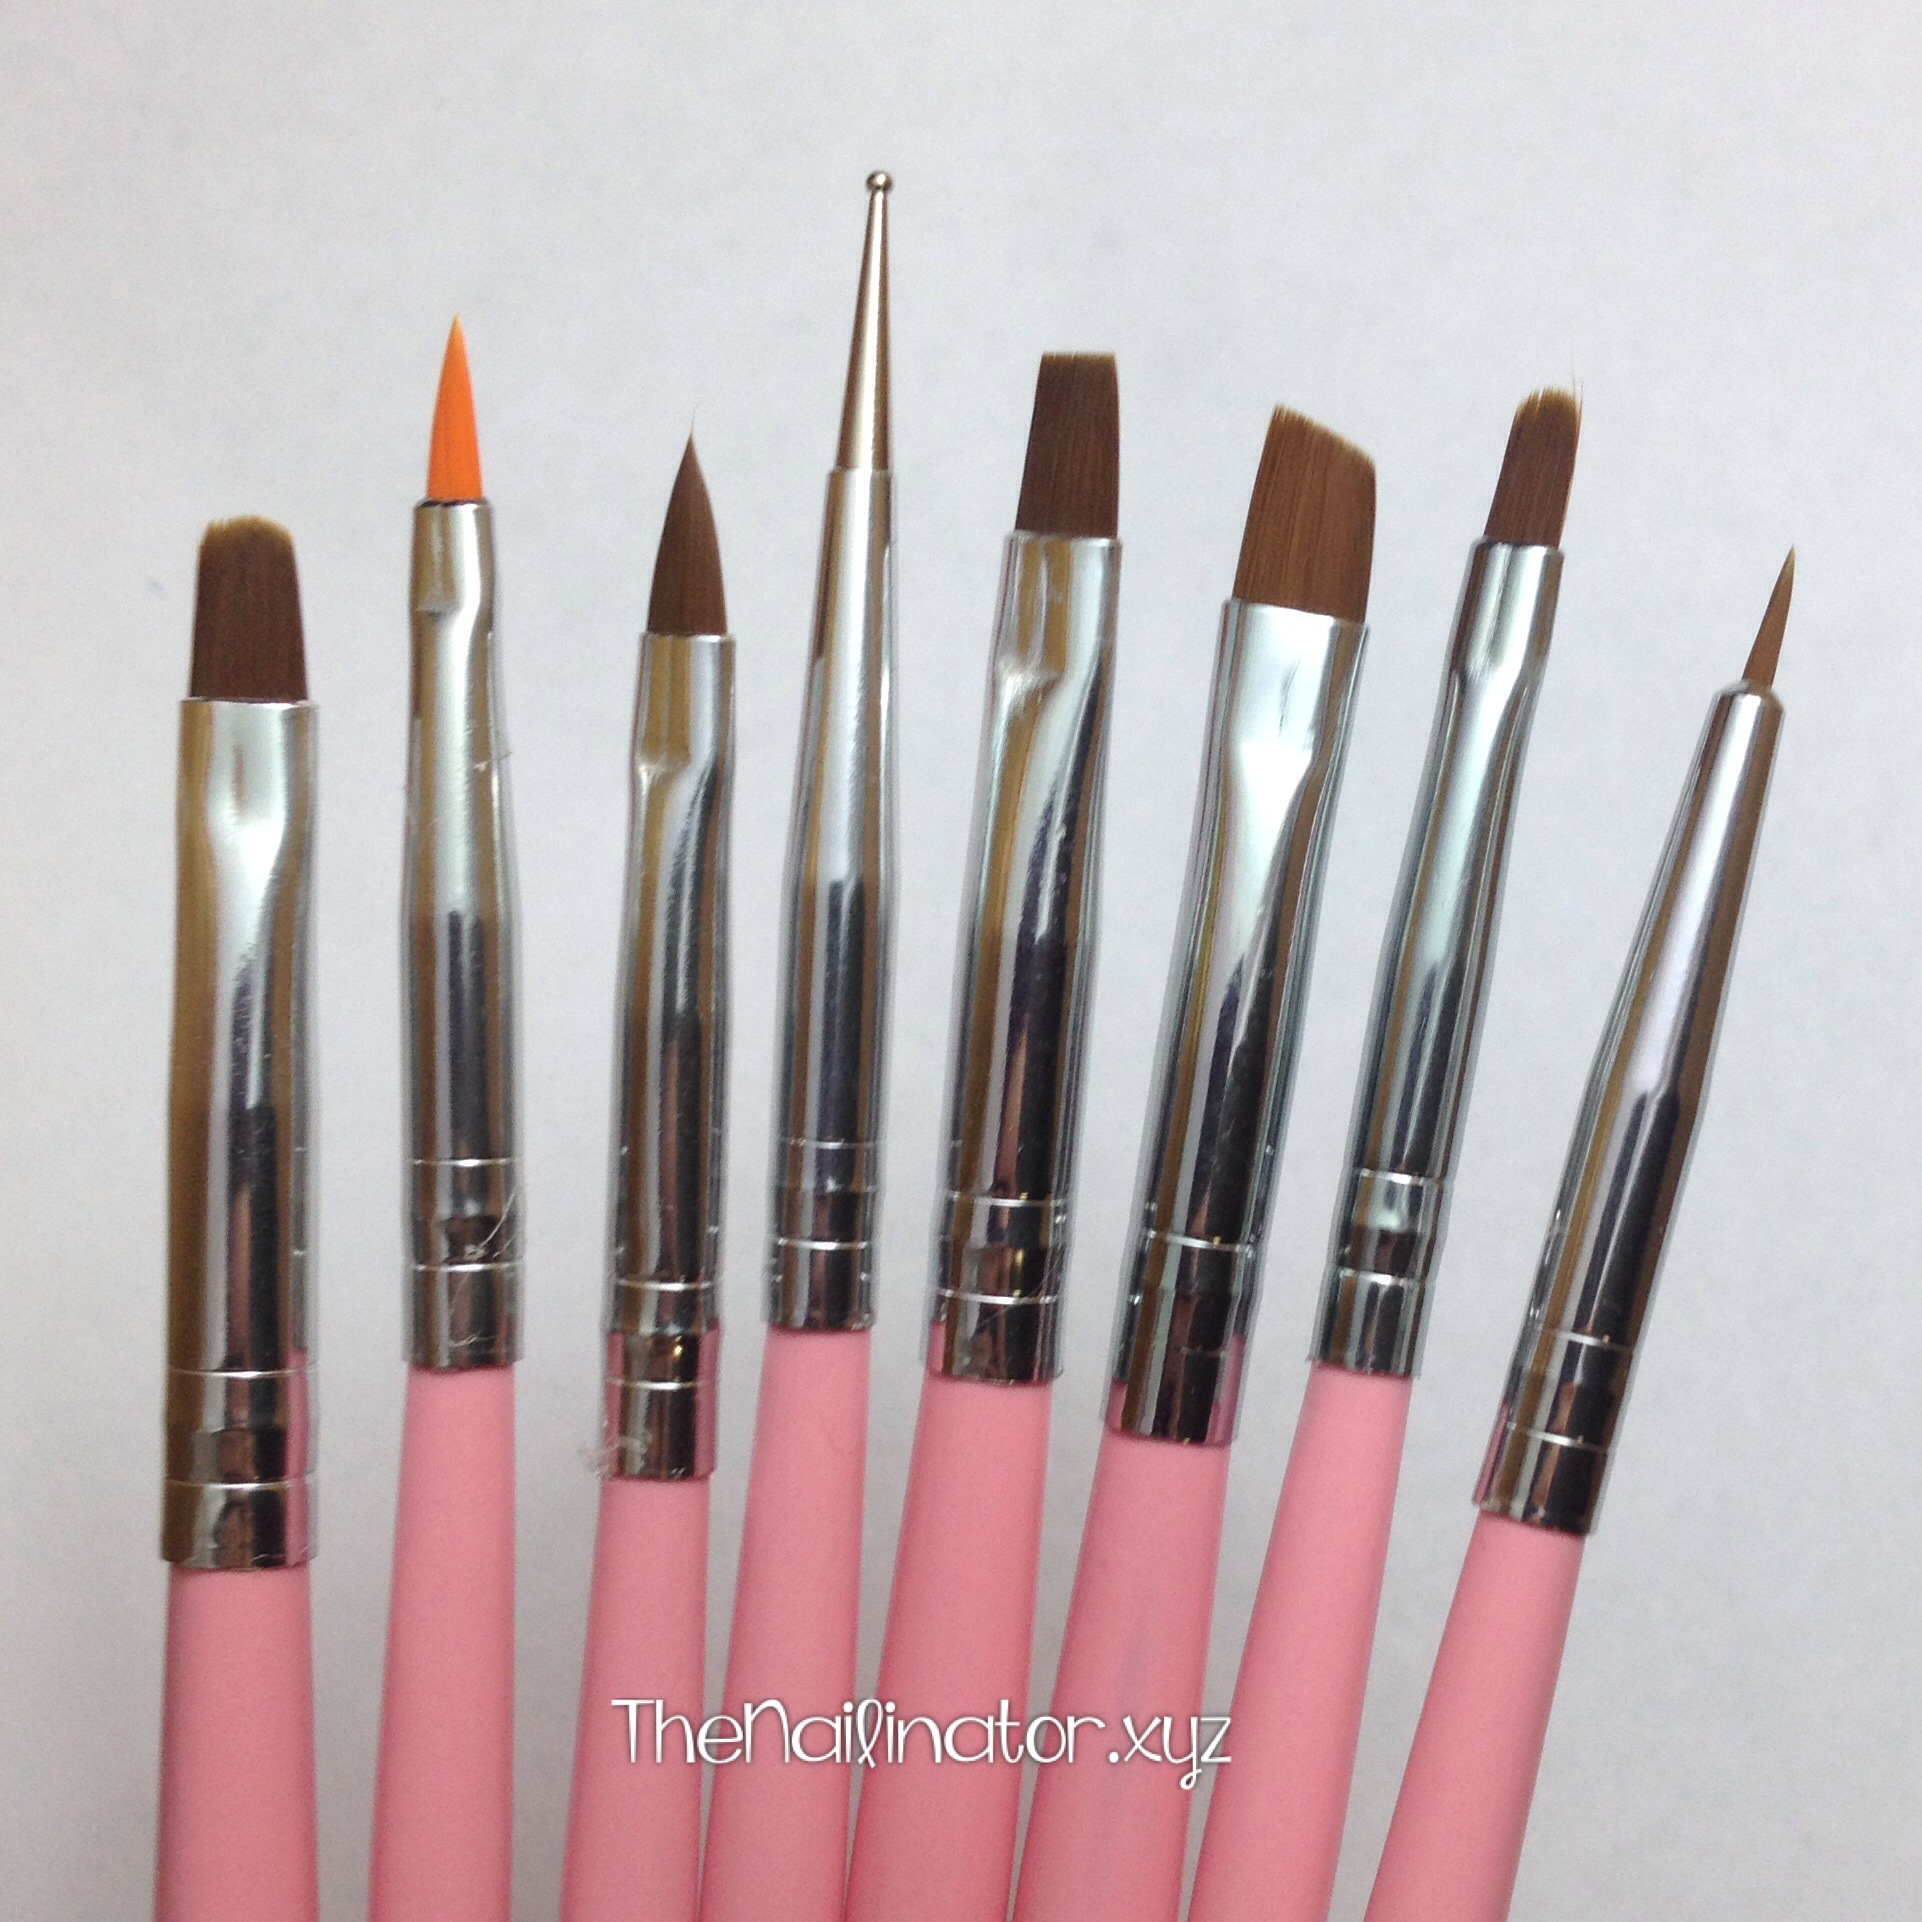
Girlstuff also carries a variety of nail art tools and accessories like rhinestones, dotting tools, brushes, stickers, and the like.  They even have washable polishes which can be removed with soap and water. I will be getting my little girl some of those when she is a bit older and wants to do her own nails.

Photo of Girlstuff nail polish and nail art supplies on display

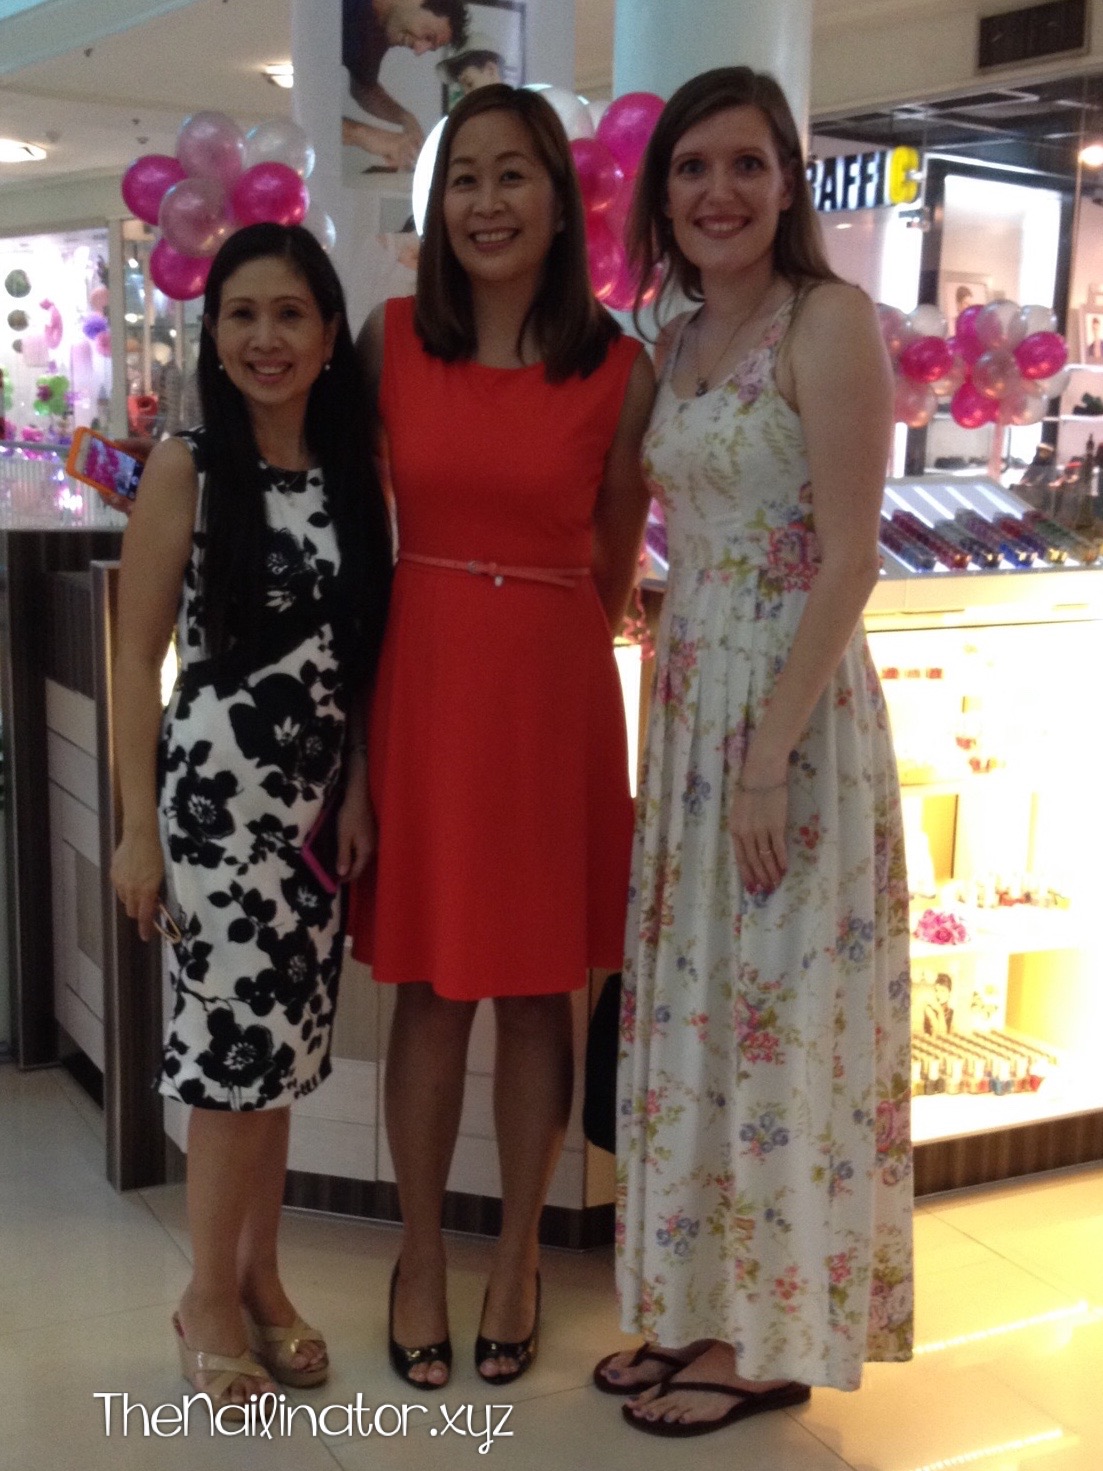
The owner and founder of the company, Janina, is a chemist-turned-SAHM. She started off making colognes and other products for little girls that are free of harmful chemicals. Eventually she started making nail polishes. Janina told me that each product is tested multiple times during production to ensure that the finished products are safe for us and especially for our little ones. Here’s a shot of me at the opening (on the right) with Janina (middle) and Ging, (on the left) who is the operator of the Cebu branch.

Ging, Janina, and I in front of Girlstuff Forever Ayala Cebu

If you want to get your hands on some of this lovely polish for you or for the little girls in your life, you can find them here in Cebu on the 2nd level of Ayala. The other branches are located at SM Mall Of Asia, SM North Edsa, SM Megamall and SM San Lazaro. You can also contact them directly and they can ship to you.

You can keep up with Girlstuff through Facebook, Instagram, or their brand new website.

I hope you have a great day!
Hugs,
Rachael

31 Oct

Born Pretty Store Nail Art Brush Set Review

Today I’m reviewing a brush set from Born Pretty Store. They sell all sorts of nail art supplies and products (plus makeup, jewelry, etc.) and ship internationally for free, which is great! If you live in the Philippines, you will have to pay customs and a parcel fee on the package when it arrives. So keep that in mind. It cost me about 150 pesos to claim a package with 3 items in it. Just something to consider when ordering online.

The product I’m reviewing today is their 8 pc Nail Art Brush Set.

8 Pc. Nail Art Brush Set

I am rather pleased with this affordable brush set. They cost USD$4.32 right now, which is about PHP 190. The set includes seven different  brushes and one small dotting tool. The handles are pink, which I personally love.

Born Pretty Store Nail Art Brush Set

If you look at the close-ups of the brushes below, you will see two sizes of brushes that come to a point, one angled brush, one flat brush, and two sizes of flat brushes that are slightly rounded at the end. I love these flat brushes for cleanup around the cuticle or for making bigger shapes for nail designs. If I had any skills whatsoever with one-stroke flowers, I’m sure they would be perfect for that as well. The set also comes with a very small tip brush, which is great for detail work (like the leaves of my roses in the picture below). The dotting tool in this set is a very small one and it’s perfect for making tiny polka dots like you see below and for the swirly parts of these roses. I use this size of a dotting tool to do the markings of leopard print nail art.

Close up of Born Pretty Store Nail Art Brush Set

The set is shipped with these protective covers (pictured below) to help keep them from being bent. It is best to store them with the covers on, just to be safe.

Born Pretty Store Nail Art Brush Set with protective cases

Overall, this is definitely a good set of brushes. The price is right, it has a decent variety of tools and uses. If you purchased this set, you would be able to do a lot of different designs with them. You could even cut some of the bristles off  one of these brushes to make finer tip brushes if you want something smaller. I’ll be sharing some nail art I’ve done with these very soon.

Nail Art Brush Set in hand

Well, that’s my review of this 8 pc. Nail Art Brush Set. What do you think of this set? Do you want it? Already have it?

I’ve got a coupon code for you that will give you 10% off your entire order if you get the hankering to order this, or anything else, on BornPrettyStore.com.

Coupon

I hope you have a great day. I’m off to bed so I can get up in the morning and take my two little ones (Super Mario and Queen Elsa) trick-or-treating at the mall. Yeah, we do things a bit differently here in the Philippines.
Hugs,
Rachael

03 Sep

I’m Guest Posting at Simply Rins!

Hey all!
I’ve whipped up something bright and fun for a guest post at Simply Rins. Rina is an uber talented nail blogger from the Philippines. She is a super sweet gal as well and I’m thrilled that she asked me to post for her. Perhaps you recall that she did a guest post for me back at the beginning of this year. It’s so fun to have friends that share your passion. Please go check out her blog! You won’t be sorry you did. Thanks again, Rina!

I’ve included some instructions and tips in my post on how you can get this look.

Go check out my guest post now!

Rawr! Summer isn’t over just yet. Thanks for dropping by. Have a fabulous day/night!

Hugs,
Rach

07 Jan

Guest Post by Simply Rins

Howdy!

I’m so excited to have the very talented Rina of Simply Rins stop by for a guest post today. Rina is the very first Filipina nail artist I discovered when I began getting into my hobby obsession and I’ve been stalking her ever since. She has great tutorials and tips and tricks for nail art and always has something creative to share. The tip that still comes to mind for me is to cut out caffeine before you plan to paint to minimize shakiness. It really makes a big difference. Please go check out her blog if you haven’t already. I even recreated her dripping rainbow manicure when I first started my blog. I’ll let her say hello now. 🙂

………………………………………………………………………………………………………….

First of all, I’d like to say “Hello” to all the readers of The Nailinator! It seems timely that I mark the new year with something that I haven’t done before — to guest post! This is definitely the first for Simply Rins. I deeply appreciate the invitation and I hope that this nail art design I came up with will not disappoint.

Now where to begin? How about starting with the fact that we have entered 2014! The past year was full of challenges for me as a blogger. But every turn of the year calls for a celebration. Don’t you think so? No matter what happened the previous year, a new year represents another chance to be better. And so folks, I think my first nail design for 2014 should be a celebration. Only one idea came to mind before I sat down to do this — confetti.

I simply called this nail art, Welcoming 2014:

Welcoming 2014 Nail Art Design by Simply Rins

The idea is to paint colorful confetti on all my nails on a dark background so that the colors would pop. I was imagining confetti being showered on the streets during the new year countdown. I love the effect of contrasts at night.

Welcoming 2014 Nail Art Design on Seche Nouveau

For base, I used 2 coats of Seche Nouveau. I found Seche lacquers being sold in one of the bazaars I went to last October 2013 and I bought a few bottles. I have been meaning to try these ever since the news came out that Seche was launching 45 polish shades into the market. I am a huge fan of Seche Vite fast drying top coat and I am curious how the brand will fair with polishes. With the 3 colors that I have, I must admit it didn’t disappoint!

Nouveau appears charcoal gray on the nails and I love eeeet! I personally feel it is a great alternative to black. Consistency is good that makes application really manageable. Can be a one coater with a generous coat. But I still prefer 2 thin layers for complete coverage. I can’t wait to try the other shades.

Welcoming 2014 Nail Art Design

This is a freehand nail art using acrylic paints and a dotting tool. I find it easier to draw swirls using a dotting tool instead of a nail art brush because I can control the strokes better. A brush can result to a more defined edges or lines. But for this design, I don’t think you really need much precision.

Welcoming 2014 Nail Art

I decided to use pastel colors for the confetti. I particularly used 5 different shades for each nail on both hand. I used the same colors for adding a few dots to fill in awkward spaces. Initially, I thought that neons would look better but I didn’t have any. Are there neon acrylic paints? I think that would be a great addition to my nail art tools. I can also imagine how this would look if they are glowing in the dark!

Welcoming 2014 Nail Art Design by Rina Alcantara

Well, there you have it! A nail art design to celebrate 2014! The concept is simple and it is not so hard to do as well. I had fun painting my nails with this design and quite happy with how it turned out. What do you think?

Thank you again to the wonderful author of this blog for this opportunity to share with you, her dear readers, one of my nail art creations. It is a pleasure to start the year with a chance to reach out to fellow nail art enthusiasts. Happy New Year to everyone! 🙂

 ………………………………………………………………………………………………………….
Aren’t they adorable? The design is so festive and the colors are great. What a great idea to use a dotting tool for the swirls. Don’t forget to check out Rina’s blog to see more great nail art.
Rins, thank you so much for dropping by! I’m honored that you agreed to do a design and have your first guest post be on my blog! I love what you came up with. It was definitely worth the wait! 😉 Happy New Year to you too! I hope 2014 turns out to be your best yet!
20 Dec

Christmas Tree Accent Nail with Bobbie Star Gazer

Nothing says Christmas quite like a pretty tree filled with lights and sparkly baubles and topped with a glittering star. Right?

I wanted to do some Christmas tree nail art this year, but I didn’t really want to have a tree on every nail so I decided to go with an accent nail instead. I started with two coats of NYC Fashion Safari on all my nails and then applied  Klean Colors Military Green with a small brush and small strokes to make the tree for the accent. I decked it out with a dotting tool and a glitter star for the topper. For the rest of the nails, I added one coat of Bobbie Star Gazer over the base. Star Gazer was so pretty in the bottle, but I have to admit I was disappointed when I tried it. By itself, it was so faintly pigmented that I’m positive I would have had VNL even after 3 or more coats. The glitter may have been dense enough to cover everything up, but choosing NYC Fashion Safari as my base gave me the color I was looking for and everything ended up alright. Being a VNL-aphobe means I don’t play with jellies very much, but I will have to experiment more to make use of the pretty jellies I do have.

Anyway, this isn’t my best work and I don’t LOVE it like I did my snowflake nails. I’m not a huge fan of nudes on my nails so, honestly, it doesn’t really stand a chance. That being said, it IS cute and I still learned something important: Elmer’s School Glue Gel (the blue stuff) works as a fantastic peel-off base for glitter polish. I squeezed some into an clean polish bottle, applied one thick coat, and let it dry well before applying my polish. I only sported this look for a day before taking it off, so I’m not sure about the wear time.

That’s it for me today. It’s been a long week for me. I hope you are having a great one. Do you use anything as a peel off base for glitter polish? What polish/es have you used recently that looked the bomb in the bottle but bombed when swatched?

%d bloggers like this: