20 Feb

Fun and Funky Pink and Black Skittles

Hello ladies!

I hope everyone is doing fine. I am just now entering my third trimester and the baby is doing great. I can complain of aches and pains but that sounds rather boring. Don’t you think? Instead, I just wanted to pop in with a quick post to share a quick skittle mani I came up with. I was in the mood for something a bit bold and funky and this is what I came up with. I have some swatch posts coming up but I wanted to share this fun nail art first.

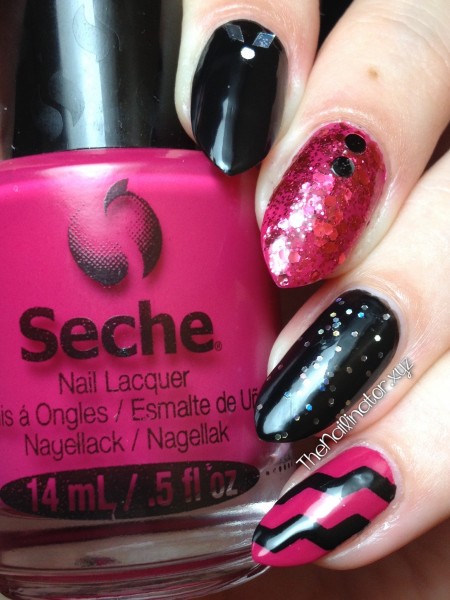
Fun and Funky pink and black skittles

Fun and funky, right? I’ve used several different polishes including Medusa from Nails To Go on my ring finger and Decadent by Sinful Colors on my middle finger.  I also tried out the craft scissors and ziplock bag technique for the first time. I painted a couple of coats of black nail polish onto a clean ziplock bag. After the polish dried, I peeled it off the plastic and used some zigzag craft scissors and cut some strips. I polished my pinky nail with two coats of Rendezvous by Seche and, while it was still a little bit tacky, I carefully placed the black zigzags and applied topcoat to bring it all together.  The glitter bits on my pointer and middle fingers were added using a tiny dot of nail glue to keep them in place. I recommend using an orange wood stick to apply the glue in the exact place you want it. Then seal with top coat.

Well, that’s all for now. Like i said, I’ve got some swatches coming up next. I hope you enjoyed seeing these fun nails and that perhaps it inspires you to think out of the box a bit and have some fun with your next mani. I hope you have a wonderful week and that you get to make someone smile today.

Hugs,
Rach

25 May

Bloggers’ Elite Summer Collection ft. Pueen Love Elements

Hello again!

How was your weekend? Mine was quite busy and stressful, but it was a good one overall! I was looking for the song “Swinging on a star” by Bing Crosby and scored an album on iTunes for $3.99 for 100 Bing Crosby songs! I’m listening to it as I type this. I LOVE oldies! Especially Doris Day, Elvis Presley, Dean Martin, and the like.

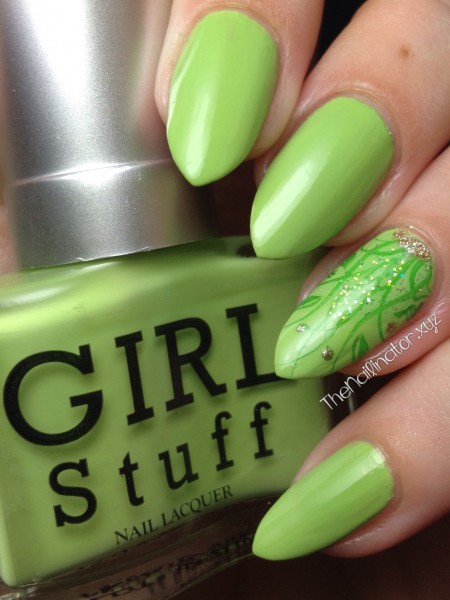
Anyhooo… y’all came here for the nails! I won’t disappoint! I just published my review and swatches of the new Bloggers’ Elite Summer Collection from Girlstuff this past weekend. Please do check out the post if you haven’t already. I thought I would share the easy stamped nail art I wore with each one. I used my Pueen stamping plates from their Love Elements Collection which I bought a couple of years ago.


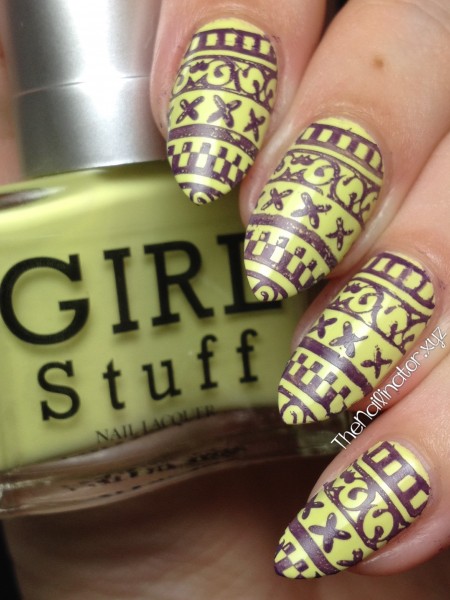
Topaz Horizon ft. Pueen 38

Girlstuff Topaz Horizon With Stamping Pueen 38

With Topaz Horizon, I decided to use plate 38 from the Love Elements collection and a dark purple polish which worked very well. I love the finished look!


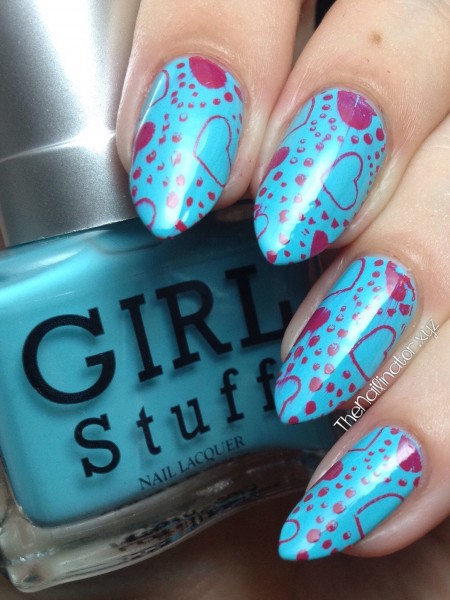
Struttingonsunshine ft. Pueen 43

Girlstuff Strutting on Sunshine with stamping Pueen 43

I picked a dark pink polish to stamp an image from plate 43 onto Struttingonsunshine. The image stamped well, but I had issues with the polish streaking when I went to add topcoat. I even floated the brush across the design, so I guess the pink polish just didn’t want to stick to SOS. Still pretty and eye catching!


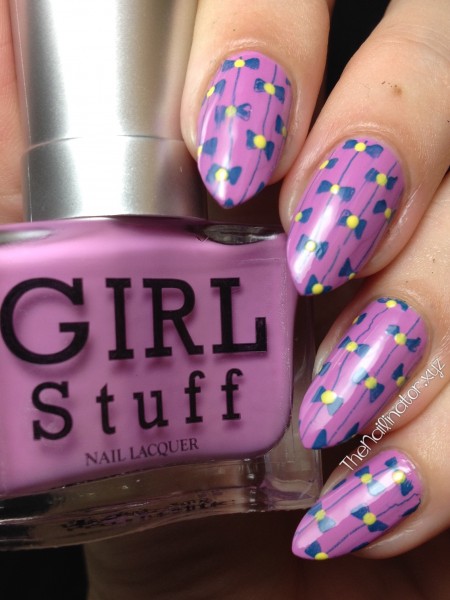
AskMeWhats ft. Pueen 29

Girlstuff AskMeWhats with stamping Pueen 29

With AskMeWhats, I stamped this cute bow design using Pueen 29 and a dark blue polish of mine. Then I added some yellow dots to make the design pop! I like how it turned out.

Go Jackie Go ft. Pueen 46

Girlstuff Go Jackie Go with accent nail Pueen 46

I wanted something whimsical for an accent nail with Go Jackie Go. This is what I came up with using Pueen 46. I dabbed a bit of iridescent glitter at the base of my nail. Then I stamped this image over it. Then with a dotting tool, I added some gold dots for a final touch. It turned out so pretty!

I had fun coming up with a complimentary stamped look for each of these colors. I haven’t had as much time for hand painted designs lately, but one can still be creative with stamping, and though simple, it definitely takes your nail polish to another level. Mr. Nailinator has been bugging me to try my hand at another insanely time-consuming design, and I’ve been toying with the idea. Maybe next week after the kids and I close out the school year.

Here is hoping the Monday blues don’t get you down. Always remember that coffee is your friend! Have a good one!
Hugs,
Rach

27 Mar

CND Vinylux Midnight Swim Nebula Nail Art

Hi Dolls!

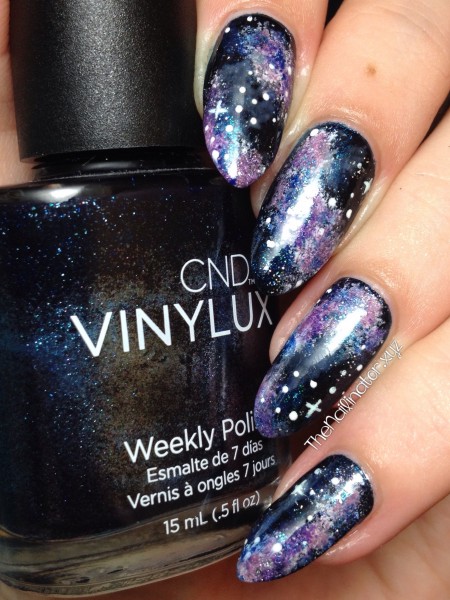
Today I’m sharing my latest Nebula (or Galaxy) art. This is one of my favorite looks to sport on my nails. Aren’t they pretty? Sometimes I think I’ll try something fancy with crazy colors and mix it up, but I always end up just liking it like this with pretty purple nebulae.

CND Midnight Swim with Galaxy/Nebula Nail art

Back in November when I swatched CND Midnight Swim, I knew I wanted use it as the base for my next Nebula nail art look. It’s such a pretty deep blue, and I was excited to test its durability with nail art over it! While the base color is CND Midnight Swim, all the purples, blues and glitter were done using  several Girlstuff polishes and a makeup sponge torn into small pieces. Check out my tutorial for nebula nails here. It takes a lot of sponging, but it is really easy to do. I added some stars using white polish and a small dotting tool. The criss-crossed stars were done using a teensy tiny brush that I cut into just a few strands.

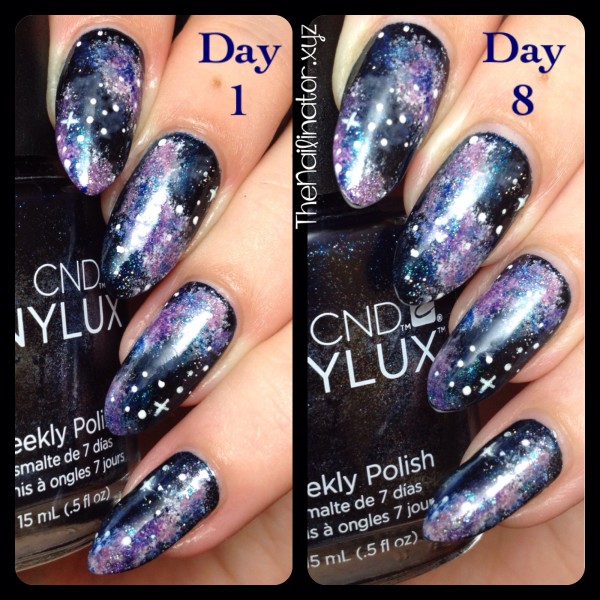
I’ve been wearing this for 8 full days now, and I’ve got to say, I am SO impressed! Just look at this side by side of Day 1 and Day 8!

CND Midnight Swim 8-Day Wear Comparison

Can you believe it? I like this brand even more the second time around! This polish is out of this world! I would definitely recommend these CND Vinylux Weekly polishes for their long wear time. Check out my full review here.

You can get your own CND products by contacting CND Philippines on Facebook, Instagram  or Twitter.

Have a stellar day!
Hugs,
Rach

02 Jan

The Nailinator Does Nails

Hi Gals!

Happy New Year! I’ve got a scheduled post for you today as our plans to go out of town pushed through. Hopefully the weather will have cleared up and we have had the chance to soak up some sun while we are by the beach. If not, I’m sure we are having a grand time anyway.

I thought I would do a quick post sharing some of the nail art I have done for friends and family last month. I did a few designs that are seasonal and a few that would be great for any time of the year.

First up we have some fun zebra stripes in Christmas colors that I convinced The Shutterbug (my youngest sister) to let me try on her. If anyone can pull of this look, it’s her! I did the stripes with acrylic paint and a striper brush.
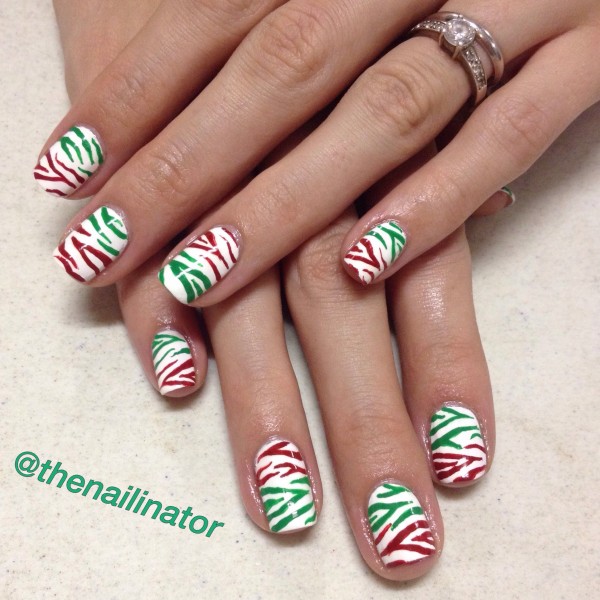
Christmas Zebra Stripes

Next we have some super cute and easy winter wonderland nails I did for The Bookworm (my other younger sister). We started with a light blue base (Sansan Warm Blue), and I stamped snow flakes and an adorable snowman from my OB19 plate that I purchased last year from MyOnline Shop. I added a few tiny dots for a finishing touch.
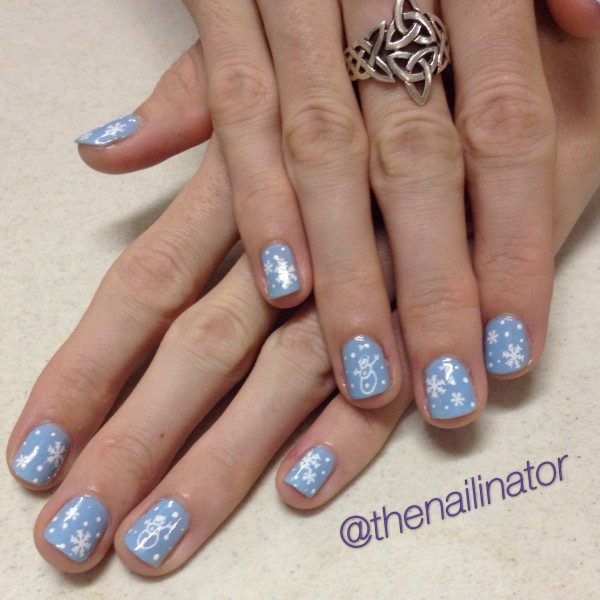
Winter Wonderland Nail Art

Next up is a look The Queen Mother requested after seeing my Holly Jolly nails. She wanted my holly stamped accent nail with all the other nails in red. I wish I could remember the name of the red she brought along. It is a stunner. I will check with her and update this (then I’ll probably go out and buy it!).
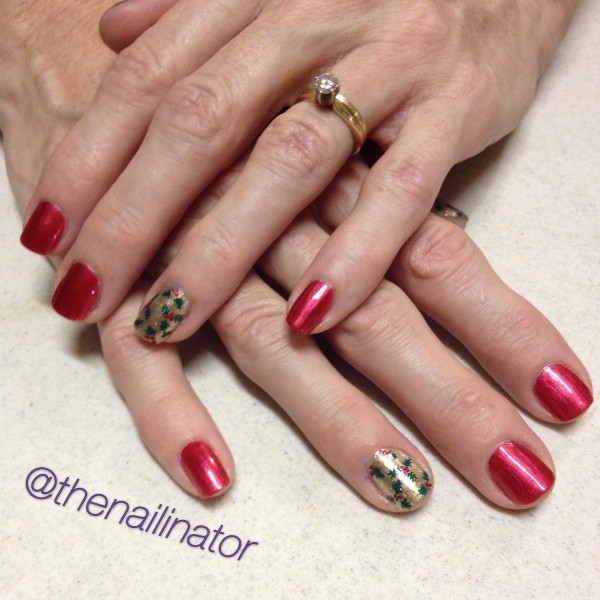
Holly Accent Nail

Next, I’m showing you a look that I was surprised to find I ended up really liking. A friend showed me a picture and I did my best to replicate what she was asking for. First I painted the whole nail in a very light jelly pink. Then I added color to just half of each nail (alternating brown and white). On each brown nail I painted a tiny gold bow. On each white nail I taped off the non-white part of the nail and stamped an image in black over the white. The tape kept the stamping on the white part I had painted before. I added a gold stripe across the nail and was finished. I had never tried a half nail design like this and had also never tried a stamping technique like this. It is always fun to try new things.
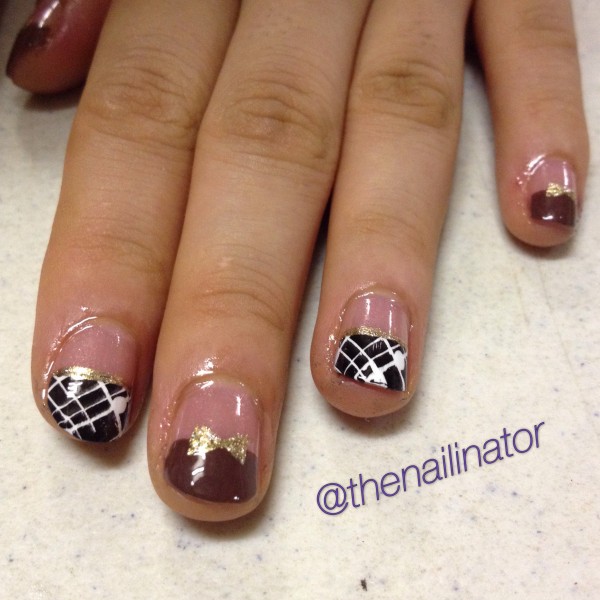
Gold Bow

The next look is a floral design, something I’ve done several times before with different color combinations. This lovely lady picked mint green and off white as her base colors and wanted small roses and leaves. This was my first time painting such tiny roses which proved to be a challenge. I did my best, though, and she liked them so that is what counts after all.
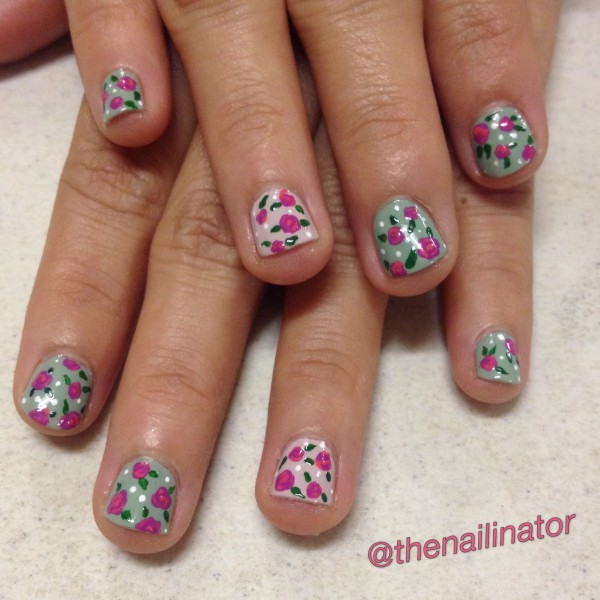
Floral Nail Art

The last look I have to share with you is so fun and colorful! My friend wanted rainbow stripes with black strokes. I used a striping brush to paint each color in rows starting from the cuticle out toward the tip (purple, blue, green, yellow, pink and orange). I used black acrylic paint and added the black marks. We did this on her accent nails and thumbs. Since we used 6 colors I suggested we paint the other nails with those colors. They look suuuper cute!
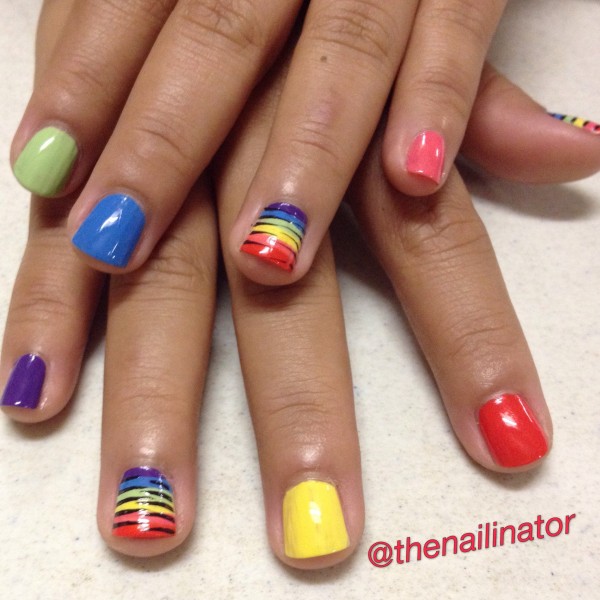
Rainbow Nails

I love doing nails for other people. It is fun to take on the challenge of suggesting things that will suit them and colors that will go with what they have in mind. Do you do nails for family and friends? If you follow me on Instagram you have probably already seen these as I share them there most of the time.

I hope you have had a wonderful holiday vacation so far. Mine has involved lots of food and laughs with my family which is just the way I like it. I’ve been under the weather with a crazy cold that won’t go away. But on the bright side, my hubby has been a darling taking care of me and the kids most of the time. I’m a lucky lady for sure!  Whatever you ended up doing for the New Year, I hope you have had a great time and blessed year ahead!

Hugs!
Rach

04 Dec

Holly Jolly Christmas Stamping with OB19

Hello loves!

I’ve got another quick post for you this evening to share these super cute nails I have been sporting for almost a week now.

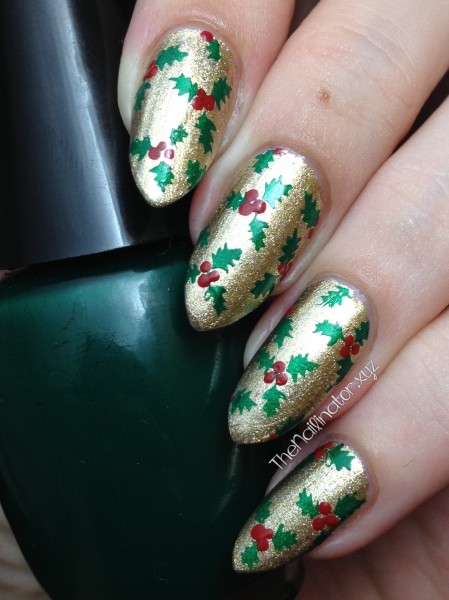
Holly Jolly Christmas Stamping nail art

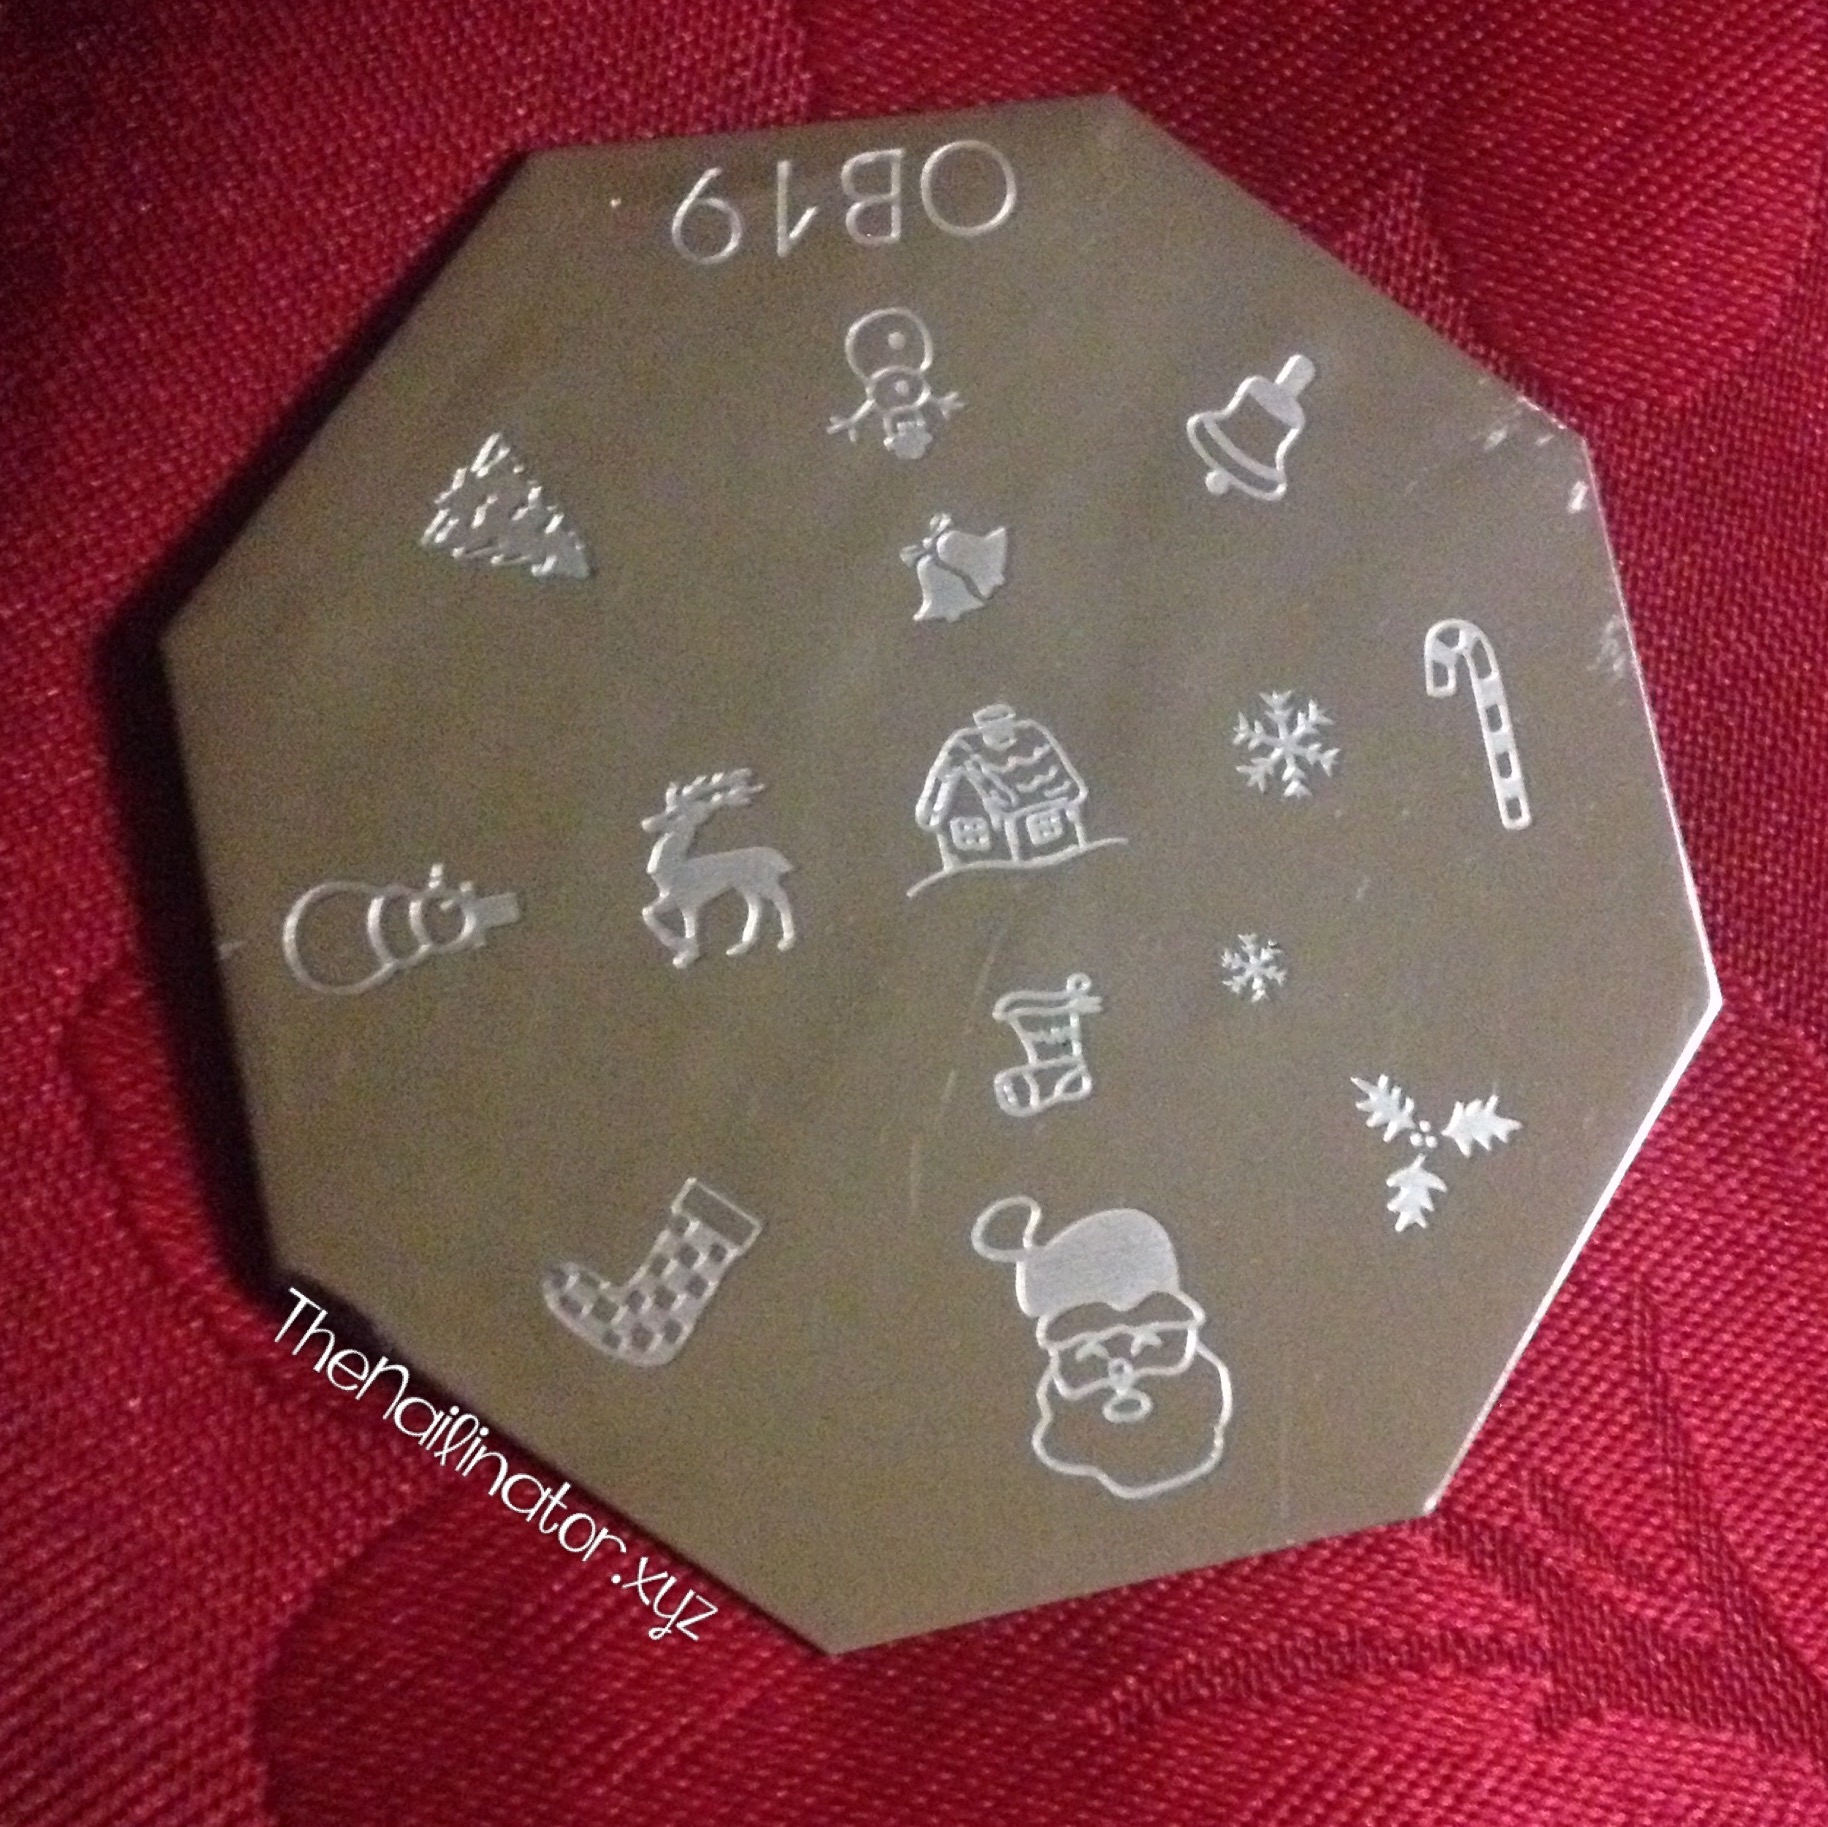
Don’t  you think they look like Christmas wrapping paper? They turned out so cute and were very easy to do. I applied my gold polish then added stamping using a no name brand opaque green polish I have in my stash. I used a small dotting tool to make the red holly berries. The holly image is part of the OB19 stamping plate which I purchased last year from Myonline Shop. This image is just perfect for Christmas nail art. It is loaded with great images. I used the two snow flake images for some nail art last December. I also used the Christmas tree image for some simple nail art on The Bookworm last night. You can see those if you check out my Instagram account.

OB19 Stamping plate - Christmas images

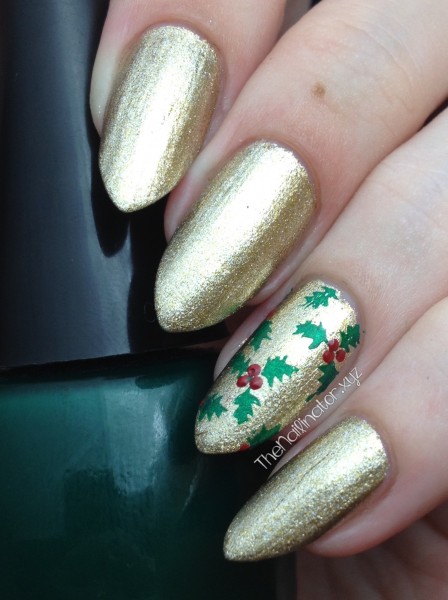
As you can tell, I chose to stamp the holly image multiple times to cover each nail. I did start off with this as a simple accent nail (see below). It was a couple of days and several compliments later that I decided I needed holly on all my nails.

Gold nails with Christmas Holly Stamping Accent Nail

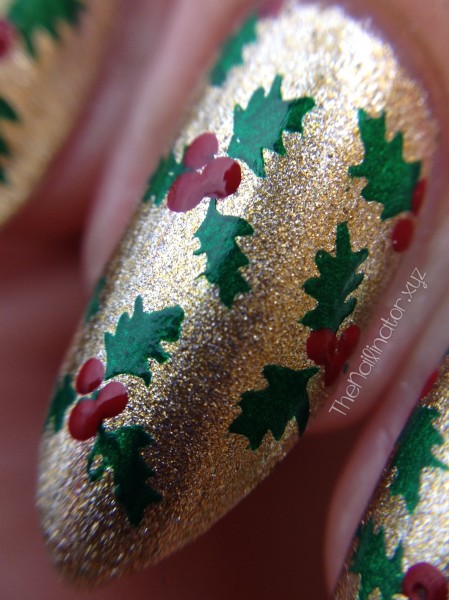
I finally got my hands on a clip-on macro lens for my phone. So I took a shot of these just for fun!

Holly Jolly Christmas Macro

Well, I hope you like these as much as I do and that they give you some inspiration for some fun holly-day nails. 🙂
Have a great day!
Hugs,
Rach

%d bloggers like this: