15 Apr

Quick and Easy Nail Art (featuring Caronia Shades of Summer)

Hi girls!

Just a super quick post tonight as I’ve got some chores to catch up on so that we can run out sometime tomorrow to get my hubby a rash guard. He and I are headed to the beach in Moalboal for a kid-free day-trip on Saturday to celebrate our 10th wedding anniversary! Yay! I’m super excited and we are both looking forward to some snorkeling, kayaking and lazing about.

I thought I’d show you a few of the quick and easy nail art ideas I came up with using  the Caronia Shades of Summer Collection (See my swatches and review here).
Caronia First Crush with subtle holo stamping

First up is First Crush with a bit of subtle stamping using Color Club Eternal Beauty.  This is an extremely easy way to add a little something extra to your nails.

Caronia Sweet Surprise with water decal

Next, I added a water decal I purchased from Hokee to add a funky contrast for my accent nail. Fun, don’t you think?

Caronia Sun Kissed with Stickers

I saved my least favorite of this bunch for last. I try and try again to love stickers for a quick nail art fix. But stickers really seem to be a hit and miss for me. Honestly the local brand, Wish, is always a miss for me. These didn’t want to cooperate, had bits of glitter on them, and I can clearly see the line from the edge of the sticker. That really bothers my OCD self. They looked pretty cool though.

I told you it would be a quickie! That’s all for today. I hope you are all having a wonderful week. Just two more days until the weekend y’all! You can do it!!!!

Keep smiling!
Rach

04 Apr

Caronia Shades of Summer – Swatches and Review

Greetings fellow polish lovers!

I’ve got a lovely summer collection of polishes to share with you today. Caronia sent me their new Shades of Summer Collection which consists of six fun shades and includes something for everyone. I’m just going to get right into the swatches and tell you what I thought. All these photos were taken in my light-box.

Summer Fling

Caronia Summer Fling Swatch

Summer Fling is a very pretty pinkish-plum creme. Its formula was just right, and I almost got away with using just one coat. I went ahead and used two to ensure no bald spots—because I’m OC like that. This shade is a fun color to sport during the summer without being too loud and crazy.

Rainbow Tan

Caronia Rainbow Tan Swatch

Rainbow Tan is a work-safe tan/beige frosted polish. It has me a bit confused with the choice of name as this isn’t rainbow-y at all. It is tan though, so we’ll just go with that. The formula on this one was thinner than the rest and is the only one that needed 3 coats for full coverage. Frosted polishes tend to show streaky brush strokes and this one does just that, as you can see. If you are into more muted shades and don’t mind frosted polishes then I’m sure you will love Rainbow Tan. It just wasn’t my cup of tea.

Sun Kissed

Caronia Sun Kissed Swatch

Sun Kissed is a vibrant orange creme that screams summer! It was an easy two-coater, and I’m surprised how much I ended up liking it despite it giving me lobster hands (making my skin look pinker than normal). This one is not for the faint of heart. Ha!

Sweet Surprise

Caronia Sweet Surprise Swatch

Sweet Surprise is right! This is a fun, bright yellow creme. It has a shimmer in the bottle that can’t be seen on the nails. But that’s not a problem for me. Application was fine with two coats to full coverage. I love this shade for summer. So bright and happy!

On-the-Go

Caronia On-the-Go Swatch

On-the-Go is a fabulous teal green creme that is almost perfect in just one coat! When I first used On-the-Go a while back, it really did have me “on-the-go”. I went to several stores looking for a bottle for my sister and a couple of back-ups for myself. I love, love, LOVE this polish! I don’t like many green polishes, but I do love this cool dark teal.

First Crush

Caronia First Crush Swatch

First Crush is a very pretty, lilac purple creme. Who doesn’t love a pretty purple polish amiright? (Have I mentioned that purple is my favorite color to wear on my nails?) The formula on this one was just fine needing only 2 coats for full coverage. This one if perfect for all you girly girls out there!


Promotional image for Caronia Shades of Summer

This collection has sophisticated, work-safe shades, bold pops of color, and cooler hues, too. There is something for everyone, I’m sure! These polishes have been reformulated and are 3-Free and dry fairly quickly. They are sold individually in 8ml bottles for (SRP) Php31 ($0.69) each at local department stores and grocery stores. The durability of this polish for the price is well worth it. It’s definitely a great budget buy. You can follow Caronia on Facebook and Instagram to keep up with them and their products.

I hope you enjoyed this review and that you found my input helpful. Let me know in the comments which shade is your favorite. Keep your eye out for some nail art featuring these babies.

Have a great weekend and don’t forget to make someone smile!
Hugs,
Rach

27 Mar

CND Vinylux Midnight Swim Nebula Nail Art

Hi Dolls!

Today I’m sharing my latest Nebula (or Galaxy) art. This is one of my favorite looks to sport on my nails. Aren’t they pretty? Sometimes I think I’ll try something fancy with crazy colors and mix it up, but I always end up just liking it like this with pretty purple nebulae.

CND Midnight Swim with Galaxy/Nebula Nail art

Back in November when I swatched CND Midnight Swim, I knew I wanted use it as the base for my next Nebula nail art look. It’s such a pretty deep blue, and I was excited to test its durability with nail art over it! While the base color is CND Midnight Swim, all the purples, blues and glitter were done using  several Girlstuff polishes and a makeup sponge torn into small pieces. Check out my tutorial for nebula nails here. It takes a lot of sponging, but it is really easy to do. I added some stars using white polish and a small dotting tool. The criss-crossed stars were done using a teensy tiny brush that I cut into just a few strands.

I’ve been wearing this for 8 full days now, and I’ve got to say, I am SO impressed! Just look at this side by side of Day 1 and Day 8!

CND Midnight Swim 8-Day Wear Comparison

Can you believe it? I like this brand even more the second time around! This polish is out of this world! I would definitely recommend these CND Vinylux Weekly polishes for their long wear time. Check out my full review here.

You can get your own CND products by contacting CND Philippines on Facebook, Instagram  or Twitter.

Have a stellar day!
Hugs,
Rach

25 Mar

Oh My Goodness! Jellybean Nails Using OMG Nail Strips!

Hi gals!

I appreciate you sticking around despite it being quiet around here lately. Unfortunately, I’ve been having some personal health issues in addition to keeping up with my regular mommy/wife duties and the blog always takes a back seat to real life. I’m sure you understand, but I thank you just the same for your patience. Y’all rock!

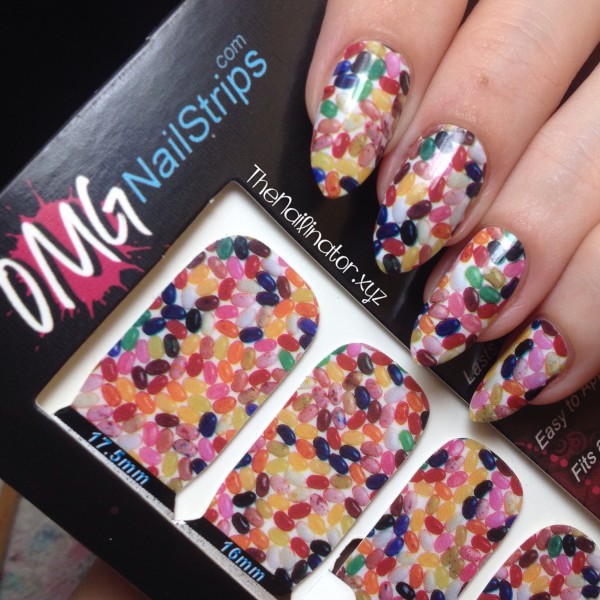
I’ve got a review for you today of a super fun product sent to me by OMG Nail Strips. They make a wide variety of nail strip designs that make for some quick and easy nail art, even if you are just a beginner!

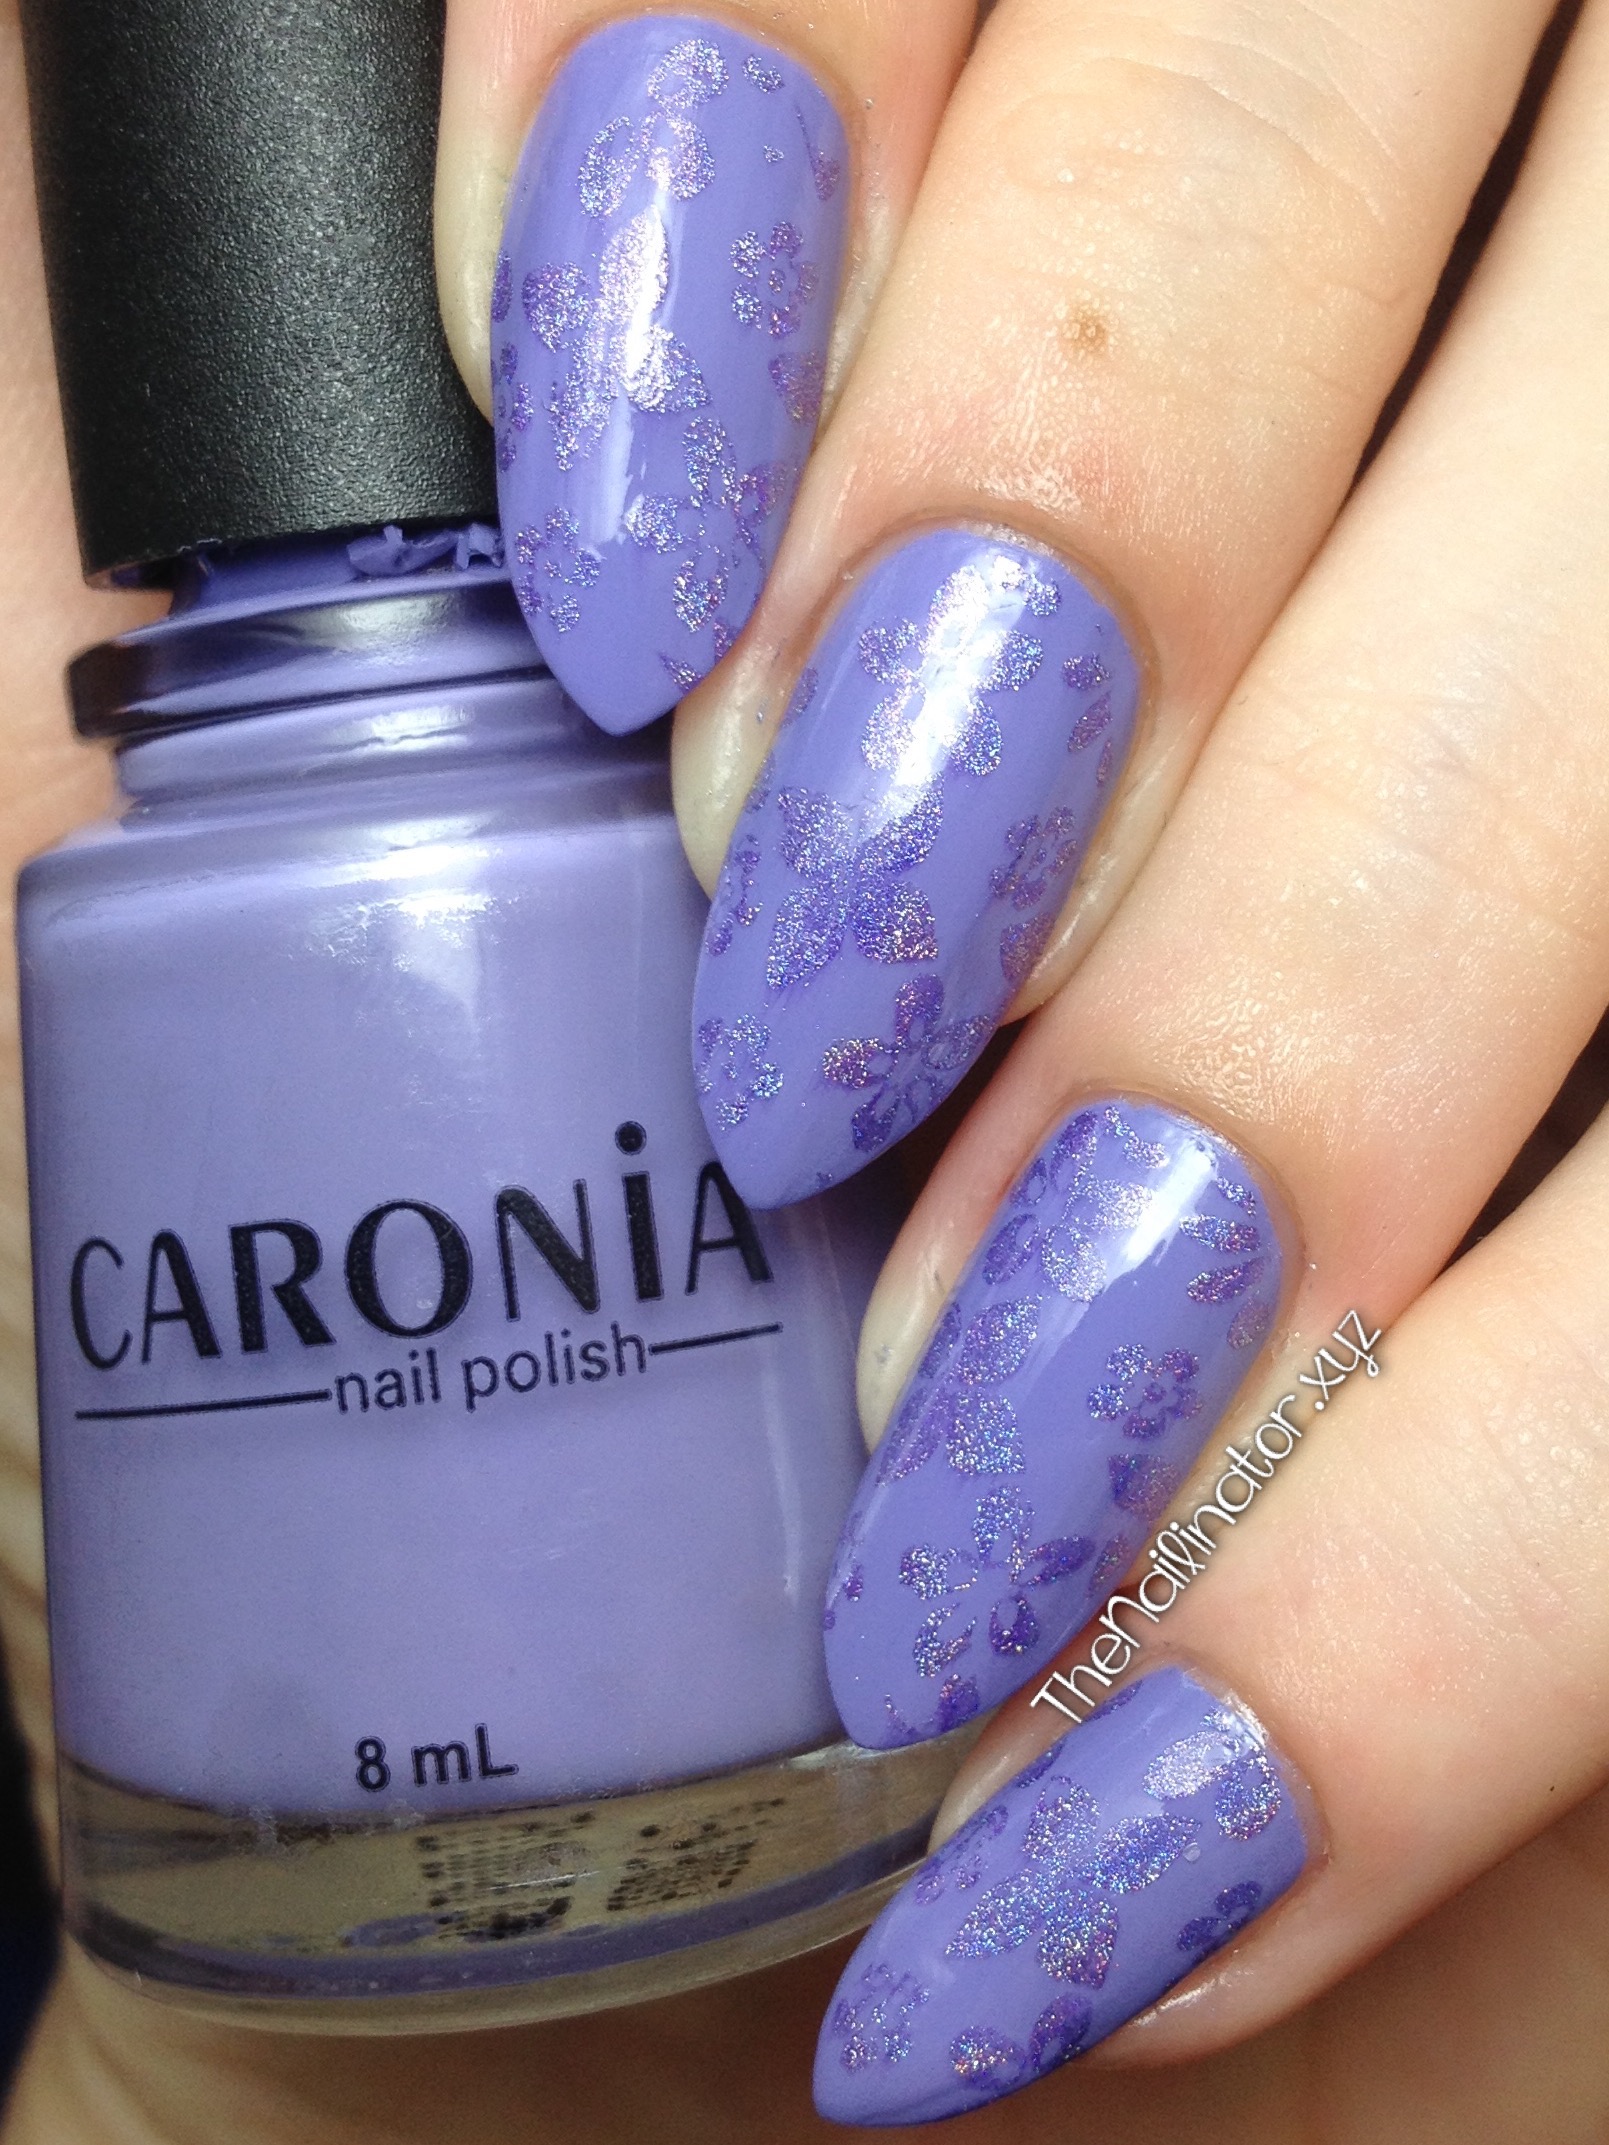
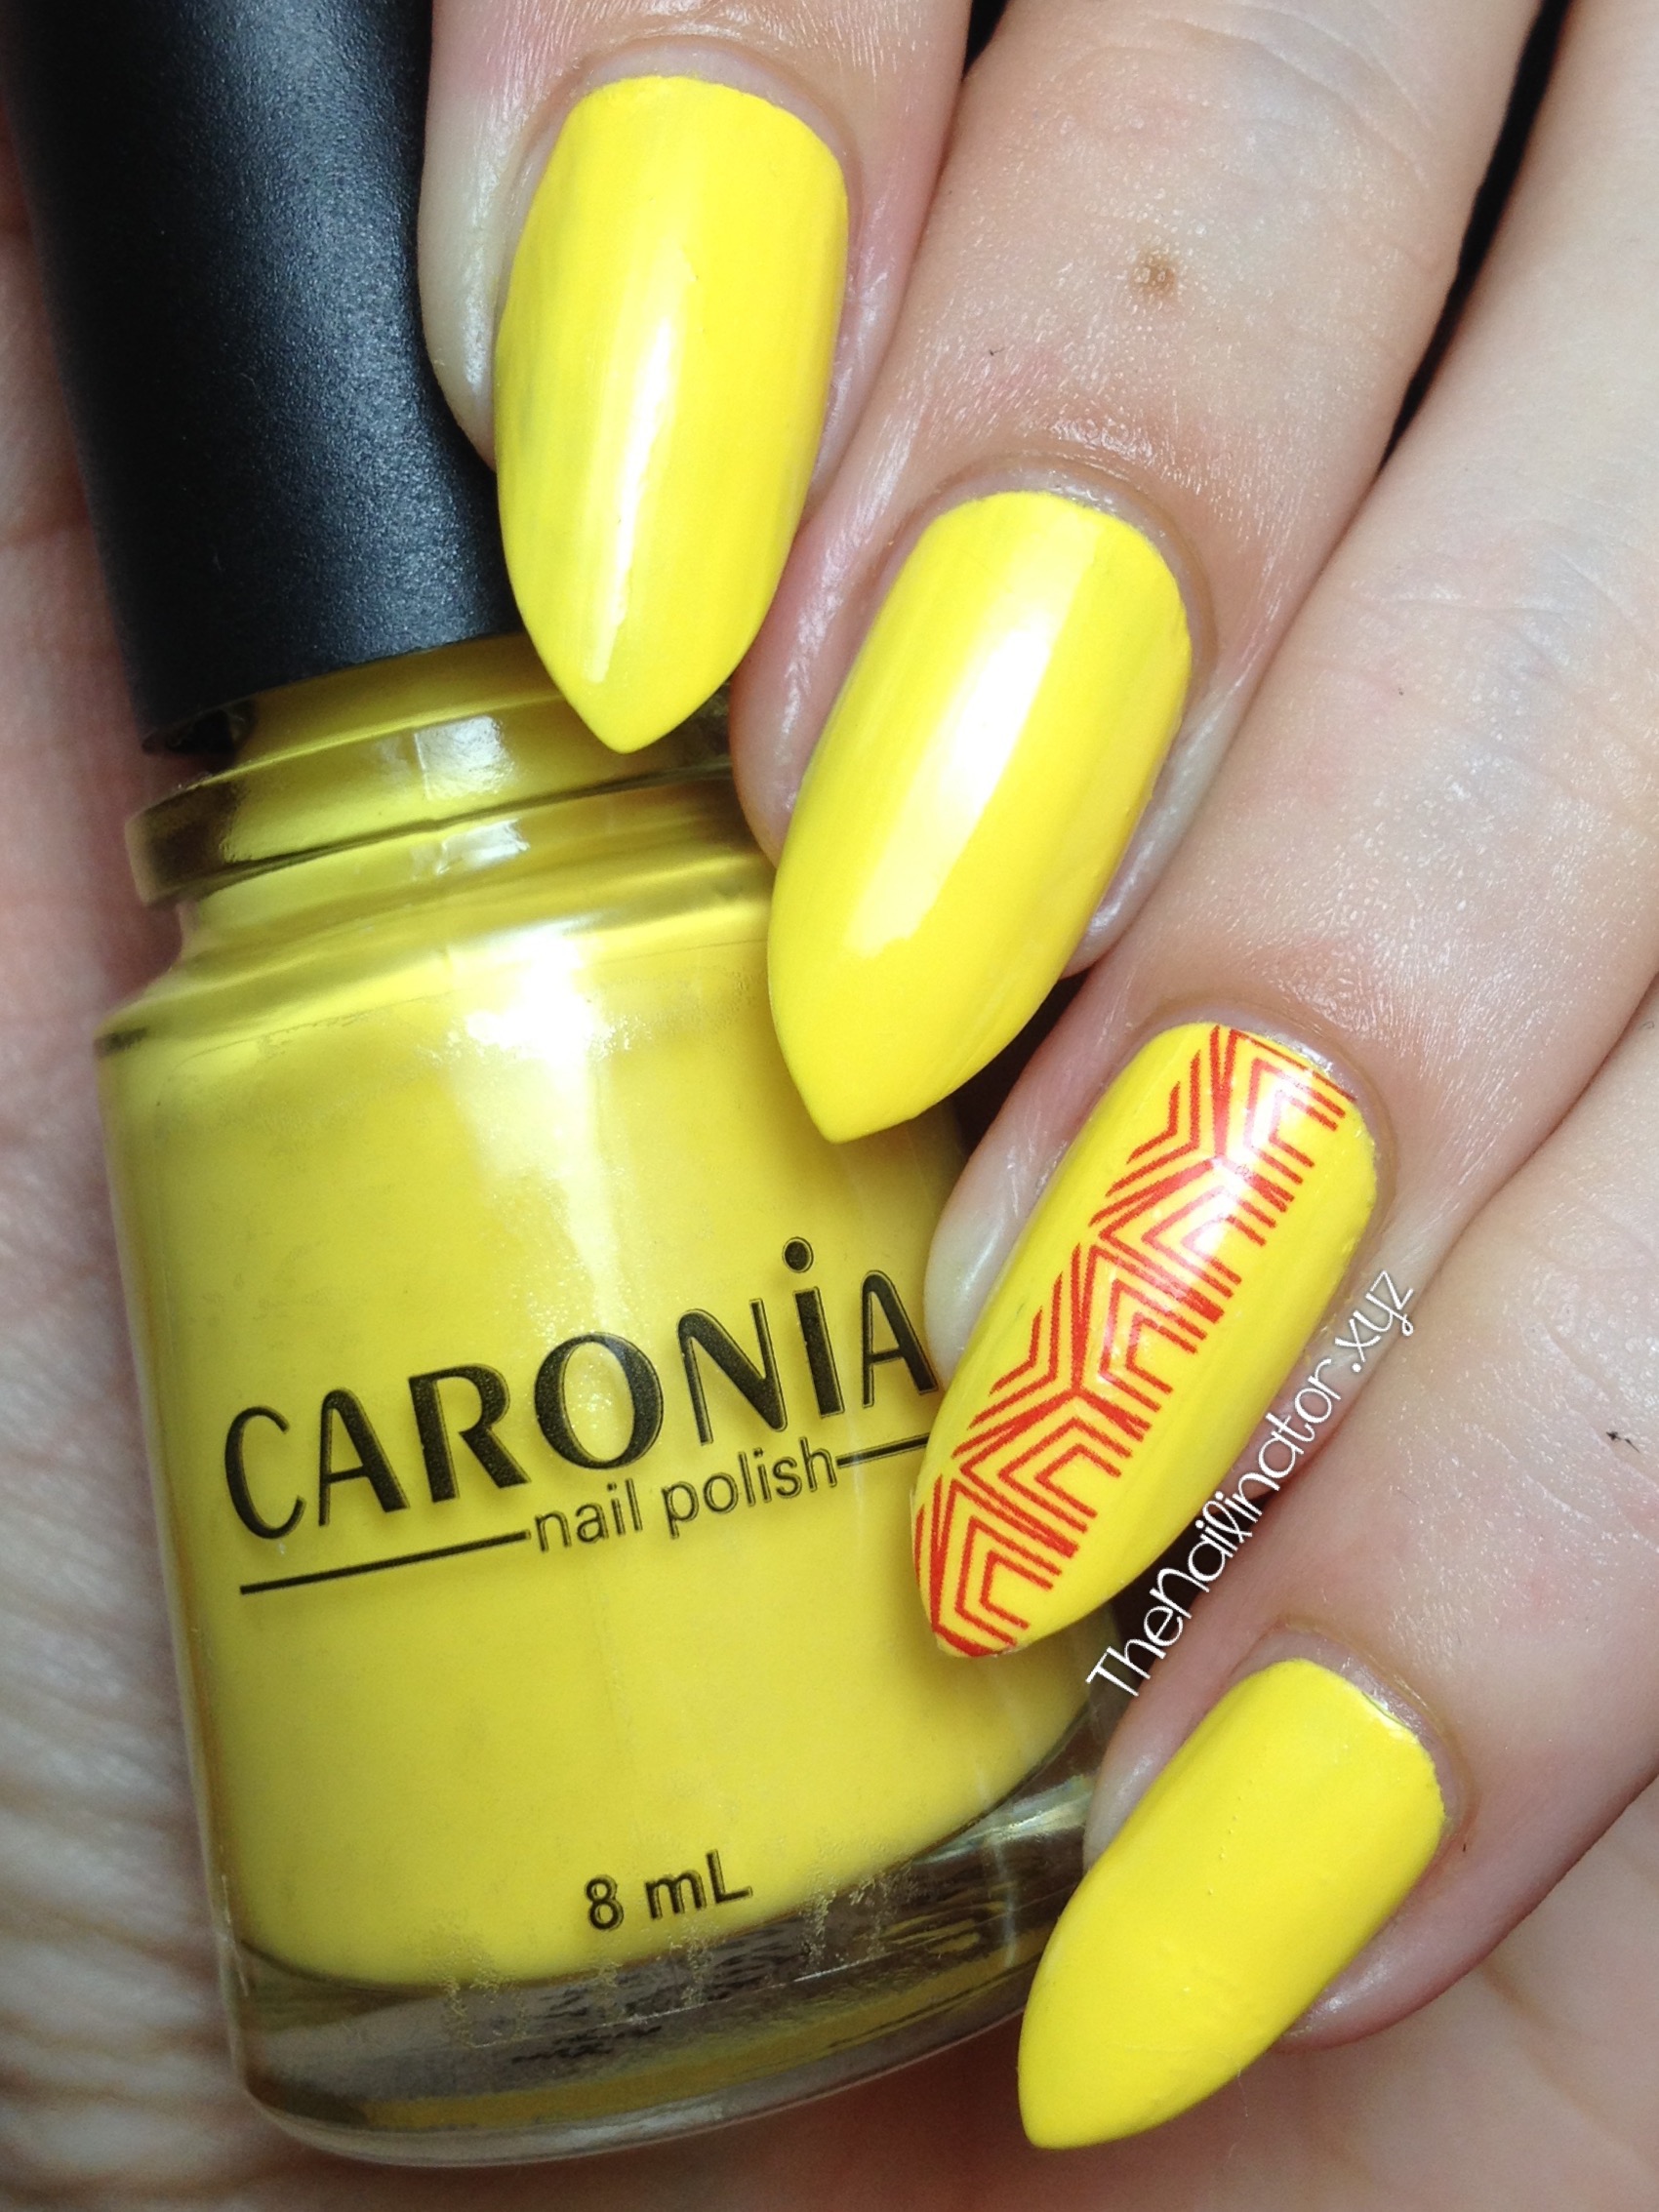
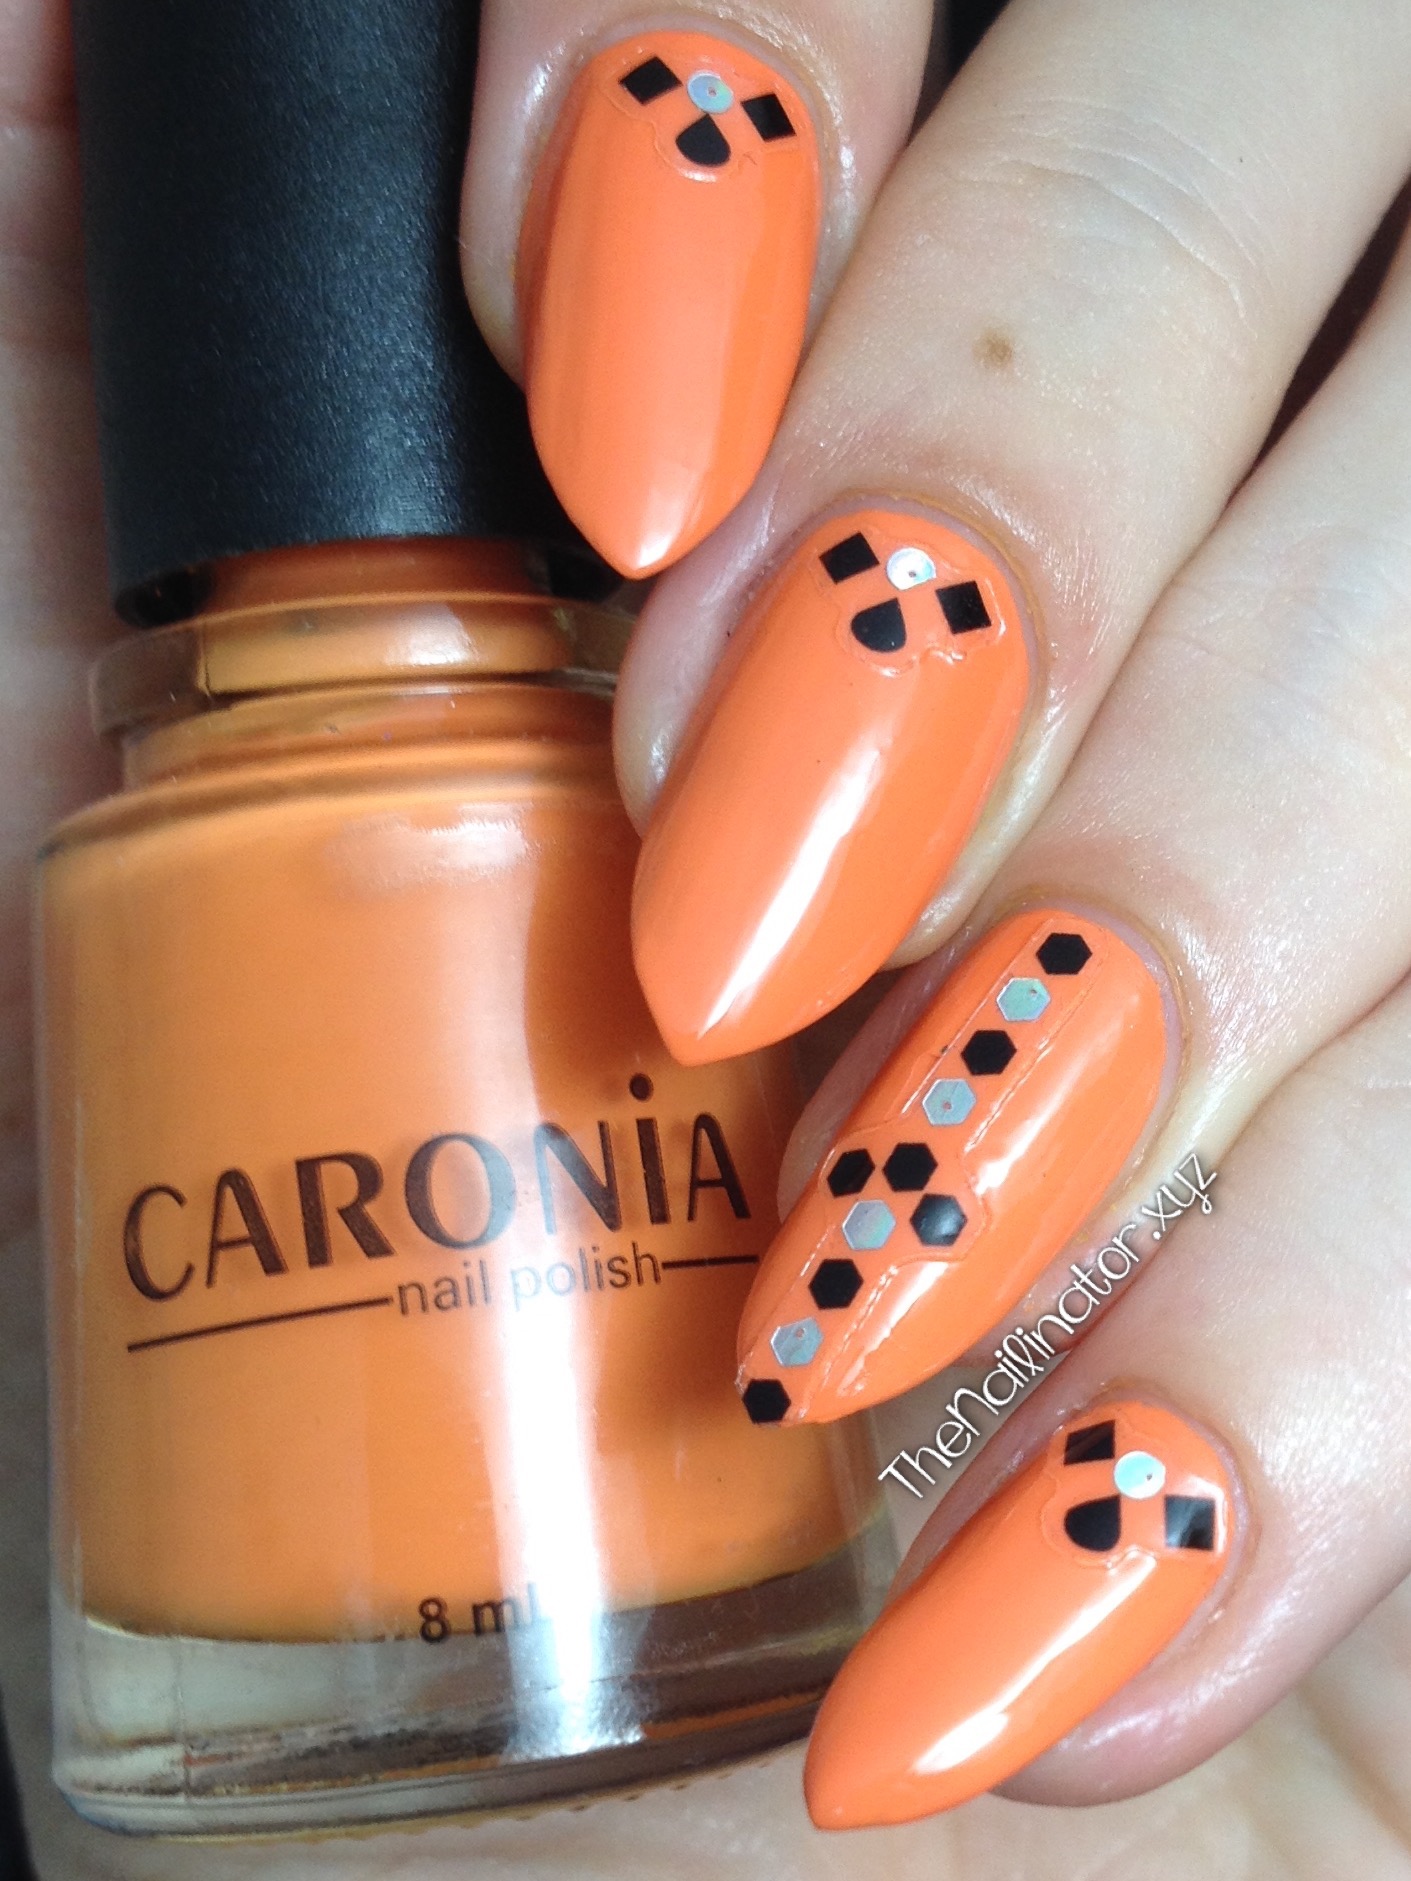
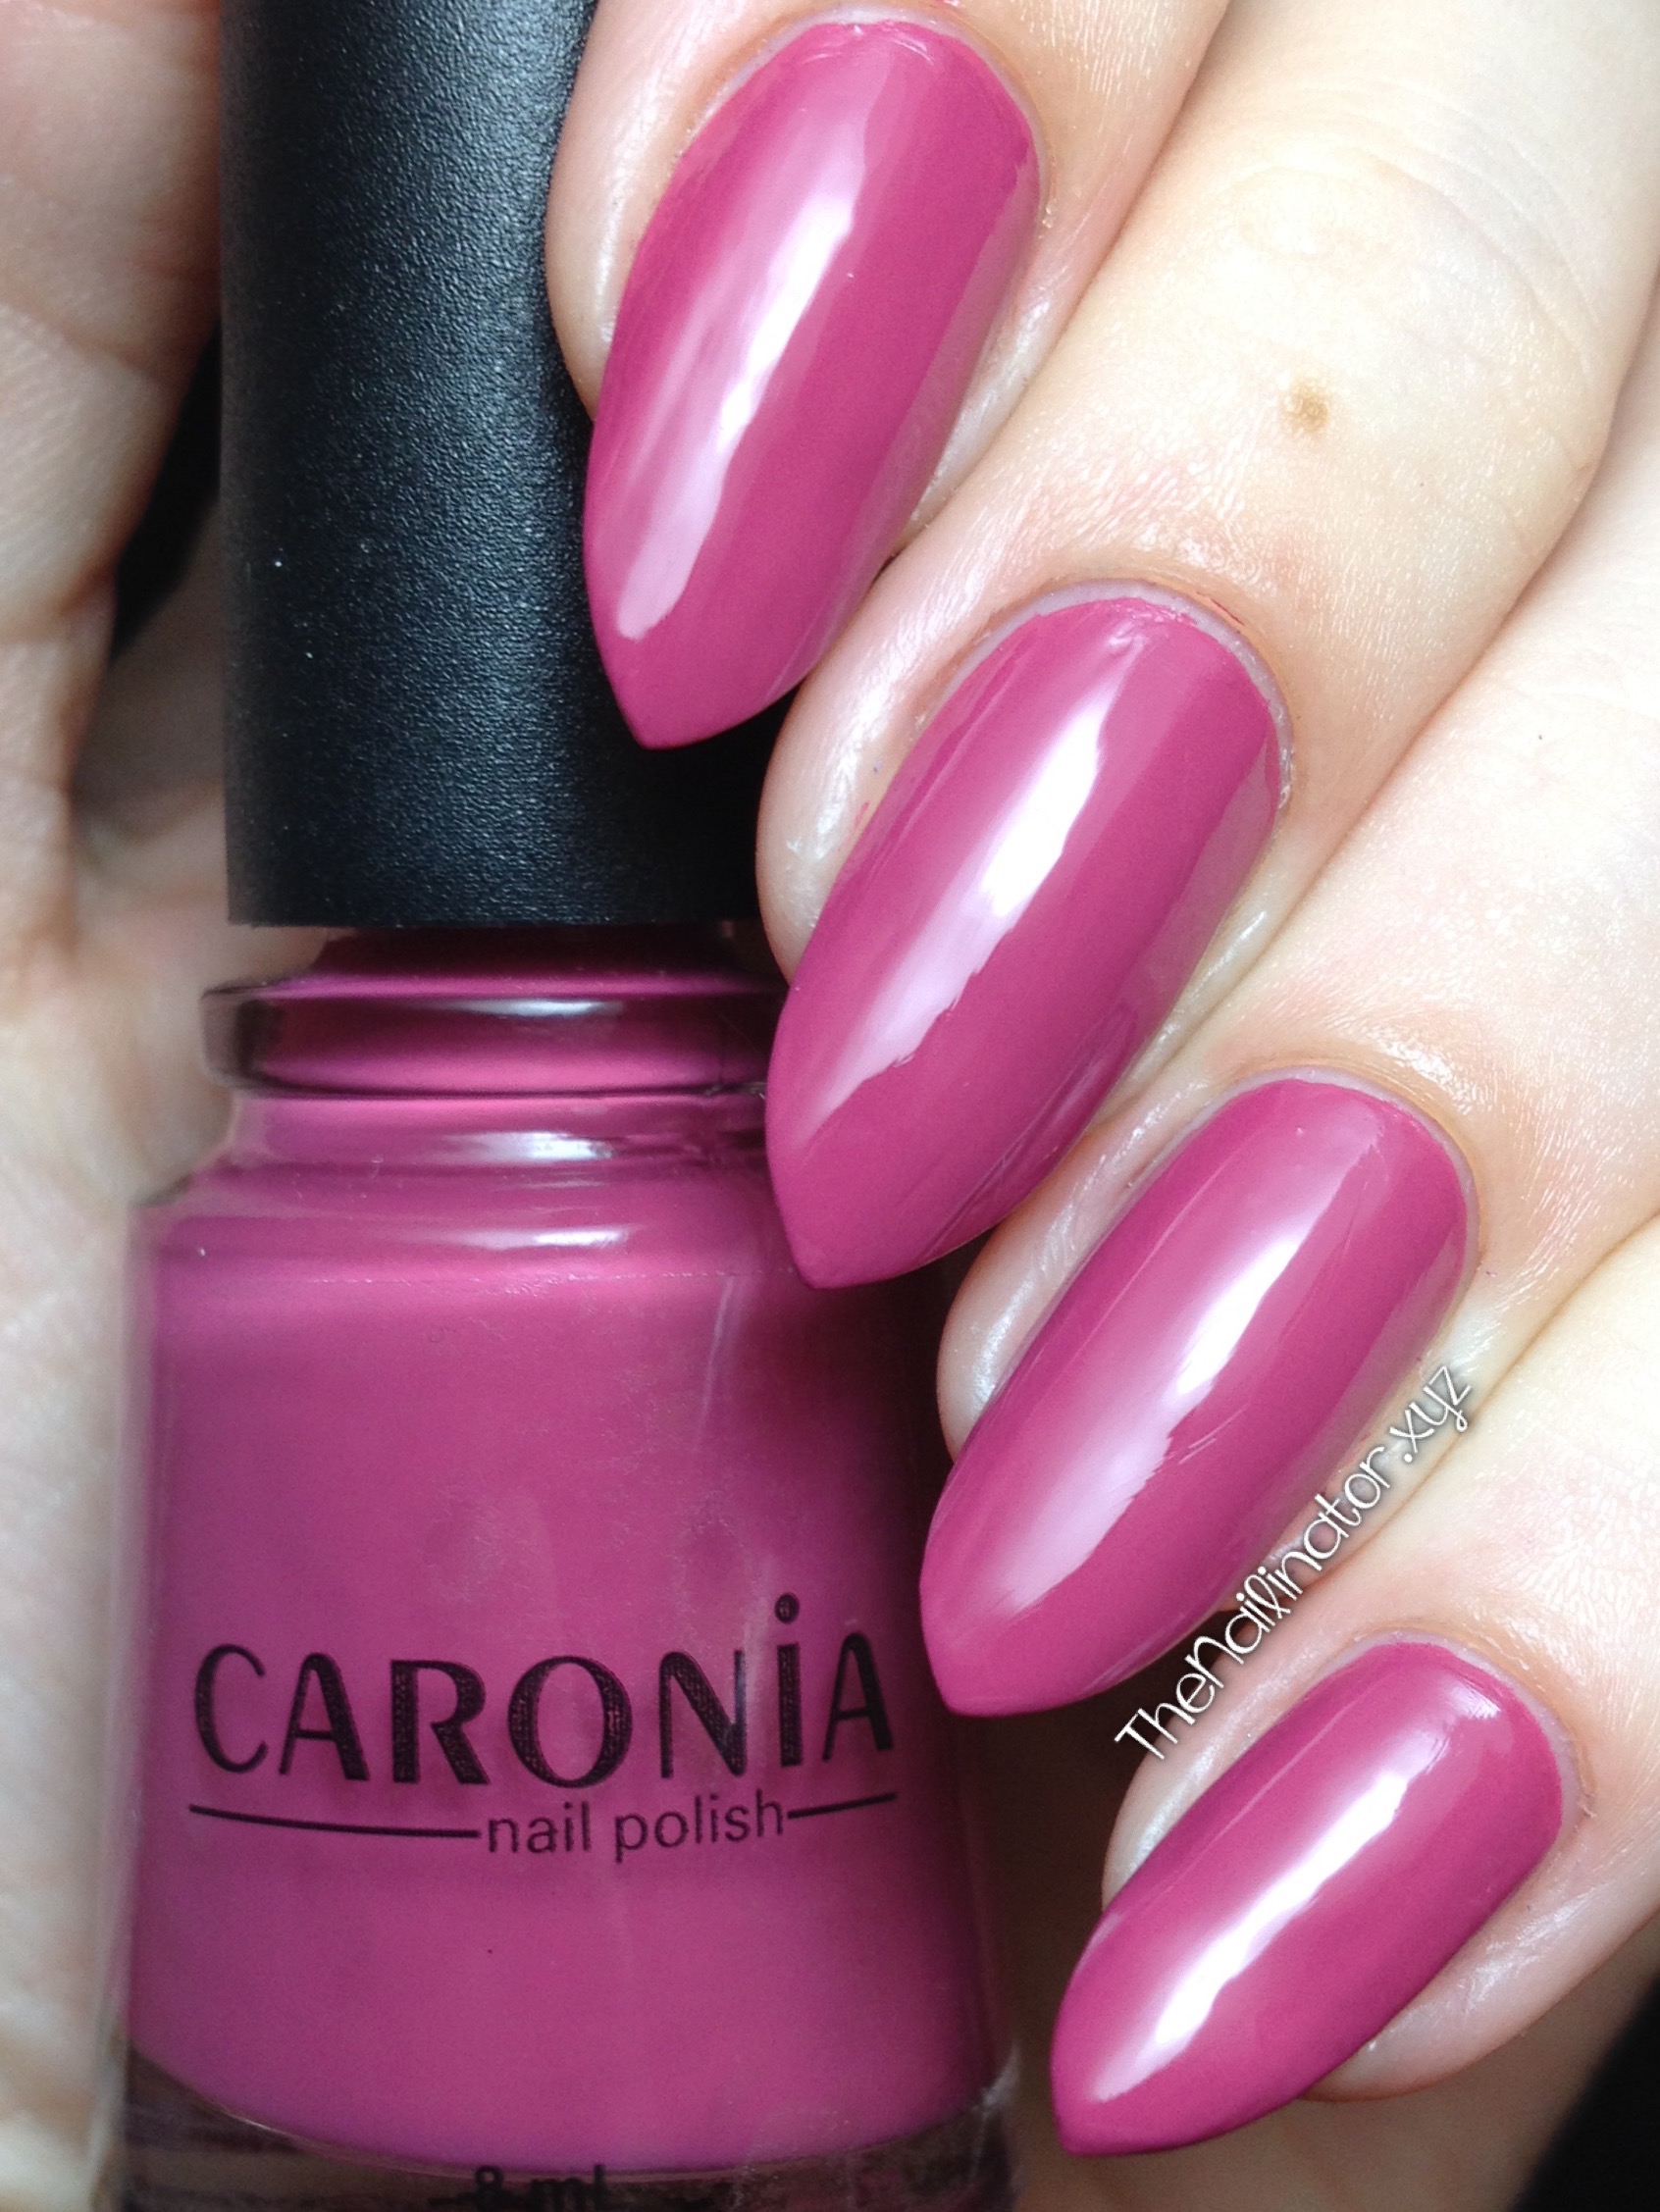
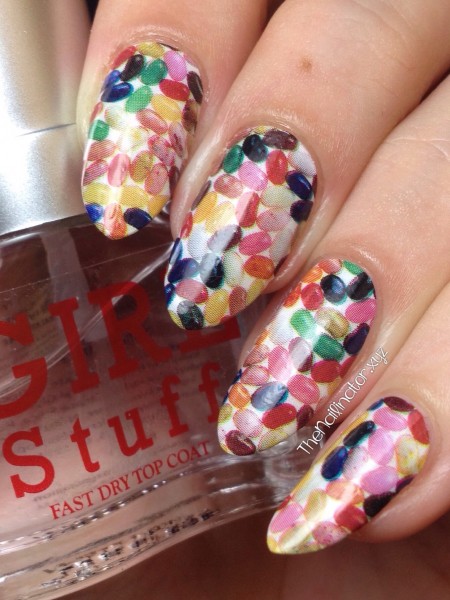
I picked out two designs to try out and today I’m showing you the Jelly Bean design. Even though I don’t like to eat jellybeans, I do think they are so cute and colorful and a very fun idea for nail art! Perfect for a spring mani. Check out how great these look! I got lots of compliments on them.

OMG Nail Strips - Jellybean

But are they as easy to use as they boast on their site? Yes! They were so easy and quick to apply! Keep in mind that there are different types of nail strips and decals on the market so it’s important to know what you are working with and follow the instructions for each type. I really appreciate that they have a video tutorial on their website which left me feeling confident when I applied these.

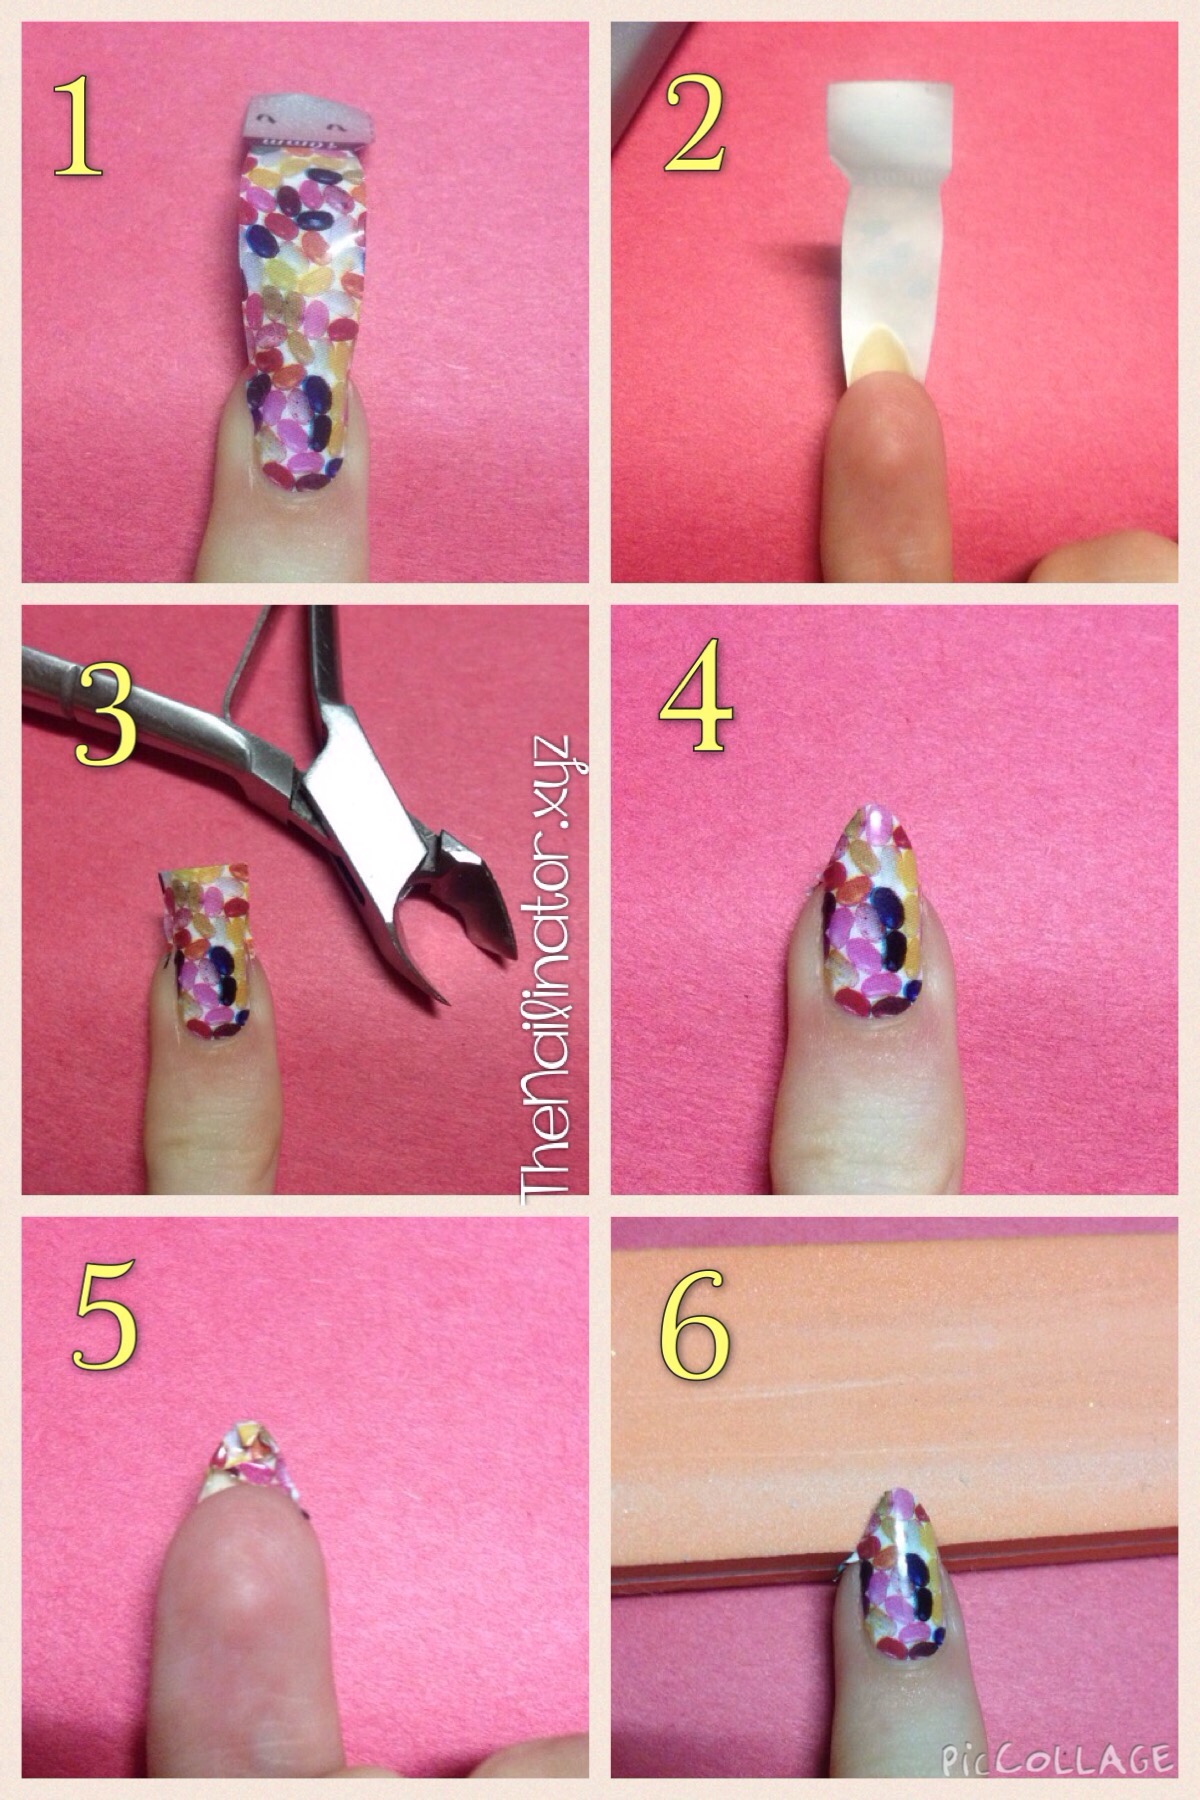
Before I started, I pushed back my cuticles and swiped some polish remover on my nail surface to make sure to remove any oil or residue that might prevent the strips from sticking well to the nail. I also used some scissors and cut the sheet of nail strips into individual strips. There are 14 strips total per pack.

OMG Nail Strip Application

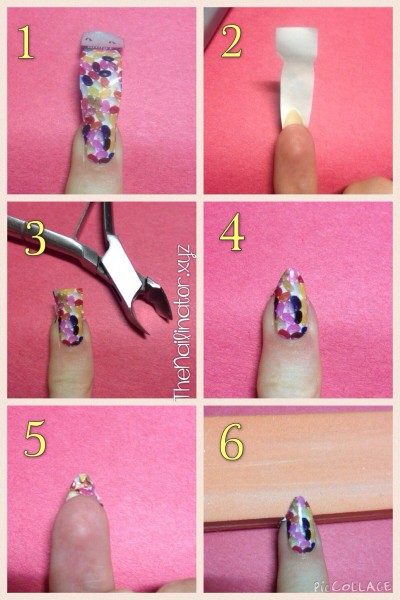
1. After selecting the correct size for my nail, I removed the clear plastic coating on top of the strip and then removed the strip from the stiff paper backing. I centered the strip to my cuticle line and sides of my nail. The underside of the strip is sticky so it is very easy to position it on the nail. It stays put while you work on cutting it down to size, but it’s not so sticky that, if you place it off-center, you can’t pull it off and reposition. It is also sturdy enough that it didn’t tear or stretch when I had to reposition.

2. After I positioned the strip, I was surprised to see how much of the strip was left hanging over the end of my nail. I have long nails, y’all. So these strips would still work on REALLY REALLY long nails. At this point, I used my finger to smooth out any bubbles under the strip. I used my rubber ended cuticle pusher to make sure the edges of the strip were stuck down well.

3. I snipped off the excess overhang of the nail strip with scissors, and since my nails are so skinny, I used my nippers to snip where the strip was a little bit too big for my nail on the sides. If you look closely at the picture, you can see what I did.

4. I used my finger to fold the strip over the free edge of my nail. It was a little tricky at first since my nails are almond shaped and not flat. But I just made sure to press along the edge and to tuck the over-hang under my nail.

5. See the excess tucked up under the tip of my nail?

6. Using a fine grit nail file, I filed along the edge of my nail until the excess came off. I did my best to hold the file parallel with my nail to keep the strip in tact on the tip of my nail. After I was finished, I topped it off with my favorite quick-dry topcoat from Girlstuff.

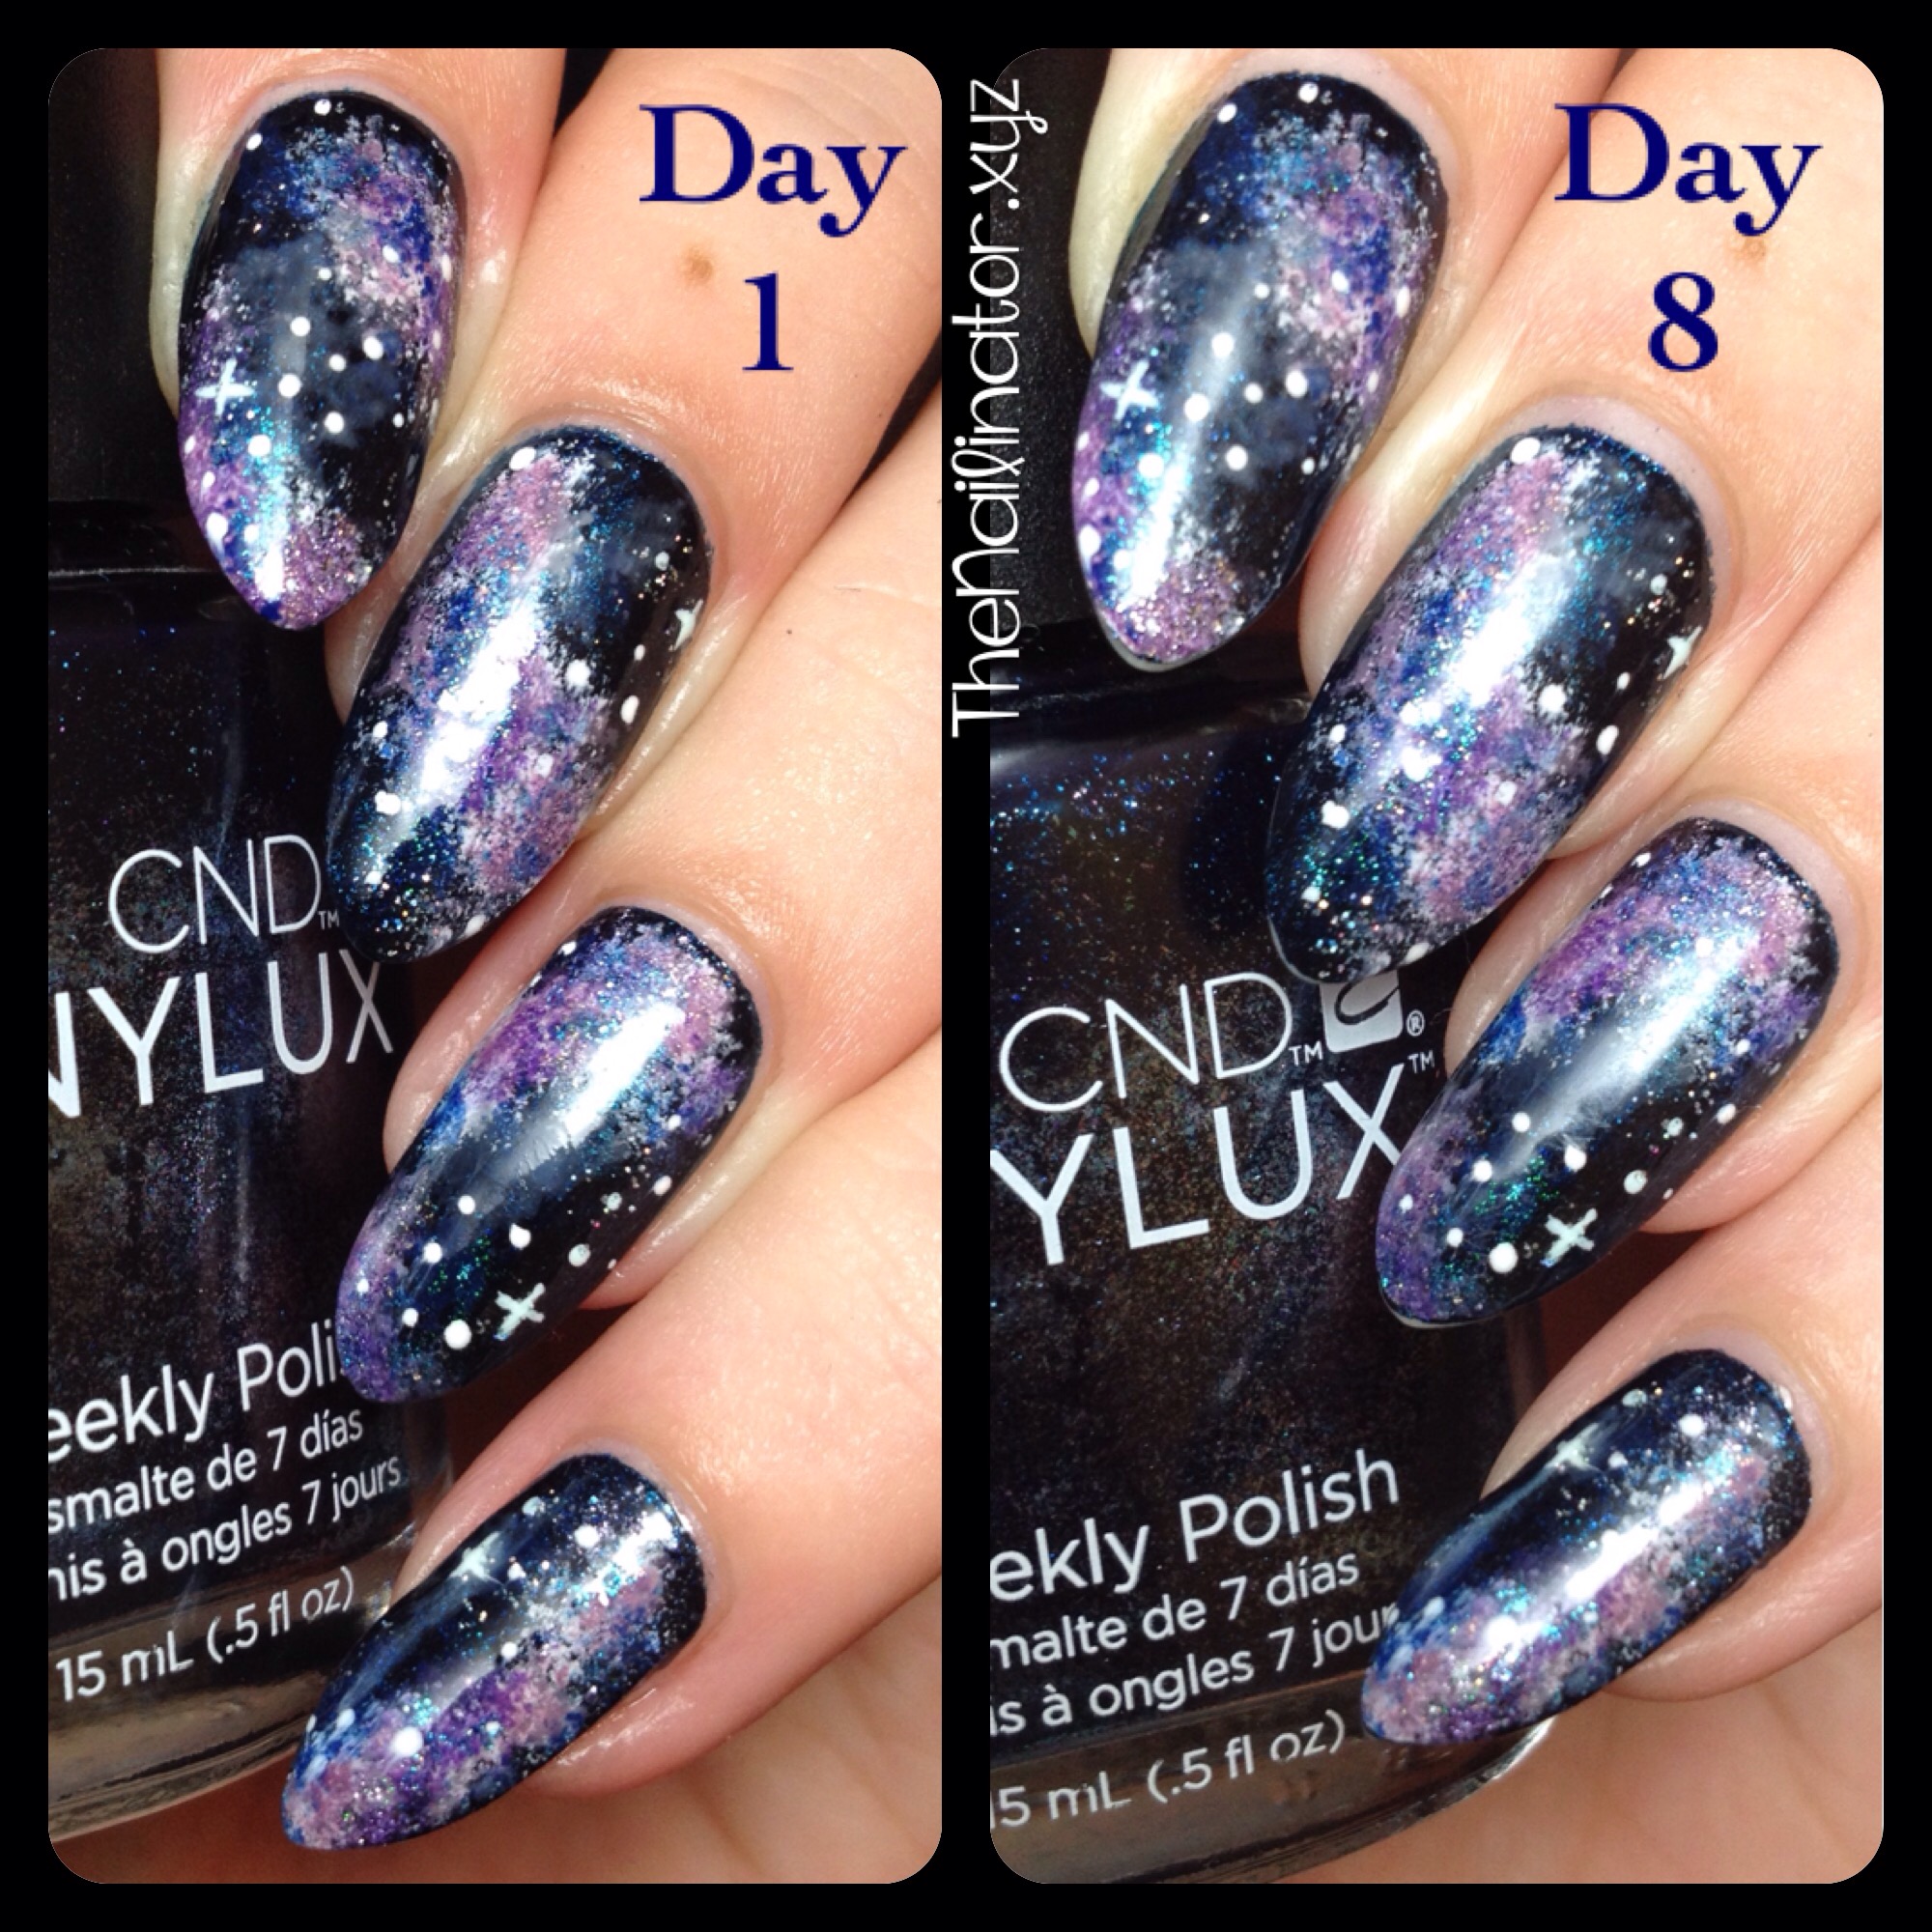
The packaging says that these last up to 10 days. I wore them for 8 days before I needed a change, but the strips weren’t peeling up around the edges at all. They did have some tip wear but not much considering they endured 8 days on my nails.

Application only took 15 minutes or so (not counting nail prep time). This really is a quick way to get some fine looking nails.

OMG Nail Strips in Jellybean

If you want to get your hands nails on some of these OMG Nail Strips, then pop over to their site and take a look. They have everything from skulls, hearts, flowers, feathers, and animal prints. These are $7.99 each or, for a better deal, you can pick 5 designs for $25 with free shipping on any orders. They even have new LED Nail Decals that have an LED that lights up with the NFC fields given off by some phones. How cool is that? Check those out here.

Have you ever tried these nail strips before? What do you think? I really like them, and I know I’ll enjoy showing off the other design I picked out soon. Thank you OMG Nail Strips for sending these to me. They sure were fun to wear!

Have a great weekend and don’t forget to make someone smile!

Hugs,
Rach

13 Feb

#Mynailsandmydress and Cebu Bloggers Society Turns 7

Hi gals,

Valentine’s Day is tomorrow. Any big plans this weekend? I’ve got a couple of things happening but more on that later. Today I’ve done some nails based on some details from a dress of mine. I don’t always match my nails to my clothes. But when I do it is awesome!

MJXXVI Stamping

For this look I started with my go-to pigmented-but-a-pain-to-apply-white (Yeah, I need to find a white I actually love). Then I stamped using Girlstuff Blues an awesome design from the MJXXVI plate sent to me by My Online Shop. As I expected, this plate stamped beautifully. I love that we have high-quality plates available locally. Meann also sells the squishy white stamper that will make stamping a dream.

My nails and my dres

I bought a gorgeous party dress this week at a little boutique here in Cebu called Best Finds Thriftshop.  I plan on wearing this dress to a Valentine’s dinner tomorrow night. We have some games planned and a potluck dinner. There will be baby sitting, so no interruptions. Yay!cbsi7

I’m also going to a blogger get together on Sunday night. The Cebu Bloggers Society is celebrating it’s 7th founding anniversary, and they have invited members to get together to celebrate. I just recently joined the Cebu Bloggers Society. I don’t get to go to many events because  what I actually blog about is very limited, but I’m still proud to be a member of a group of bloggers dedicated to making our city and our world a better place both from behind the computer or as we go about our daily lives. I love how bloggers across the board can, in their own ways, promote local companies and brands and especially come together and use social media to inspire people to be better and to help in times of crisis.  I look forward to meeting all the new faces. The Cebu City Marriot Hotel is graciously providing a venue for the bloggers of Cebu to come together and get to know one another better. I’m looking forward to it!

No matter what you are up to this weekend, I hope you have a lovely time doing it. Make someone smile!

Hugs,
Rach

%d bloggers like this: