06 Apr

L.A. Girl 3D Effects Dazzling Pink with BYS Fool’s Paradise Accent

Hi Gals!
Happy weekend! I’ve had an annoying sinus headache all day (all week off and on actually) but it has still been a nice day. The kids spent the afternoon with my parents and they are spending the night so I’ve had a little extra dose of peace around here. I spent it well this evening watching the 2nd half of The Fellowship of the Ring with Mr. Nailinator. He’s got the “platinum extended edition” so we watched all the extra scenes. I just recently decided to read the trilogy and I am enjoying them so much. I read the Hobbit as a young girl and it wasn’t my cup of tea back then. But I am loving the books now.

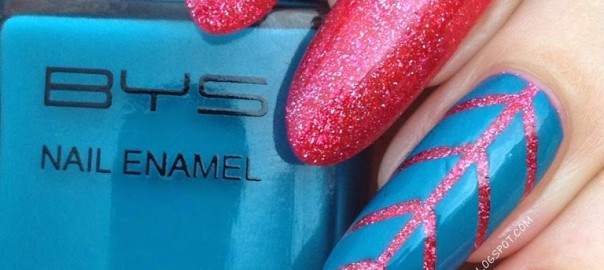
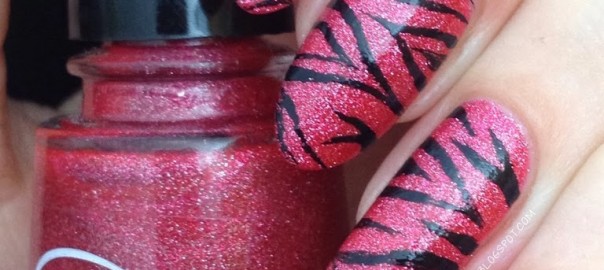
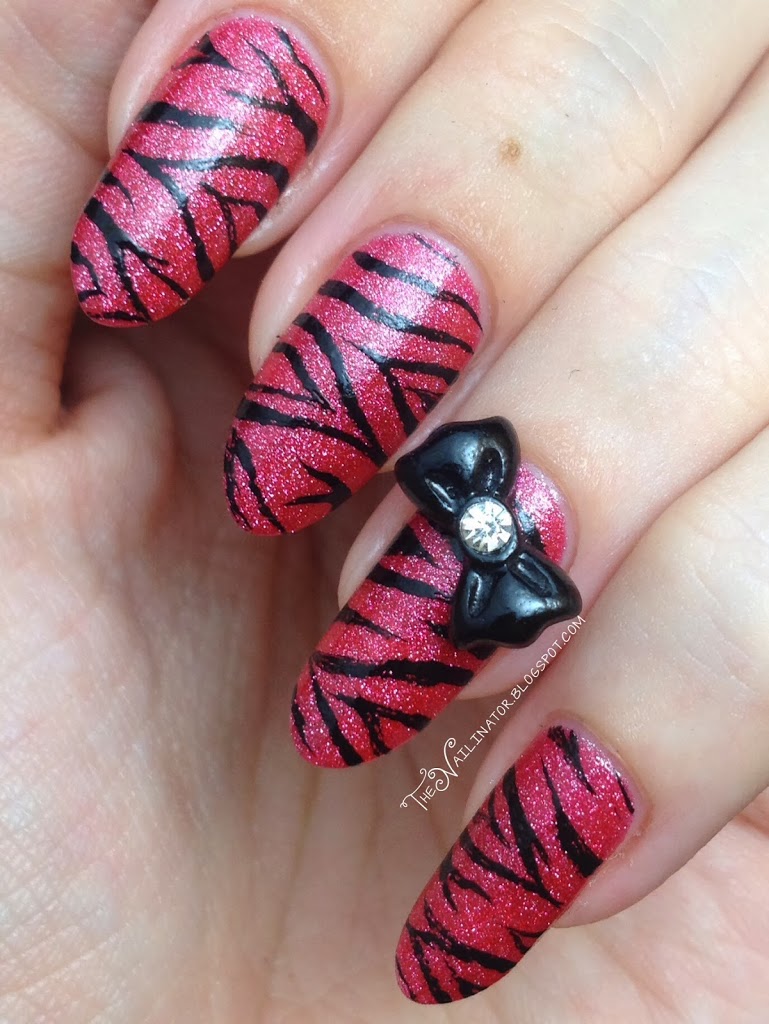
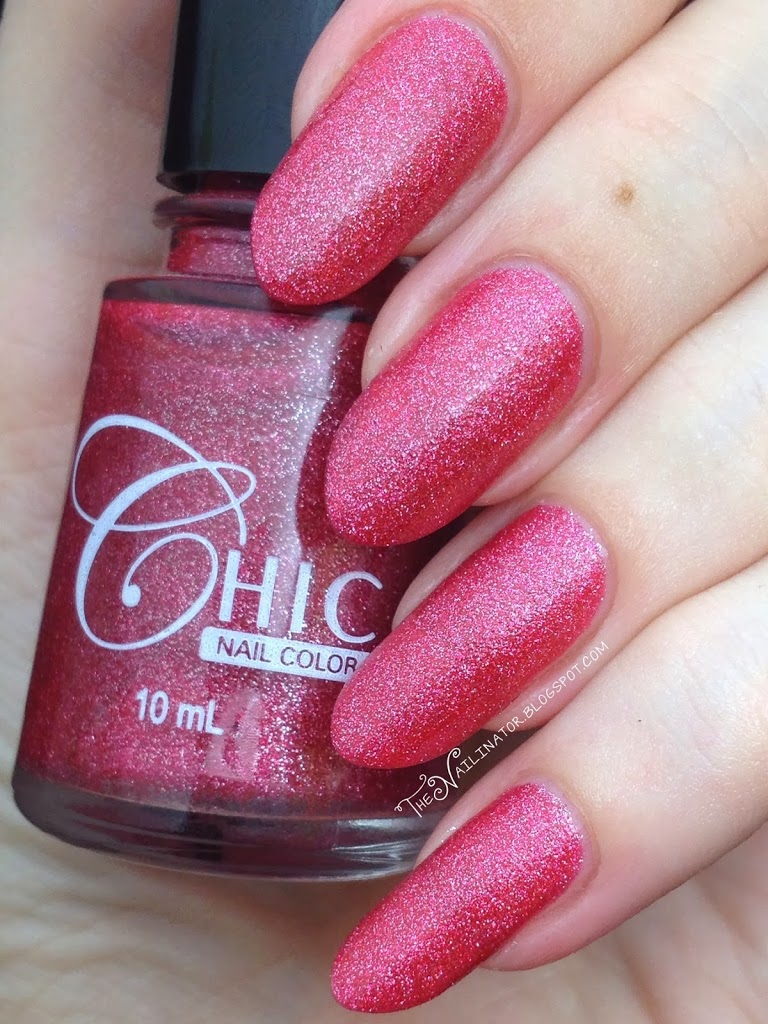
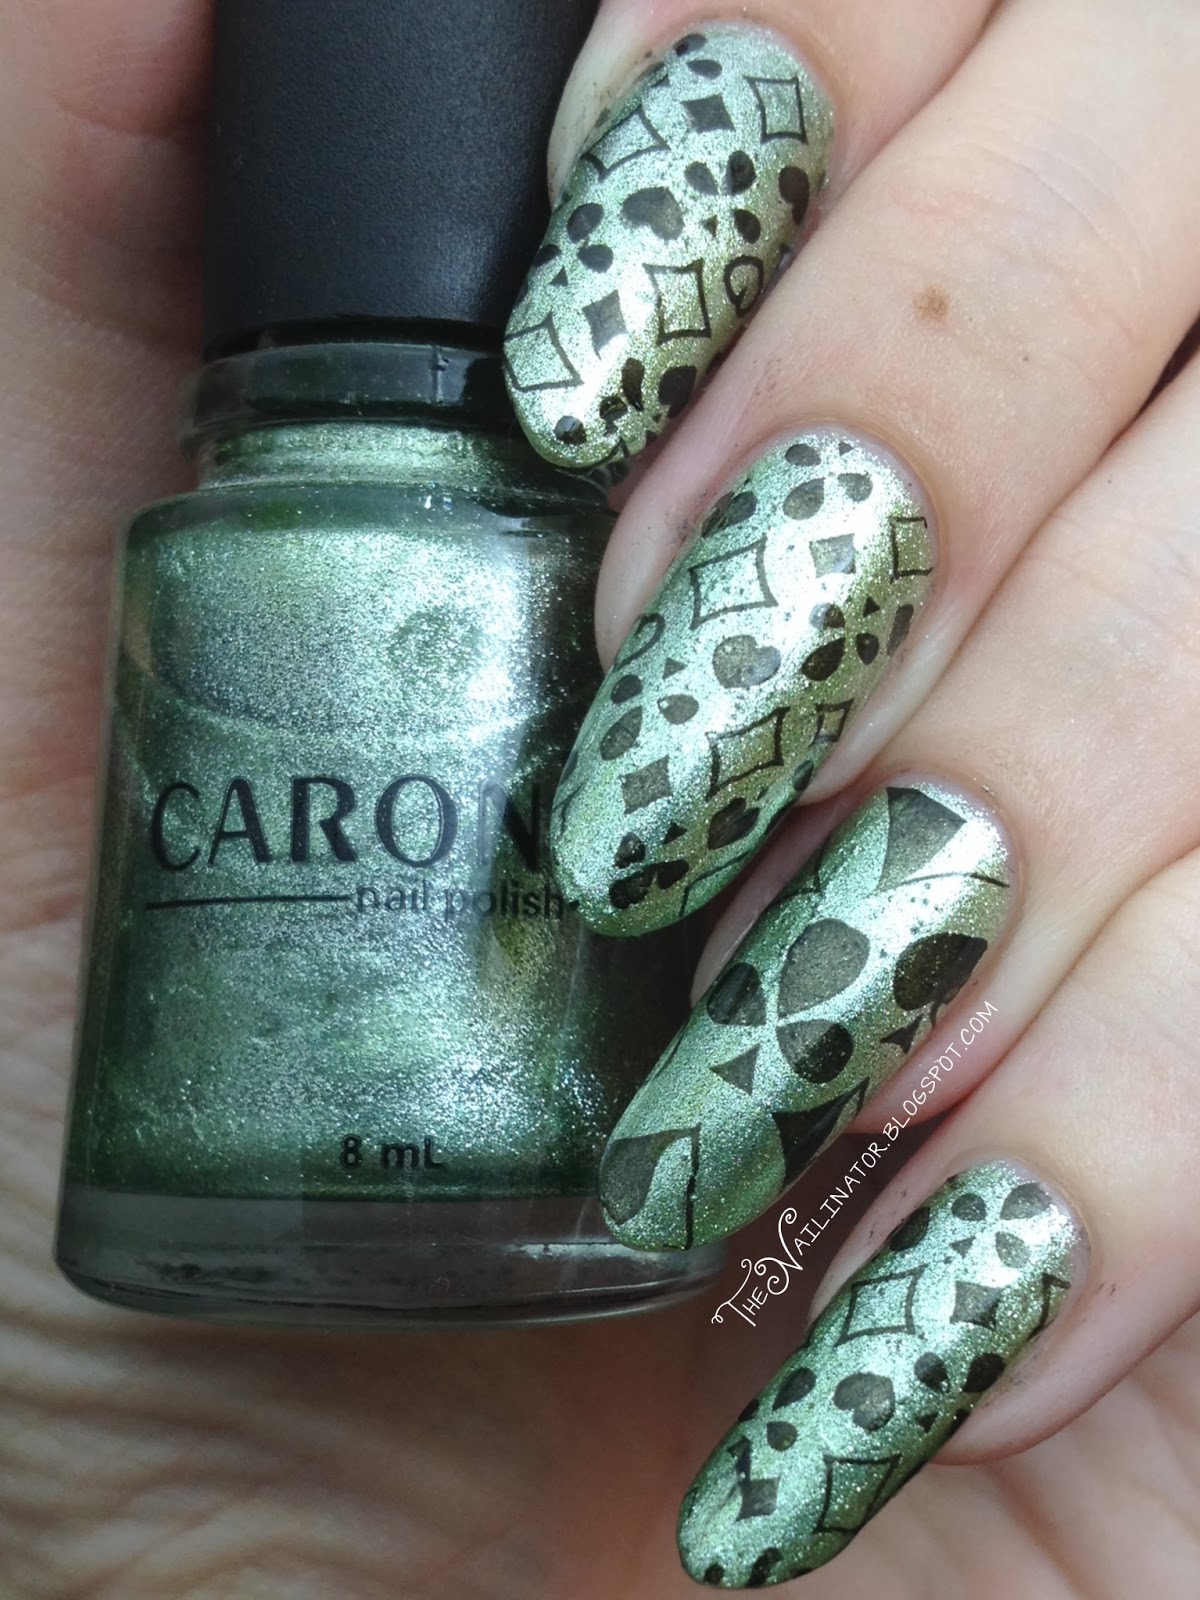
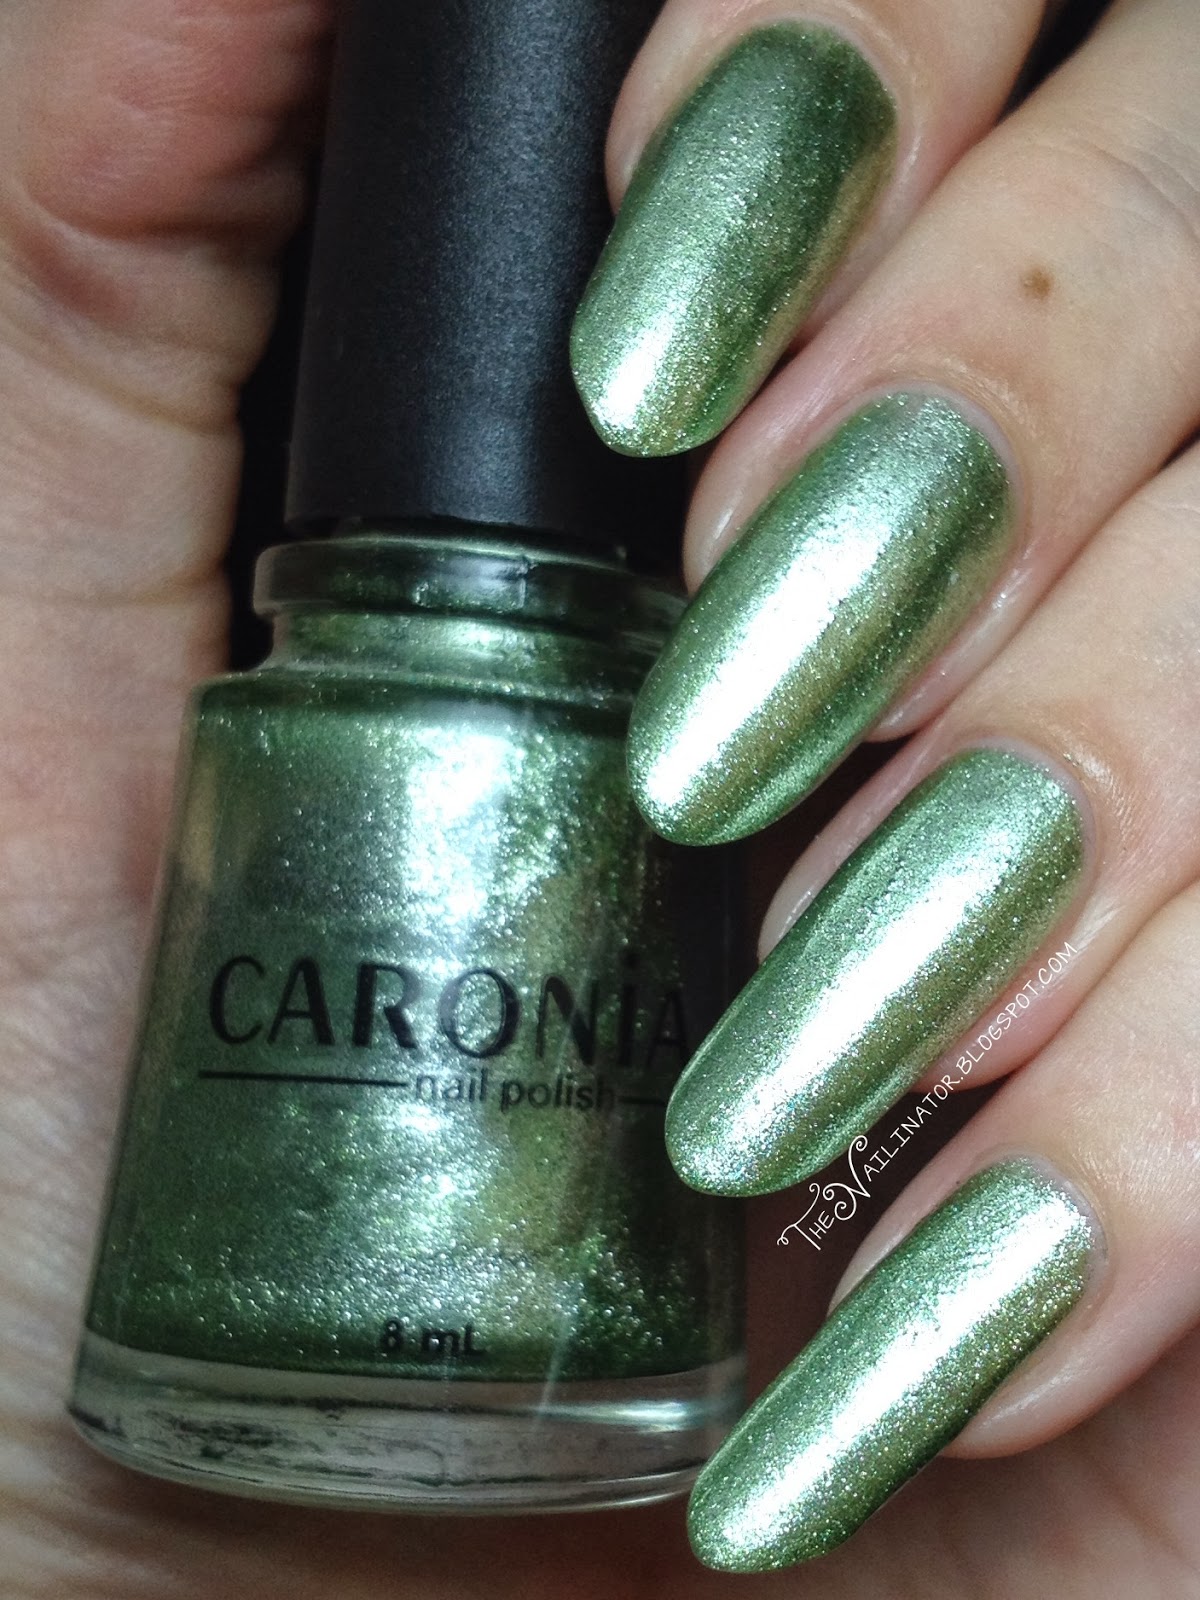
I’ll stop babbling now and get on to the main event. This isn’t a book blog after all. I’ve got a simple but fun look to show you today. I started with 3 thin coats of L.A. Girl 3D Effects Dazzling Pink. For my accent nail, I placed striping tape over the pink in the pattern seen below and polished over it with one thick coat of BYS Fool’s Paradise which was gifted to me by the lovely Rina of Simply Rins. (Thanks again Rins!) I quickly and carefully peeled off the striping tape and ended up with this.

L.A. Girl 3D Effects Dazzling Pink with accent

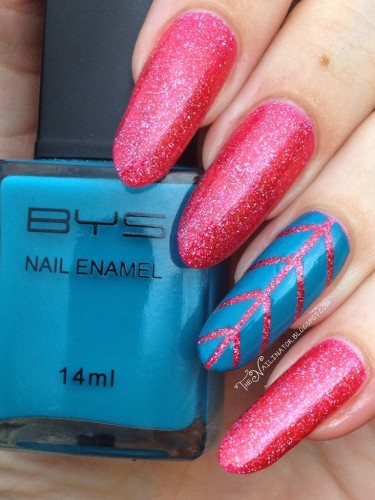
Cool huh?  I am loving accent nails these days. I have tried some edgy things I feel I might not yet be able to pull off on all ten nails. It’s easier to commit to something bold on two nails than on ten when you are unsure if you can handle it.

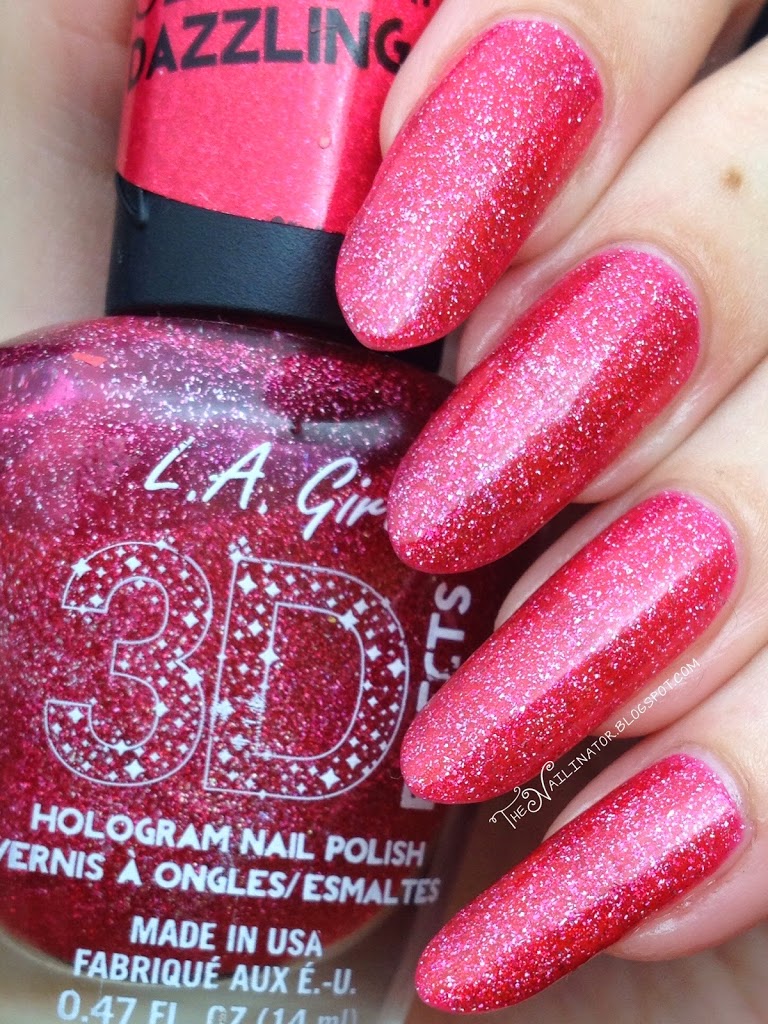
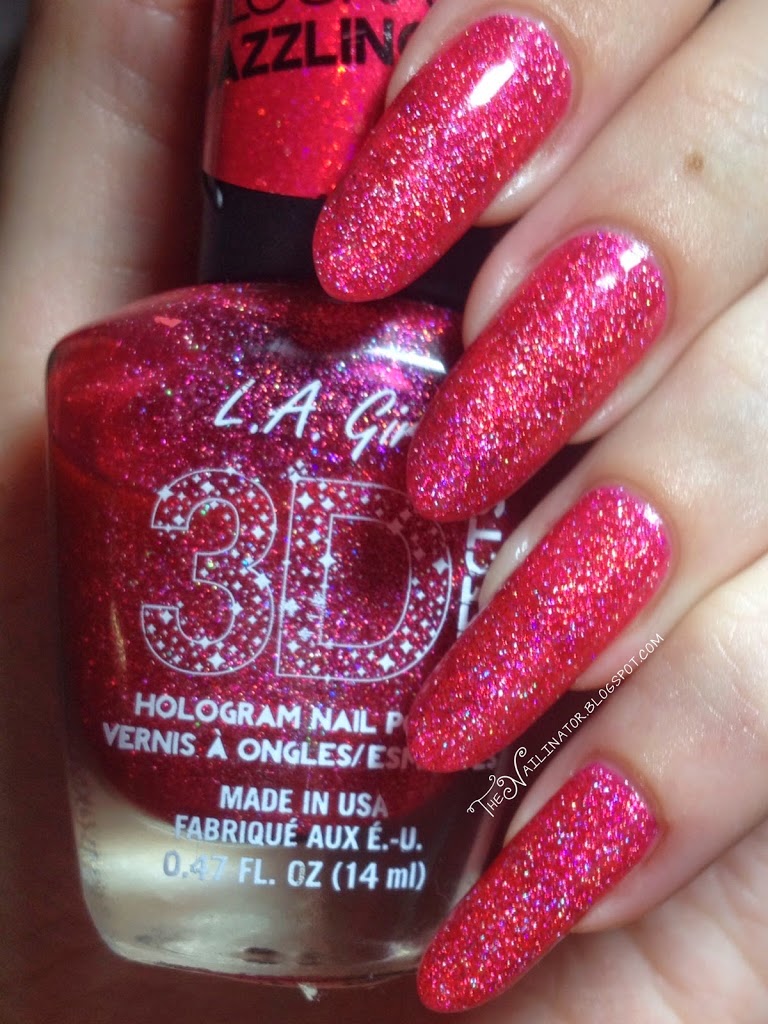
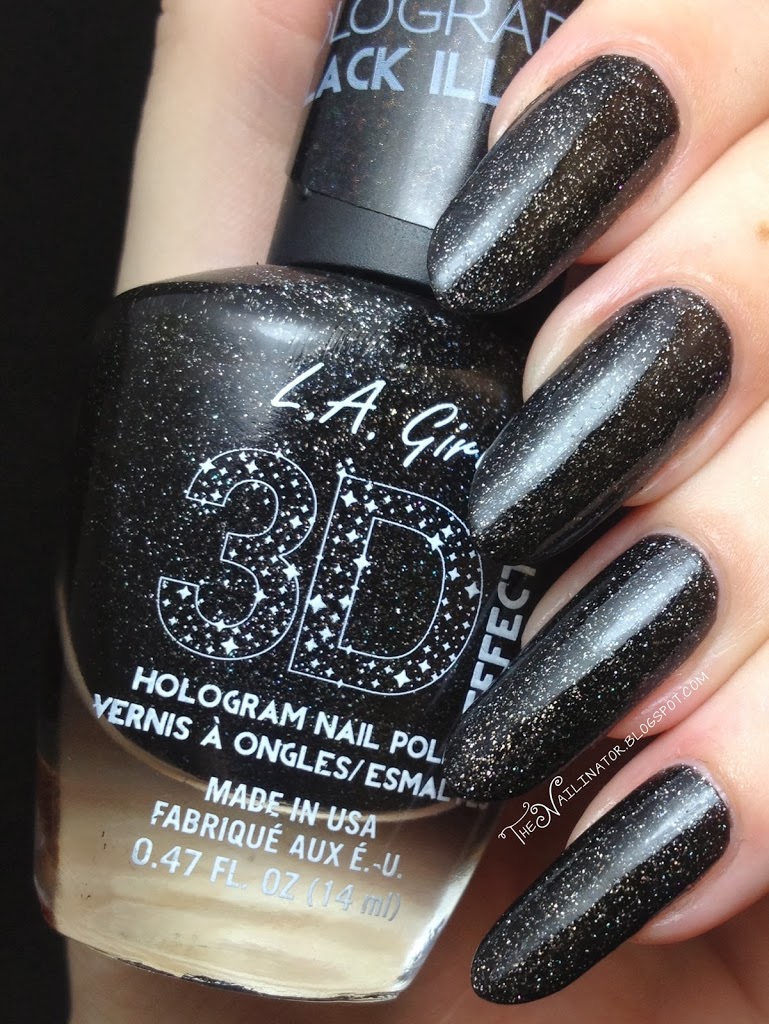
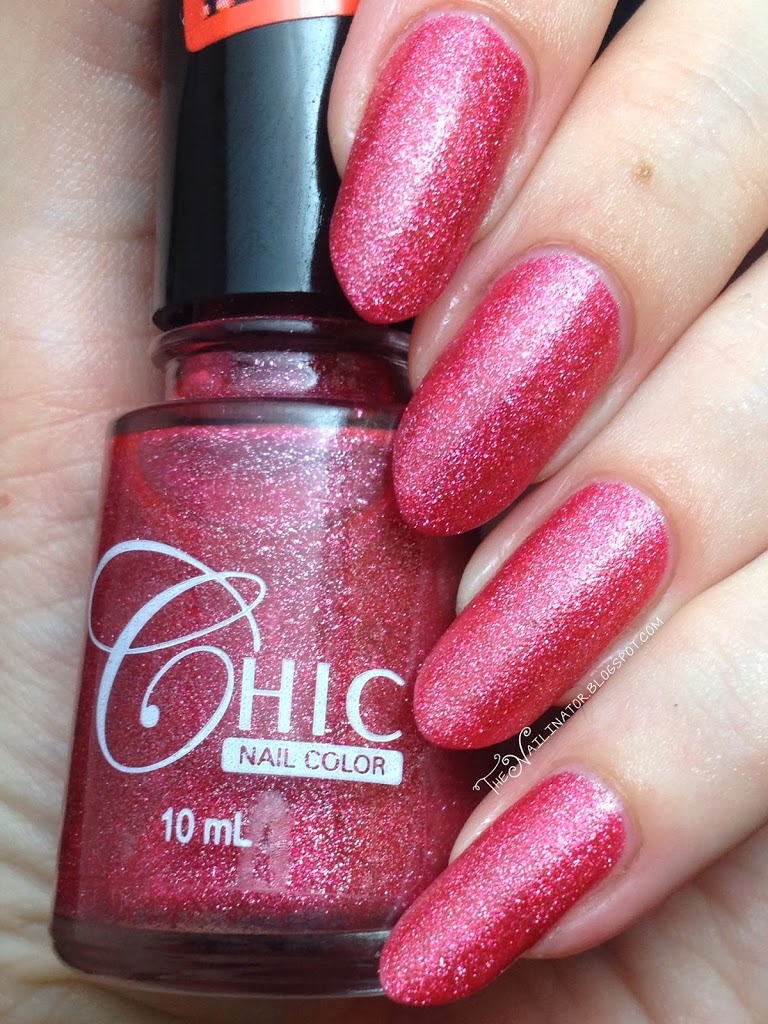
I’ve got to tell you more about my base color. I’ve raved about these LA Girl polishes before, and I’ll keep doing so because they really are some of the best out there. Dazzling Pink is the least opaque of the ones I’ve worked with so far. (I’ve used all but the purple, silver and orange) Three coats builds nicely, dries quickly and is just gorgeous. The sparkle and depth in this (and all the polishes in this line) is to die for. I’ve included a fuzzy picture in direct lighting so you can see the holo sparkle. Additionally, I wore this for a whole week with minimal tip wear. Two Dazzling Pink thumbs up from me!

L.A. Girl 3D Effects Dazzling Pink swatch
L.A. Girl 3D Effects Dazzling Pink in different lighting

I hope you have a great weekend and that you get to spend it with those most dear to you.
Hugs!
Rach

14 Mar

Nebula Nails with L.A. Girl 3D Effects Black Illusion

All products used were purchased by me.
All opinions are my own. 🙂
 

Hi Ladies,

I’m sharing a look that I’ve featured before (In fact I’ve done a tutorial for it too.) but I’ve gone with an all green theme this time. Behold…

Nebula nails over L.A. Girl 3D Effects Black Illusion

Aren’t they pretty? I think Galaxy/Nebula nails are in my top 3 favorite looks for nail art. I love them more each time I do them. I’ve seen some pastel versions of nebula nails floating around and I’m planning to try that soon. I try mix it up a bit each time I do them. This time, as I mentioned, I’ve gone with an all green look and I’ve used L.A. Girl 3D Effects in Black Illusion as my base. LOVE! I swatched it before but I’ve swatched it again and it looks great with my newer nail shape. Every time I wear these 3D Effects polishes I’m reminded that I absolutely NEED the others in the collection! They look amazing and dry super fast too. L.A. Girl Cosmetics, I’ll probably be placing an order in April/May.

L.A. Girl 3d Effects Black Illusion swatch

If you love these then why not check out my tutorial. It’s pretty easy to do and doesn’t require much precision. Indeed, I had 3 cups of coffee and an hour of sleep the night before and I was shaking like crazy when I did these. Ha! You can totally do it!!

I hope you have a stellar day. (See what I did there?)
Hugs,
Rach

08 Mar

Caronia Lounge with Pueen Stamping

All products used were purchased by me.
All opinions are my own. 🙂

Just a quick post tonight as I’ve got to get up early to walk/jog with several friends. I’ve got a simple and easy look to share today that would be great to sport on St. Patrick’s Day to avoid getting pinched! I’m submitting it for the “Stamping” theme for the N.A.I.L. – March theme.

Caronia Lounge with Pueen Stamping
I started with 3 easy coats of Caronia Lounge which is a gorgeous light green foil. I love this shade on me. Then I stamped two designs from the Pueen34 from the Pueen Love Elements set. I know FOUR-leaf clovers are typically what you see in designs for this holiday, but I went with these three-leaf designs for 2 reasons:

  1. Not everybody gets to find a four-leaf clover so this is way more realistic! Haha!
  2. I didn’t have any stamps with 4 leaf clovers and I had my heart set on stamping. 😉
I ended up with these playing card themed nails with lots of clovers to show off. I received several compliments on this look. The stamping stands out well on the light green base.
Caronia Lounge swatch

Isn’t it a lovely color?

I hope you have a great weekend. I’ve had a fun one so far!
Hugs,
Rach
28 Feb

Review of Sassy Color Shifting Polish in Maroon Chameleon

I’m sorry that I kind of disappeared for a bit. The kids and I went out of town for a week to visit friends and when we got home, Mr. Nailinator was pretty sick. Then I had a horrible sinus headache over the weekend, and one of my friends had a baby this week, so we watched their older child while they were at the hospital. So nails haven’t really been high on my priorities list. But I do have some ideas lined up for the near future.

I finally got my hands on some thermal polish and that is what I’m going to show you today. I heard a while back that Sassy came up with a line of “Color Shifting” shades, and I found them at Ayala Cebu a couple of weeks ago. I chose just one to try since I didn’t know if they were any good. I picked Maroon Chameleon.

Sassy color shifting polish Maroon Chameleon

I used 3 coats of this shade and, as you can tell, there is still some VNL going on there in the “warm” area. I couldn’t get the polish to warm up in the bottle in the air conditioned shopping area and I couldn’t find any swatches online so it was a surprise to me what the warmed up shade would be. Turns out, it’s warm shade was much lighter than I had anticipated and also ended up being a shade of greyish lilac that is not flattering at all on my skin tone. So I wasn’t really loving it on me. When I applied the first coat of this polish to my nails, I noticed several white specks in the polish and on the brush. I was concerned about these white specks but after I finished applying all 3 coats, I didn’t see any more specks. The gradient effect was really cool and it was fun to watch it change in water and when cool air blew on the nails. Maroon Chameleon dried to a semi-matte finish.

Another thing I’d like to note is when the sun came up the next morning and warmed up the air, there was no “cold” shade showing at all. I guess there isn’t much difference between the normal temperature of the air in Cebu and the warmth of my finger tips. Oh well. Maybe if I worked in an office building with air conditioning instead of at home with no a/c or if the warm shade had been more flattering on me, I would have enjoyed this polish a lot more.

Sassy color shifting polish Maroon Chameleon when warm

Will I buy any of the others? Probably not. I’d like to find some nice swatches so I can see the transitions of the different colors first. 45 pesos for a 7ml bottle is steep for local polish prices so I’d really love to see some swatches… Please, Sassy Colors?

Have you tried thermal polish yet? What brand did you try and did you have any of the same observations as I did with this one?

I hope you have a great week!

10 Feb

Review of Chic Siam (and Freehanded Zebra Stripes)

Hi!
I’ve got another locally made beauty to show you today. Chic has a line of polishes called their “Grainy” collection. I’ve used 4 of the 5 shaded in the collection in the past but this is my first time to use Siam. I applied 2 coats of Siam and used black acrylic paint and a striper brush to free hand some zebra stripes. Yeah, another edgy Valentine’s Day appropriate look!

With topcoat

I added a bow I purchased from Blooming Nail Cebu.

Just like the other shades in the Grainy Collection, Siam dries to a semi matte, slightly textured finish. The light box lighting doesn’t do the sparkle justice at all.

It is so sparkly and I love the slightly textured finish. Siam only required 2 coats for opacity and it wears well. Clean up was easy too. There were a few sparkly bits left behind, but they came off easily when I washed my hands. I would like to note that, even after I applied top coat, it still was a bit textured. So if you want that extra smooth, glossy finish, you might need 2 coats of topcoat. I love this polish just as much as I love the others in this collection. These are available in 10ml bottles for PHP 34.75/US$ 0.78.

Check out the other colors in the collection:
Shadow Crystal
Montana
Peridot
Amethyst
Montana & Amethyst Gradient

I hope you have a great week!
Hugs,
Rachael

%d bloggers like this: