23 May

Girlstuff Bloggers’ Elite Summer Collection Swatches & Review

Hello loves!

I’m back with a fun summer collection to share with you. This summer heat has really been getting me down lately, but there is nothing like some bright and cheery colors on my nails for a great pick me up! Girlstuff Forever recently released their Bloggers’ Elite Summer Collection—a four-color collection each named after a popular Philippine beauty blog. Y’all know I love Girlstuff polishes, so when I got these in the mail I was super excited! Thanks again, Girlstuff!

Let’s get right to it shall we? All of these photos were taken in my light-box. Each of these has a great, quick-drying formula. If you’d like to check out the blogs each polish is named after, just follow the link in each section below.

Topaz Horizon

Girlstuff Topaz Horizon Swatch

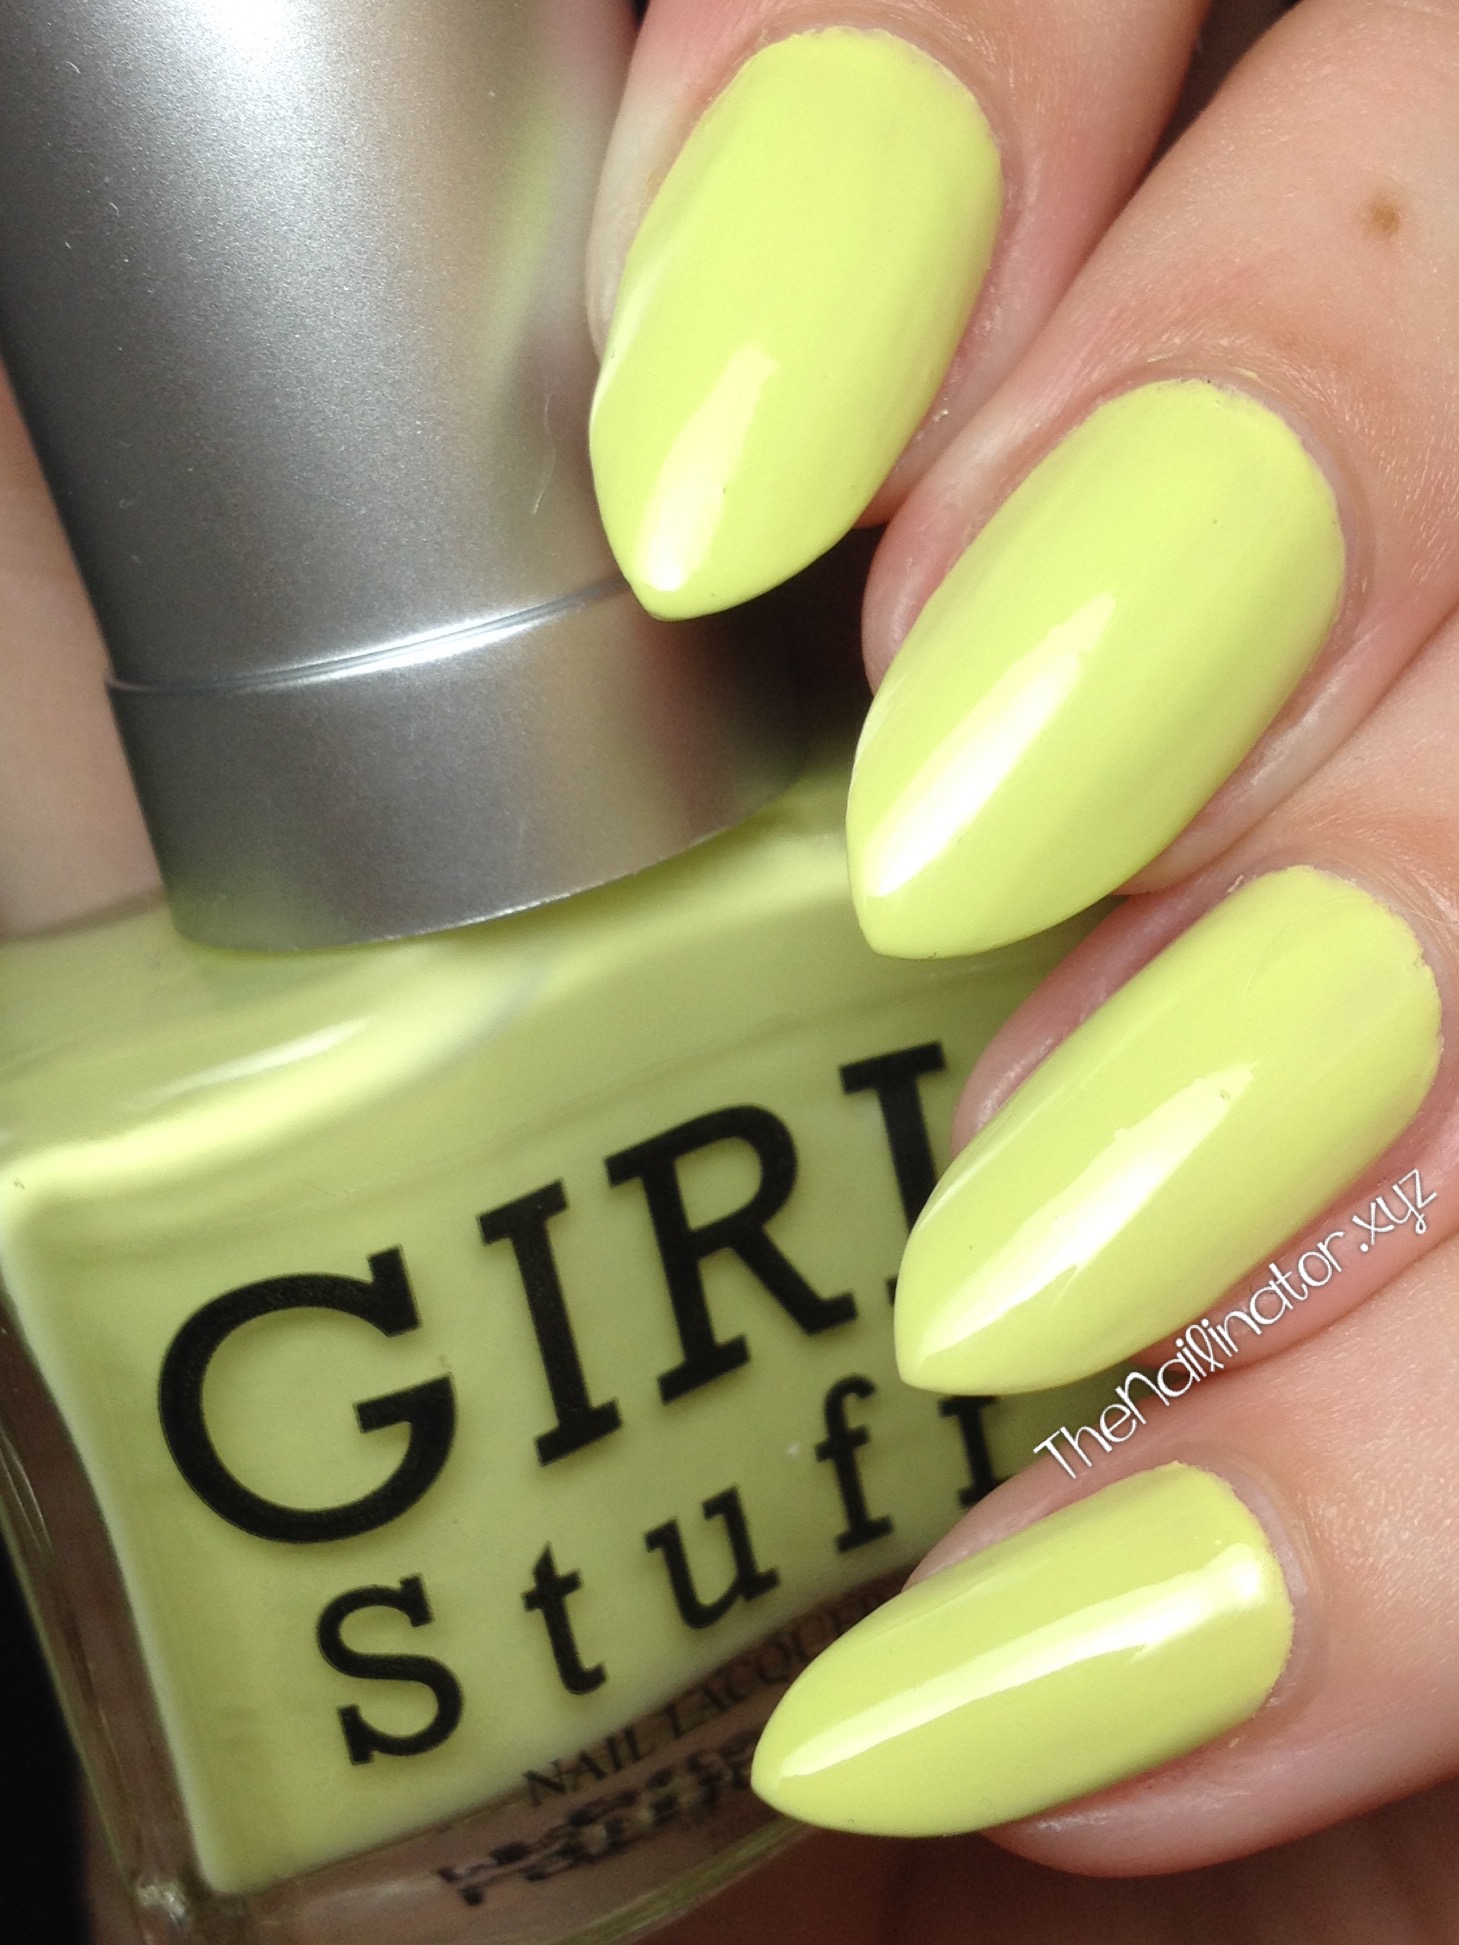
Topaz Horizon is a perfect pastel yellow creme with just a touch of green. I was surprised at how much I loved this one since I don’t typically like yellow polish for my nails. But this one is very pretty! This is two coats on most nails. I had to put a third coat on a couple of nails.
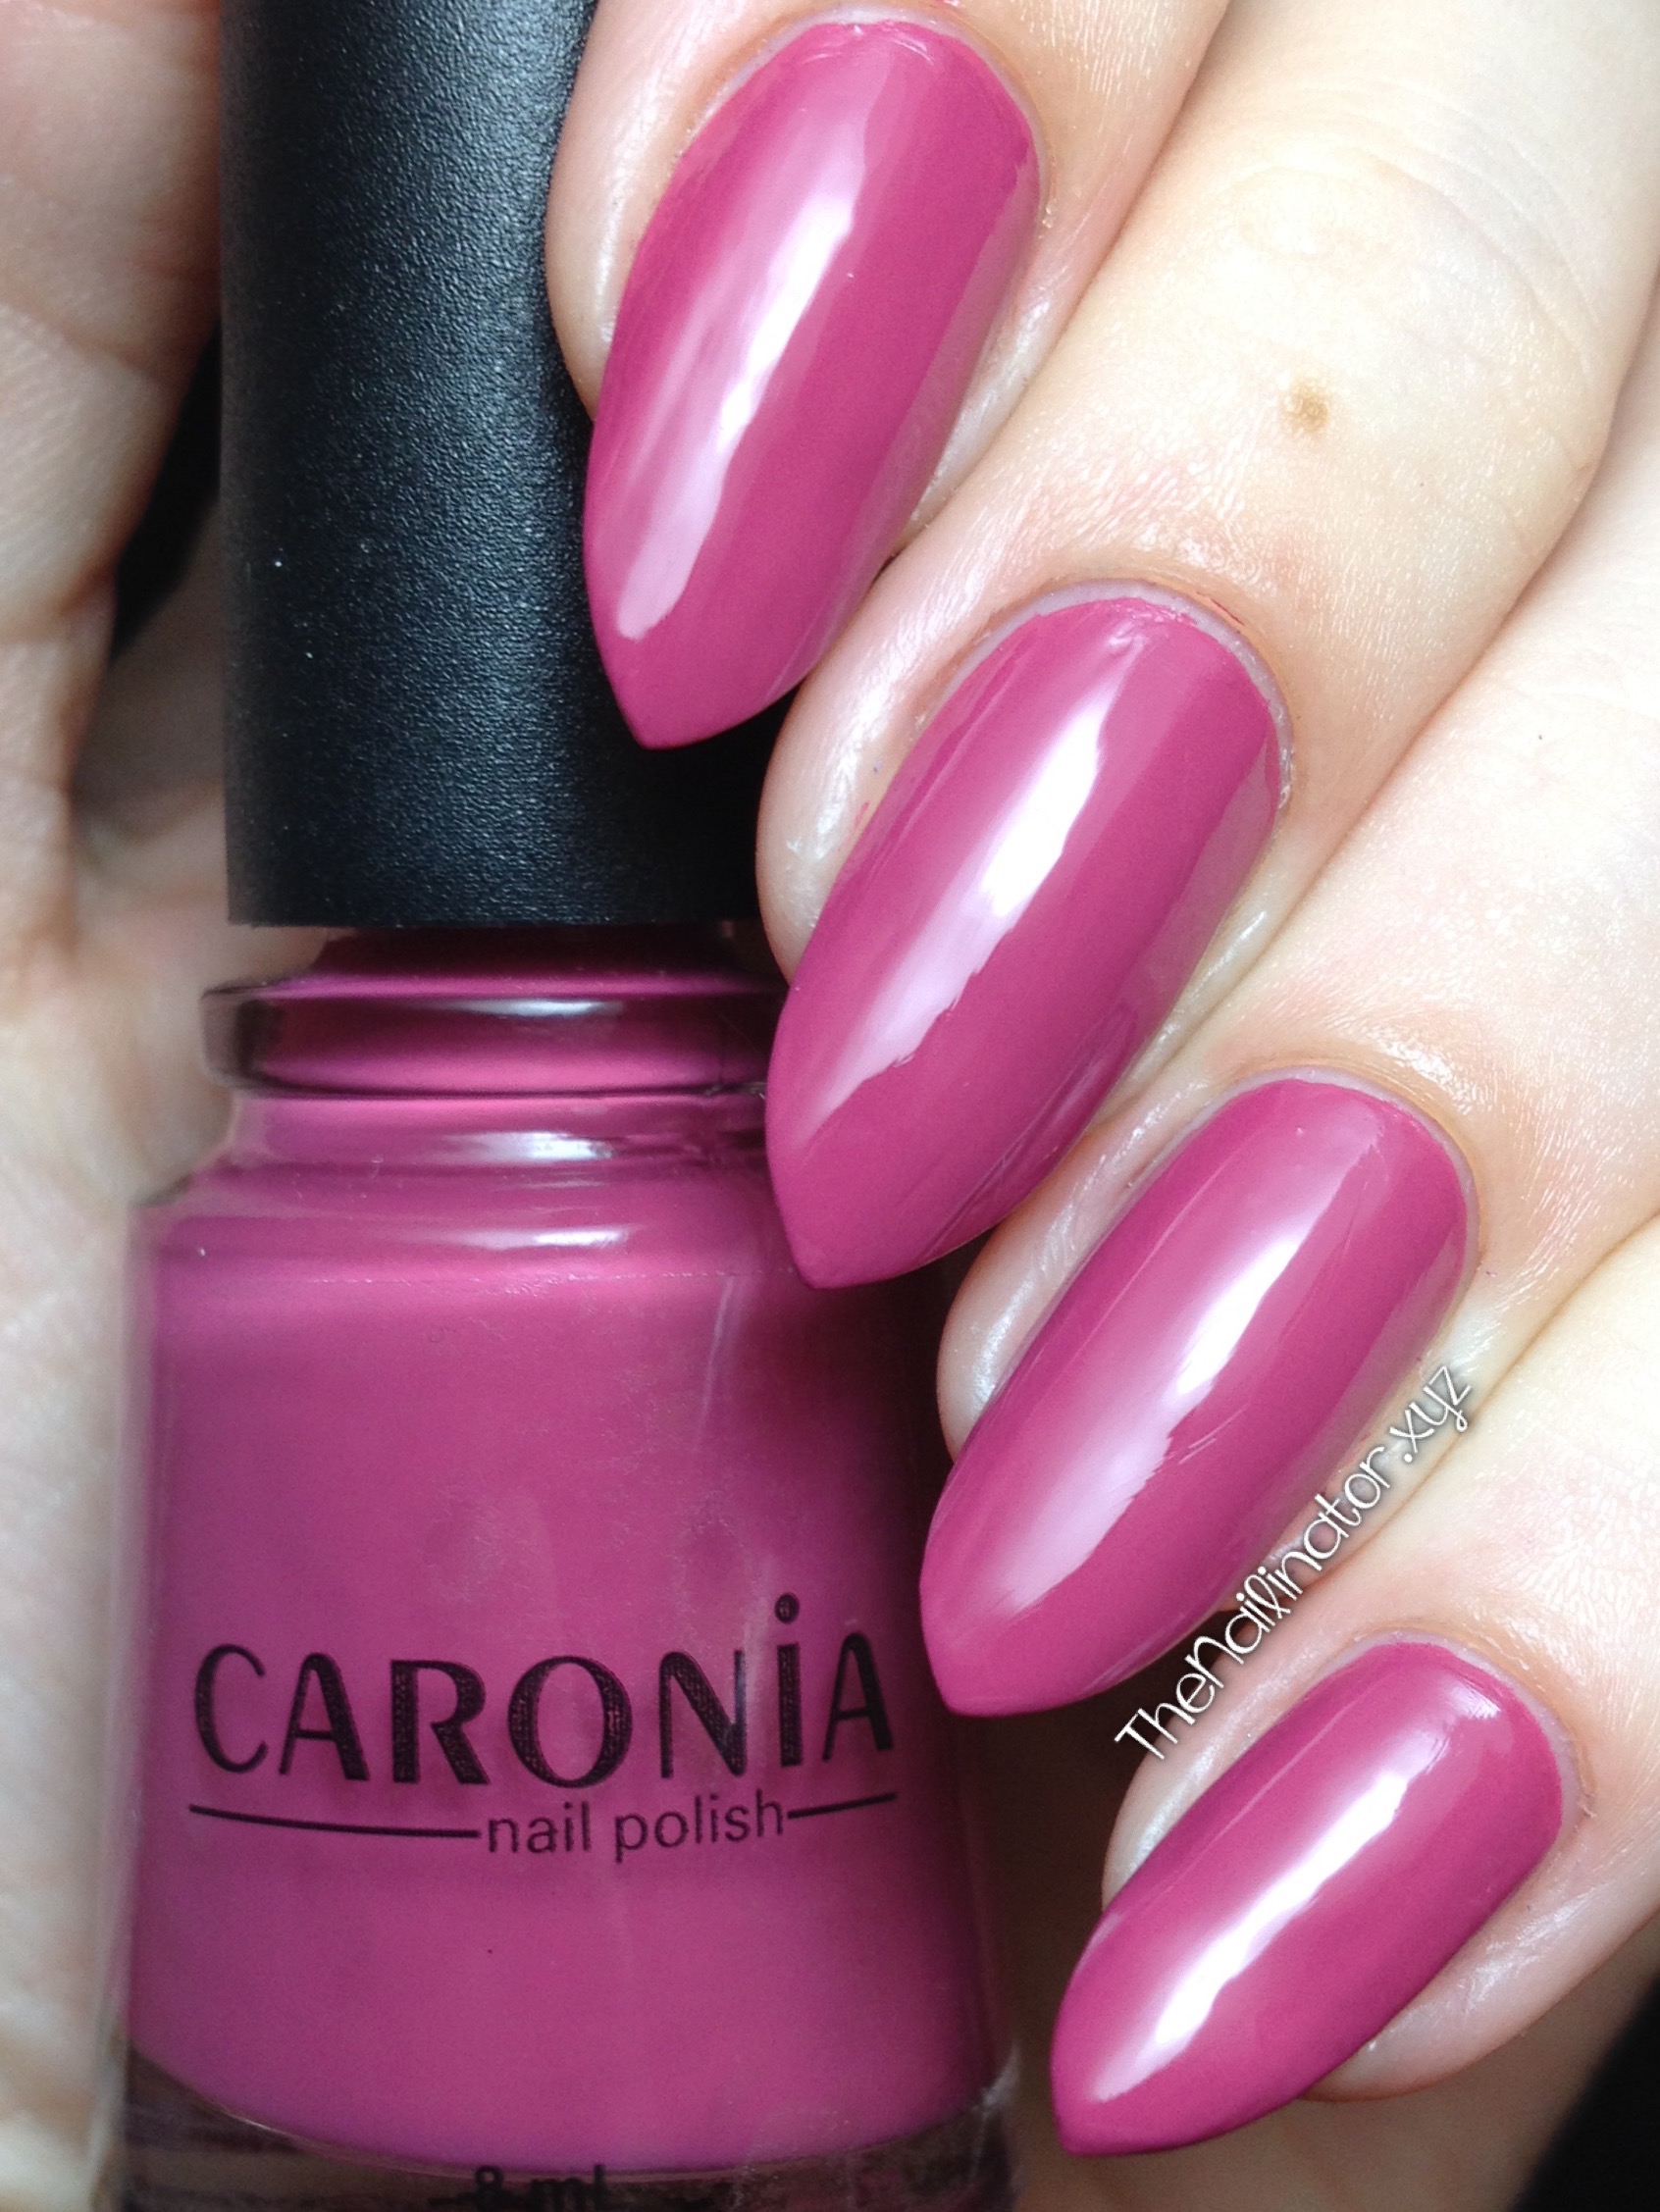
AskMeWhats

Girlstuff AskMeWhats Swatch

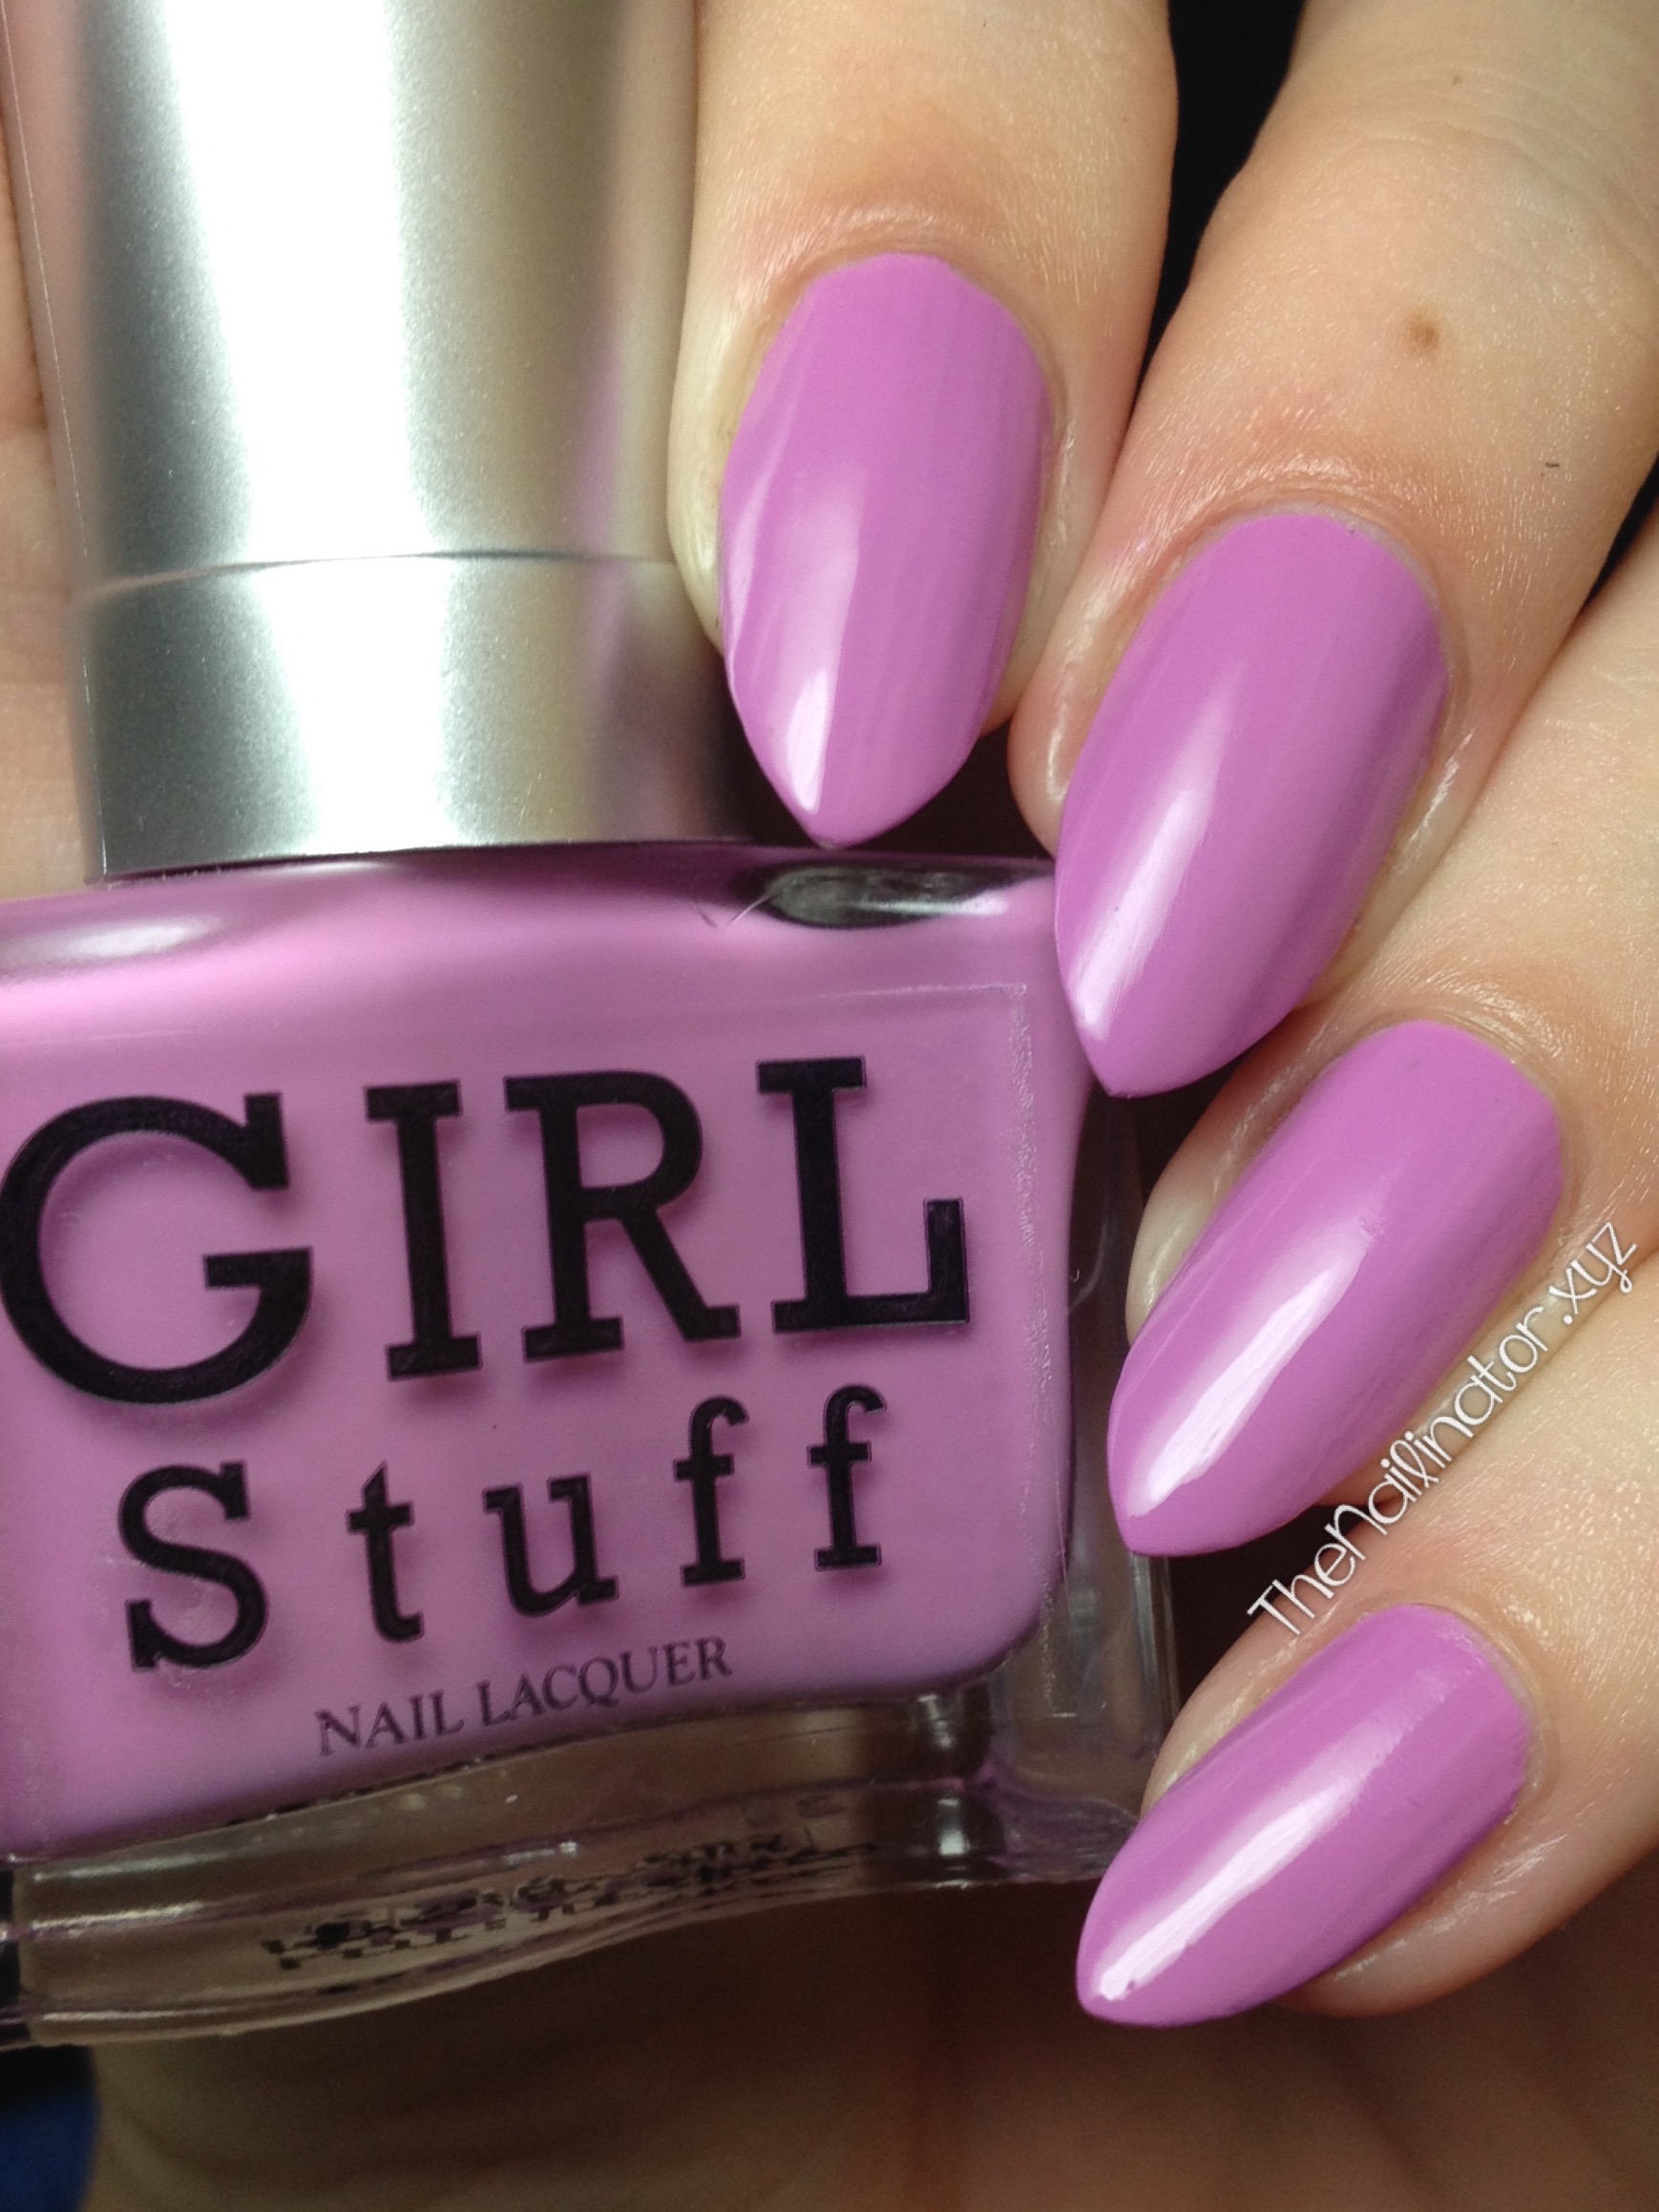
AskMeWhats is a pinkish purple (or is it purplish pink) creme. This girly color is definitely the most work-safe color of the bunch. Two coats are all that is needed for full opacity.

Struttingonsunshine

Girlstuff Strutting on Sunshine Swatch

Struttingonsunshine is a very bright robin’s egg blue creme. This is a stand out color and very fun to wear! This one was opaque in two coats.

Go Jackie Go

Girlstuff Go Jackie Go Swatch

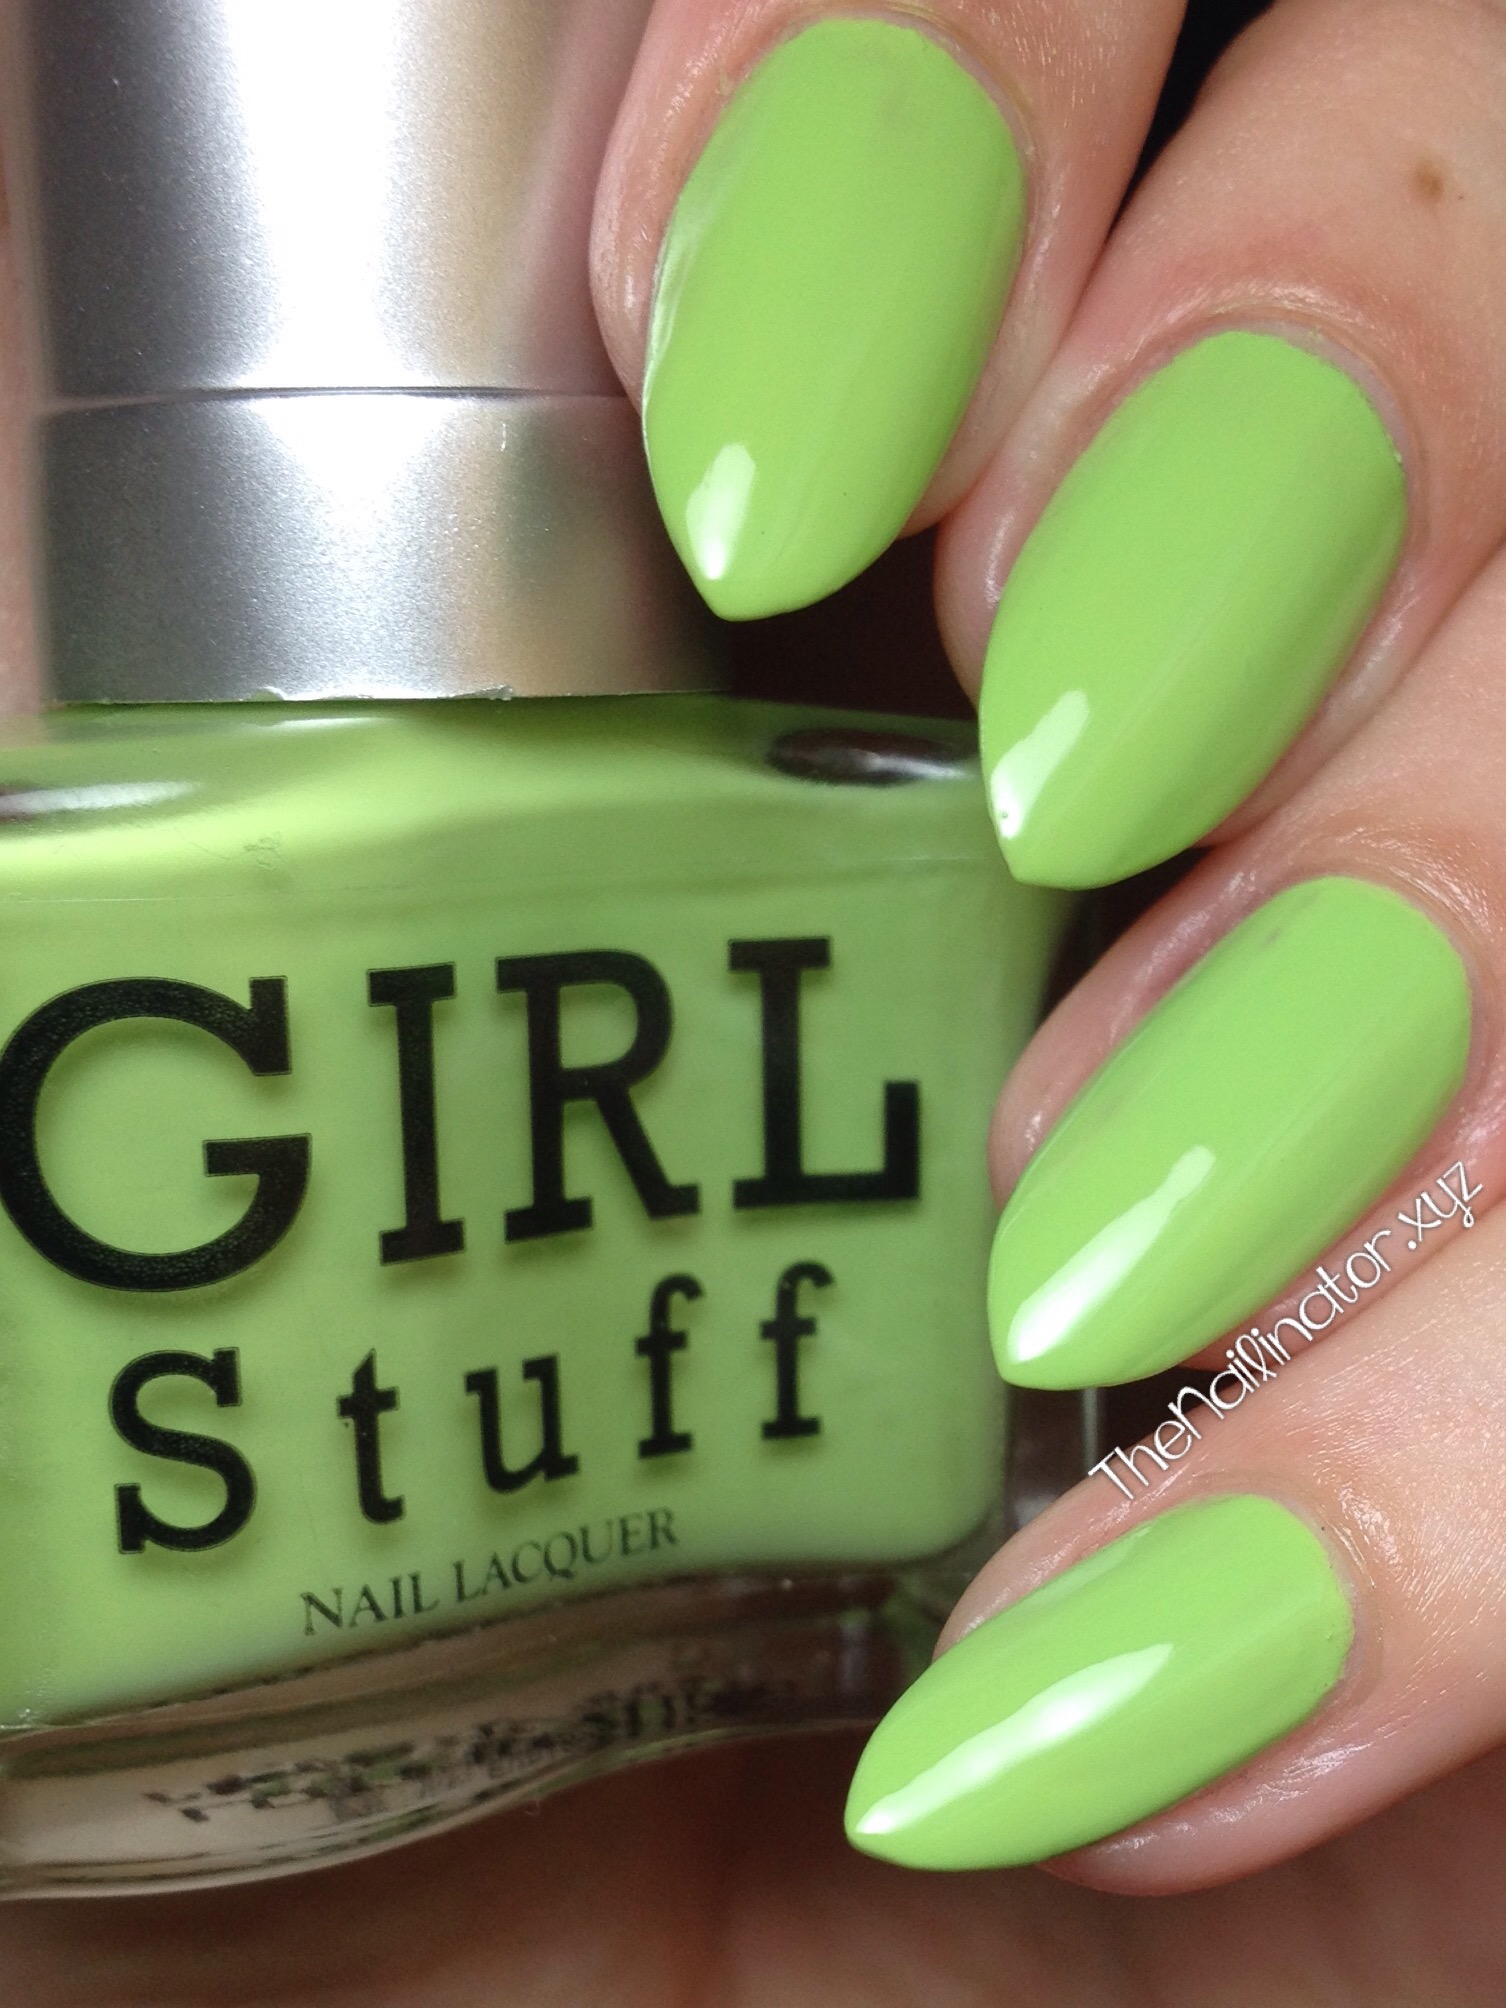
I’ve saved my personal favorite for last. Go Jackie Go is a green chartreuse creme which is very flattering on my skin tone. I usually go for dark greens because I can’t pull off lighter greens. But this one is lovely! GJG took 2 coats for opacity, and I was sad when it was time to take it off. Even my sister, The Bookworm, borrowed this one to wear when she saw it.

bloggerselite

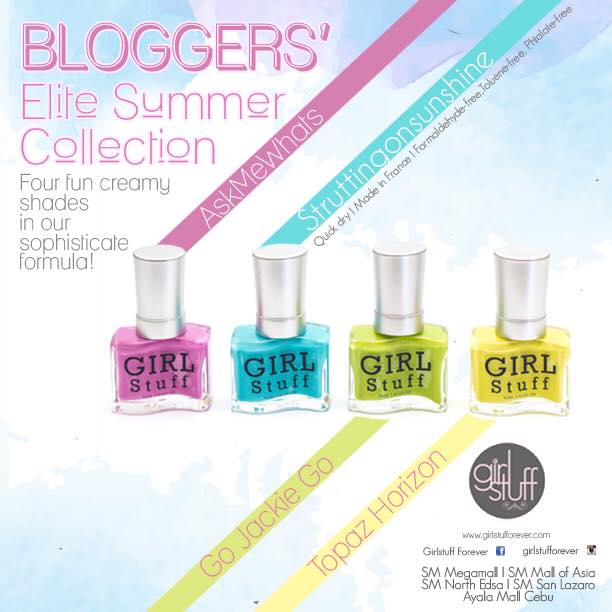
Photo Credit: Girlstuff Forever Facebook Page

Overall, I love this collection! These 4 new shades have the great quick-dry and self-leveling formula I have come to expect from Girlstuff. I believe, between Topaz Horizon, AskMeWhats, Struttingonsunshine, and Go Jackie Go, there is something for everyone with this quartet of colors.

These sell for Php120 at Girlstuff kiosks. You can also check out their website and contact them about having polishes shipped to you. You can also check them out on Facebook and follow them on Instagram @girlstufforever.

What do you think of this collection? Which is your favorite? I’ll be sharing some nail art using them very soon. I hope you have had a great week and that your weekend is full of smiles, laughs and pretty colors!

Hugs,
Rach

29 Apr

Useful Tools: Tilted Nail Polish Bottle Holder

Hello lacquered ladies!

Today I’m going to tell you about a super cool little tool that I have in my nail art stash. I bought this tilted nail polish bottle holder. from Born Pretty Store a while back, and it has come in quite handy, so I thought I would share it with you in case you wanted to get your hands on one too.

It’s flexible enough to hold several different shaped bottles in. China Glaze might give you a problem because the base of the bottle is so wide, but all the other imported and local brands that I own fit fairly well. A big plus is that it can hold skinny little bottles. Those little tubes of polish that come in nail art pen sets are so hard to hold while you polish your nails with them. This little gadget solves that problem.

Titled Nail Polish Bottle Holder

The downside to this design is that it doesn’t tilt the bottle as far as I would like. When the bottle is about half full (See my optimistic view on that?) you are going to need more of an angle to get the product near to the neck for easy dipping. But you can set the edge of the bottle holder on a thin book or coaster, and it will tilt a bit more and still feel pretty sturdy.

Tilted Nail Polish Bottle Holder with small and large bottles

I also love to use this to hold my bottle of nail glue. Nail glue usually comes in small, lightweight plastic bottles that tip over easily. When glue spills into the threads it makes the cap stick and hard to open. I used to need a pair of locking pliers to open my nail glue after a few uses. This bottle holder keeps it upright, and I don’t have any problems with spillage and sticking anymore.

This particular tilted nail polish bottle holder costs $2.46 from Born Pretty Store and is totally worth the small price. I would definitely suggest getting your hands on one if you are searching for something like this. BPS gave me a coupon code to share so that you can get 10% off your entire order from their store.

Born Pretty Store Coupon 10% Off Code, TEAW10

I hope you found this post useful. Have a great day and don’t forget to make someone smile!

Hugs,
Rach

04 Apr

Caronia Shades of Summer – Swatches and Review

Greetings fellow polish lovers!

I’ve got a lovely summer collection of polishes to share with you today. Caronia sent me their new Shades of Summer Collection which consists of six fun shades and includes something for everyone. I’m just going to get right into the swatches and tell you what I thought. All these photos were taken in my light-box.

Summer Fling

Caronia Summer Fling Swatch

Summer Fling is a very pretty pinkish-plum creme. Its formula was just right, and I almost got away with using just one coat. I went ahead and used two to ensure no bald spots—because I’m OC like that. This shade is a fun color to sport during the summer without being too loud and crazy.

Rainbow Tan

Caronia Rainbow Tan Swatch

Rainbow Tan is a work-safe tan/beige frosted polish. It has me a bit confused with the choice of name as this isn’t rainbow-y at all. It is tan though, so we’ll just go with that. The formula on this one was thinner than the rest and is the only one that needed 3 coats for full coverage. Frosted polishes tend to show streaky brush strokes and this one does just that, as you can see. If you are into more muted shades and don’t mind frosted polishes then I’m sure you will love Rainbow Tan. It just wasn’t my cup of tea.

Sun Kissed

Caronia Sun Kissed Swatch

Sun Kissed is a vibrant orange creme that screams summer! It was an easy two-coater, and I’m surprised how much I ended up liking it despite it giving me lobster hands (making my skin look pinker than normal). This one is not for the faint of heart. Ha!

Sweet Surprise

Caronia Sweet Surprise Swatch

Sweet Surprise is right! This is a fun, bright yellow creme. It has a shimmer in the bottle that can’t be seen on the nails. But that’s not a problem for me. Application was fine with two coats to full coverage. I love this shade for summer. So bright and happy!

On-the-Go

Caronia On-the-Go Swatch

On-the-Go is a fabulous teal green creme that is almost perfect in just one coat! When I first used On-the-Go a while back, it really did have me “on-the-go”. I went to several stores looking for a bottle for my sister and a couple of back-ups for myself. I love, love, LOVE this polish! I don’t like many green polishes, but I do love this cool dark teal.

First Crush

Caronia First Crush Swatch

First Crush is a very pretty, lilac purple creme. Who doesn’t love a pretty purple polish amiright? (Have I mentioned that purple is my favorite color to wear on my nails?) The formula on this one was just fine needing only 2 coats for full coverage. This one if perfect for all you girly girls out there!


Promotional image for Caronia Shades of Summer

This collection has sophisticated, work-safe shades, bold pops of color, and cooler hues, too. There is something for everyone, I’m sure! These polishes have been reformulated and are 3-Free and dry fairly quickly. They are sold individually in 8ml bottles for (SRP) Php31 ($0.69) each at local department stores and grocery stores. The durability of this polish for the price is well worth it. It’s definitely a great budget buy. You can follow Caronia on Facebook and Instagram to keep up with them and their products.

I hope you enjoyed this review and that you found my input helpful. Let me know in the comments which shade is your favorite. Keep your eye out for some nail art featuring these babies.

Have a great weekend and don’t forget to make someone smile!
Hugs,
Rach

25 Mar

Oh My Goodness! Jellybean Nails Using OMG Nail Strips!

Hi gals!

I appreciate you sticking around despite it being quiet around here lately. Unfortunately, I’ve been having some personal health issues in addition to keeping up with my regular mommy/wife duties and the blog always takes a back seat to real life. I’m sure you understand, but I thank you just the same for your patience. Y’all rock!

I’ve got a review for you today of a super fun product sent to me by OMG Nail Strips. They make a wide variety of nail strip designs that make for some quick and easy nail art, even if you are just a beginner!

I picked out two designs to try out and today I’m showing you the Jelly Bean design. Even though I don’t like to eat jellybeans, I do think they are so cute and colorful and a very fun idea for nail art! Perfect for a spring mani. Check out how great these look! I got lots of compliments on them.

OMG Nail Strips - Jellybean

But are they as easy to use as they boast on their site? Yes! They were so easy and quick to apply! Keep in mind that there are different types of nail strips and decals on the market so it’s important to know what you are working with and follow the instructions for each type. I really appreciate that they have a video tutorial on their website which left me feeling confident when I applied these.

Before I started, I pushed back my cuticles and swiped some polish remover on my nail surface to make sure to remove any oil or residue that might prevent the strips from sticking well to the nail. I also used some scissors and cut the sheet of nail strips into individual strips. There are 14 strips total per pack.

OMG Nail Strip Application

1. After selecting the correct size for my nail, I removed the clear plastic coating on top of the strip and then removed the strip from the stiff paper backing. I centered the strip to my cuticle line and sides of my nail. The underside of the strip is sticky so it is very easy to position it on the nail. It stays put while you work on cutting it down to size, but it’s not so sticky that, if you place it off-center, you can’t pull it off and reposition. It is also sturdy enough that it didn’t tear or stretch when I had to reposition.

2. After I positioned the strip, I was surprised to see how much of the strip was left hanging over the end of my nail. I have long nails, y’all. So these strips would still work on REALLY REALLY long nails. At this point, I used my finger to smooth out any bubbles under the strip. I used my rubber ended cuticle pusher to make sure the edges of the strip were stuck down well.

3. I snipped off the excess overhang of the nail strip with scissors, and since my nails are so skinny, I used my nippers to snip where the strip was a little bit too big for my nail on the sides. If you look closely at the picture, you can see what I did.

4. I used my finger to fold the strip over the free edge of my nail. It was a little tricky at first since my nails are almond shaped and not flat. But I just made sure to press along the edge and to tuck the over-hang under my nail.

5. See the excess tucked up under the tip of my nail?

6. Using a fine grit nail file, I filed along the edge of my nail until the excess came off. I did my best to hold the file parallel with my nail to keep the strip in tact on the tip of my nail. After I was finished, I topped it off with my favorite quick-dry topcoat from Girlstuff.

The packaging says that these last up to 10 days. I wore them for 8 days before I needed a change, but the strips weren’t peeling up around the edges at all. They did have some tip wear but not much considering they endured 8 days on my nails.

Application only took 15 minutes or so (not counting nail prep time). This really is a quick way to get some fine looking nails.

OMG Nail Strips in Jellybean

If you want to get your hands nails on some of these OMG Nail Strips, then pop over to their site and take a look. They have everything from skulls, hearts, flowers, feathers, and animal prints. These are $7.99 each or, for a better deal, you can pick 5 designs for $25 with free shipping on any orders. They even have new LED Nail Decals that have an LED that lights up with the NFC fields given off by some phones. How cool is that? Check those out here.

Have you ever tried these nail strips before? What do you think? I really like them, and I know I’ll enjoy showing off the other design I picked out soon. Thank you OMG Nail Strips for sending these to me. They sure were fun to wear!

Have a great weekend and don’t forget to make someone smile!

Hugs,
Rach

28 Jan

Girlstuff Chestnut and MJ XXVIII Stamping

Hey gals,

Sorry for being so quiet around here lately. I blame it on a wedding in the family and some related festivities, my son’s birthday party, lovely hormones, having my nose stuck in a book, homeschooling my kids, and just being busy with real life in general. You all know how it goes.

While I have been too busy to blog, I haven’t been too busy for doing my nails. Recently I’ve enjoyed wearing some of my favorites and simply polishing nails for several friends.

Girlstuff Chestnut with MJ XXVIII stamping

Today, I’m sharing a stamped design using MJ XXVIII which is available from My Online Shop. Meann was kind enough to send me a couple of the new MJ stamping plates to test out along with some gold and silver stamping polish. Yay! Every single plate I have from MyOnline Shop stamps beautifully and this one is no exception. I’ve included a couple of macro shots near the end of this post because it’s my blog and I can do stuff like that if I want to. Ha!

MJ Stamping Plates

My base is two coats of Girlstuff Chestnut. My sweet hubby surprised me with this pretty over the holidays, and I am happy to show it off now. I think it fits in with Marsala—the “color of the year”—don’t you?

Girlstuff Chestnut

I used two coats for this and had no issues with application or removal. The formula was great and it was quick drying like all Girlstuff Polishes.

MJ XXVIII Stamping Macro

Look at the detail in this stamping! I used the bottom right of the larger sections of etching on the MJ XXVIII as it reminded me of henna designs, and I liked the idea of gold over Chestnut. It’s quite pretty if I do say so myself.

Macro Shot of MJ XXVIII Stamping

Well, that is all I have to share for today. I hope you are all having a lovely week so far. Keep smiling!

Hugs,
Rach

%d bloggers like this: