05 Jan

Pure Ice Spit Fire Sponging

Hi lovely ladies!

I hope you are having a great start to the year. While we enjoyed our holiday break, things got off to a bumpy start for us yesterday with getting back to work and back to doing school with the little ones.

I was originally planning on doing a glitter placement mani to ring in the new year. But since I was sick and preparing for a trip out-of-town, I wanted something that was quick and easy but didn’t skimp on the bling. I also wanted something that wouldn’t chip off while I was out-of-town.

Pure Ice Spit Fire Sponging Swatch

My hubby surprised me by bringing this beauty home one day while we were in Texas this past Summer. Pure Ice Spit Fire is a gorgeous glitter bomb with multi-sized hex and square glitters suspended in a clear base with a pinkish tint to it. The smallest glitters are light pink, but there are also some bigger silver holographic glitters that give this some major sparkle.

Pure Ice Spit Fire Out of Focus

I started with a thin coat of Color Club Miss Bliss which is a holographic pink polish. After that dried, I put scotch tape around my nail and cuticle area to minimize cleanup time. Then I used the bottle crush to put a drop of Spit Fire on the sponge and then dabbed the glitter onto the nail. I kept working until I was satisfied with the coverage. I included the out-of-focus shot so you can see more of the holo sparkle. I received many compliments on this flashy mani.

Pure Ice Spit Fire Macro

Check out this macro shot! Oh so pretty!

Tip: Use an orange wood stick to help with glitter cleanup around the cuticle area. Just use your flat brush to brush some polish remover on the cuticle and then gently scrape off any glitter that is crampin’ your style!

What did you sport on your nails for the New Year? I hope you have a great day and fabulous year to come!

Hugs,
Rach

02 Jan

The Nailinator Does Nails

Hi Gals!

Happy New Year! I’ve got a scheduled post for you today as our plans to go out of town pushed through. Hopefully the weather will have cleared up and we have had the chance to soak up some sun while we are by the beach. If not, I’m sure we are having a grand time anyway.

I thought I would do a quick post sharing some of the nail art I have done for friends and family last month. I did a few designs that are seasonal and a few that would be great for any time of the year.

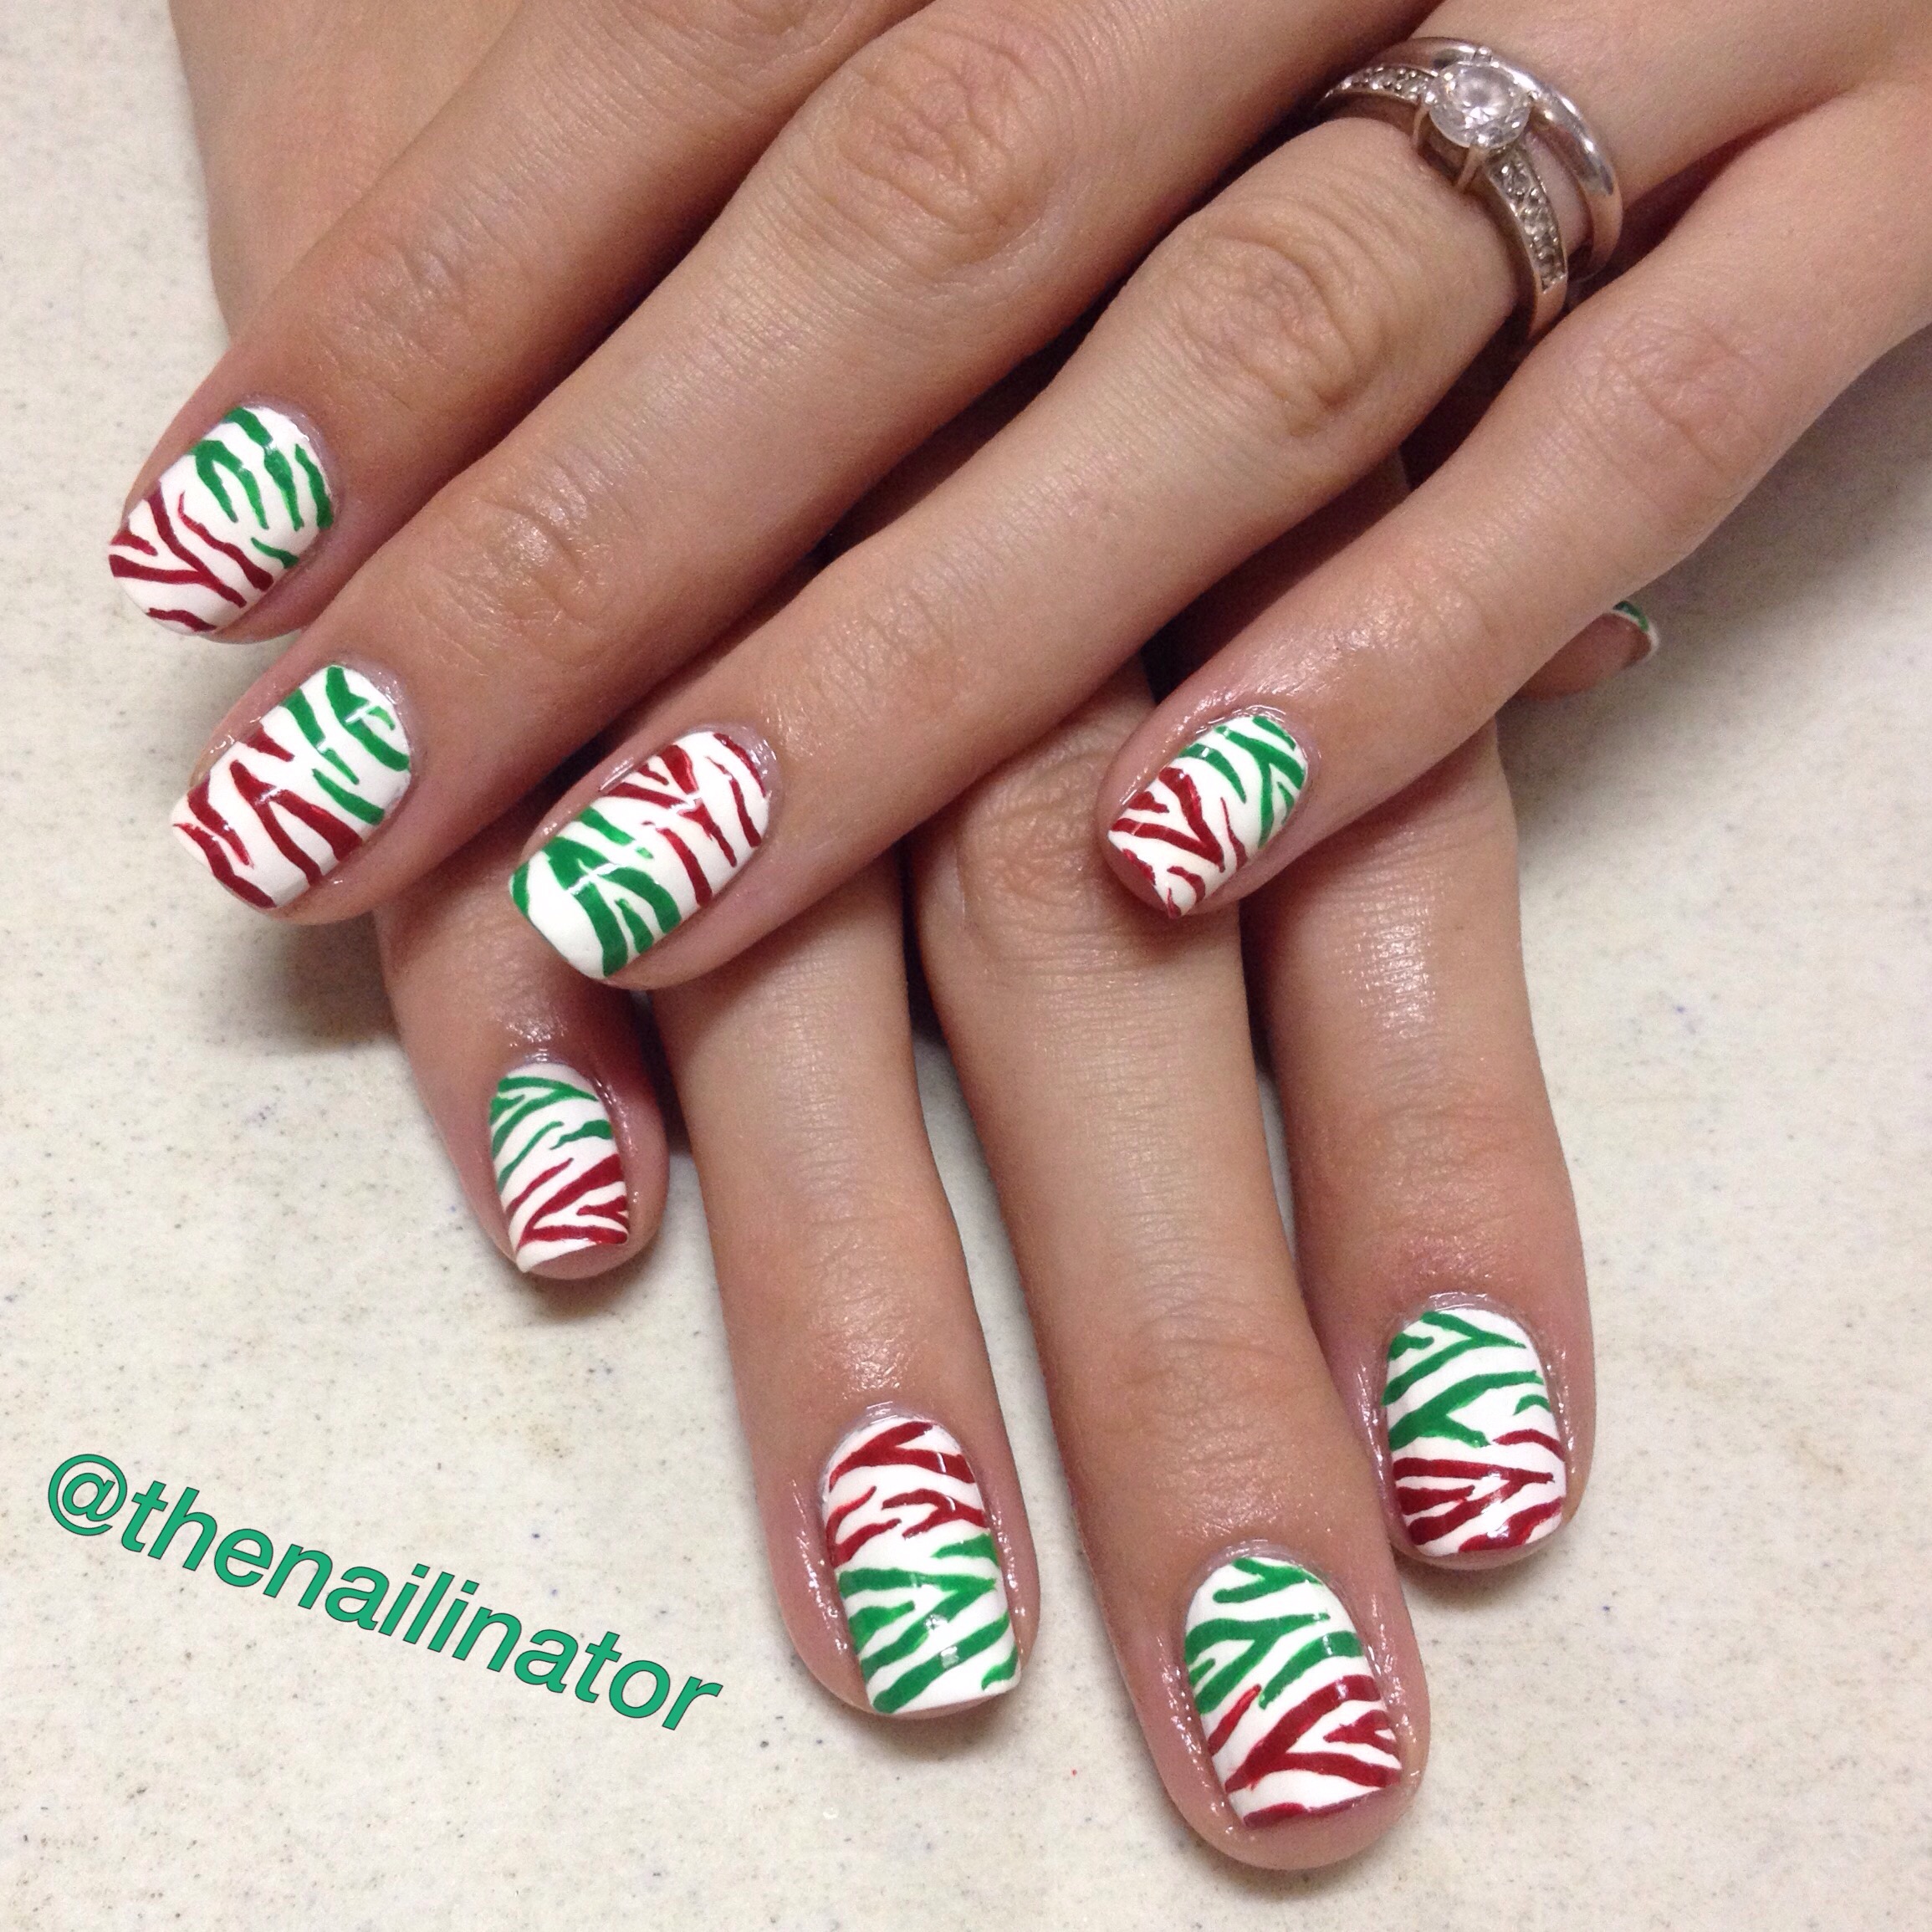
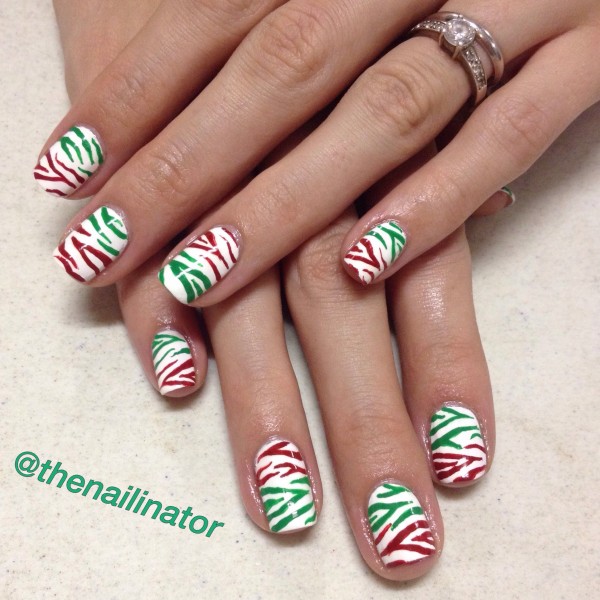
First up we have some fun zebra stripes in Christmas colors that I convinced The Shutterbug (my youngest sister) to let me try on her. If anyone can pull of this look, it’s her! I did the stripes with acrylic paint and a striper brush.

Christmas Zebra Stripes

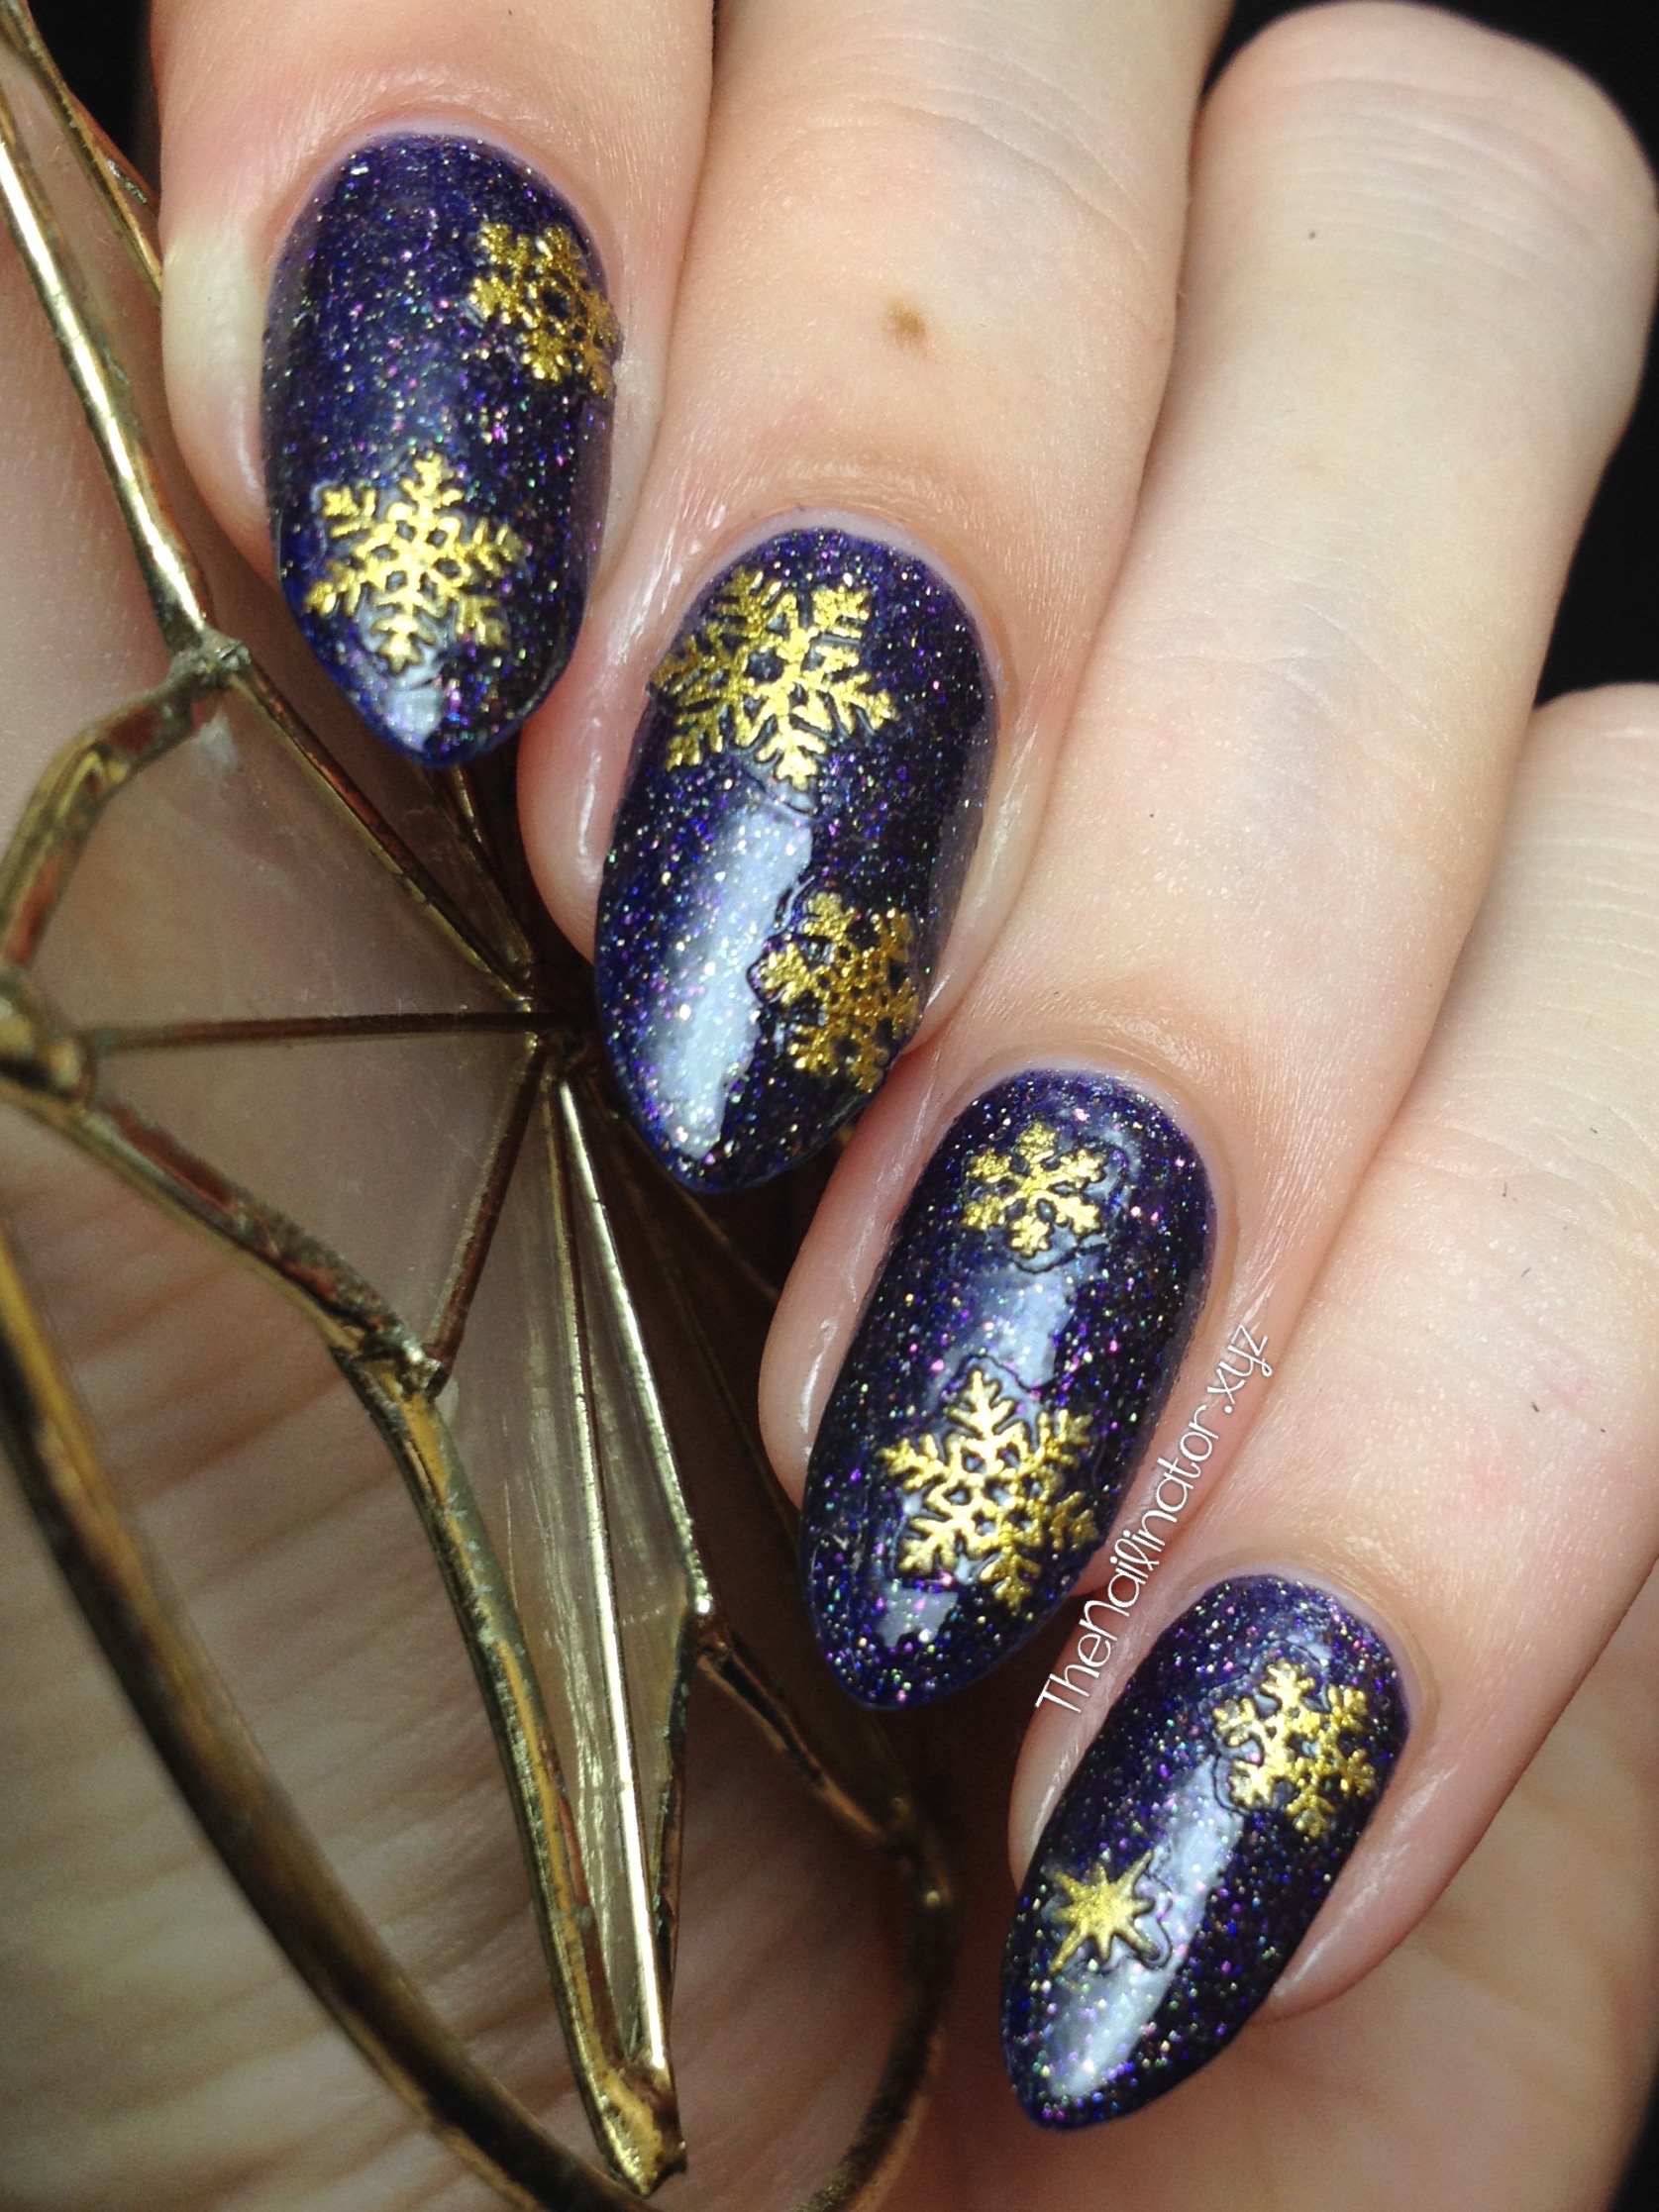
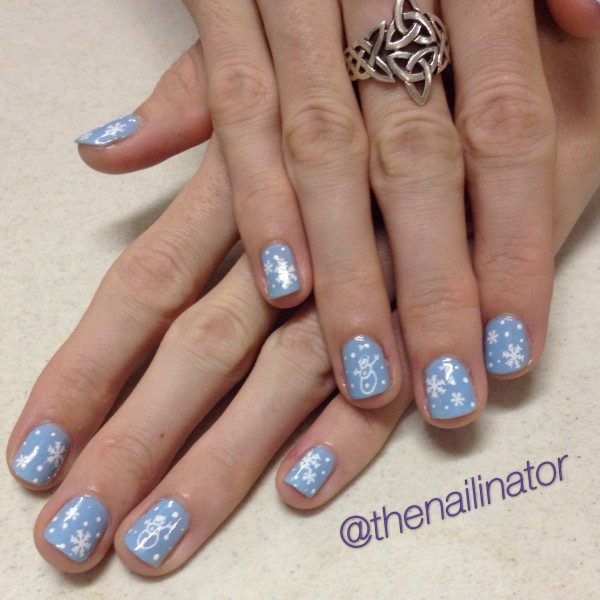
Next we have some super cute and easy winter wonderland nails I did for The Bookworm (my other younger sister). We started with a light blue base (Sansan Warm Blue), and I stamped snow flakes and an adorable snowman from my OB19 plate that I purchased last year from MyOnline Shop. I added a few tiny dots for a finishing touch.

Winter Wonderland Nail Art

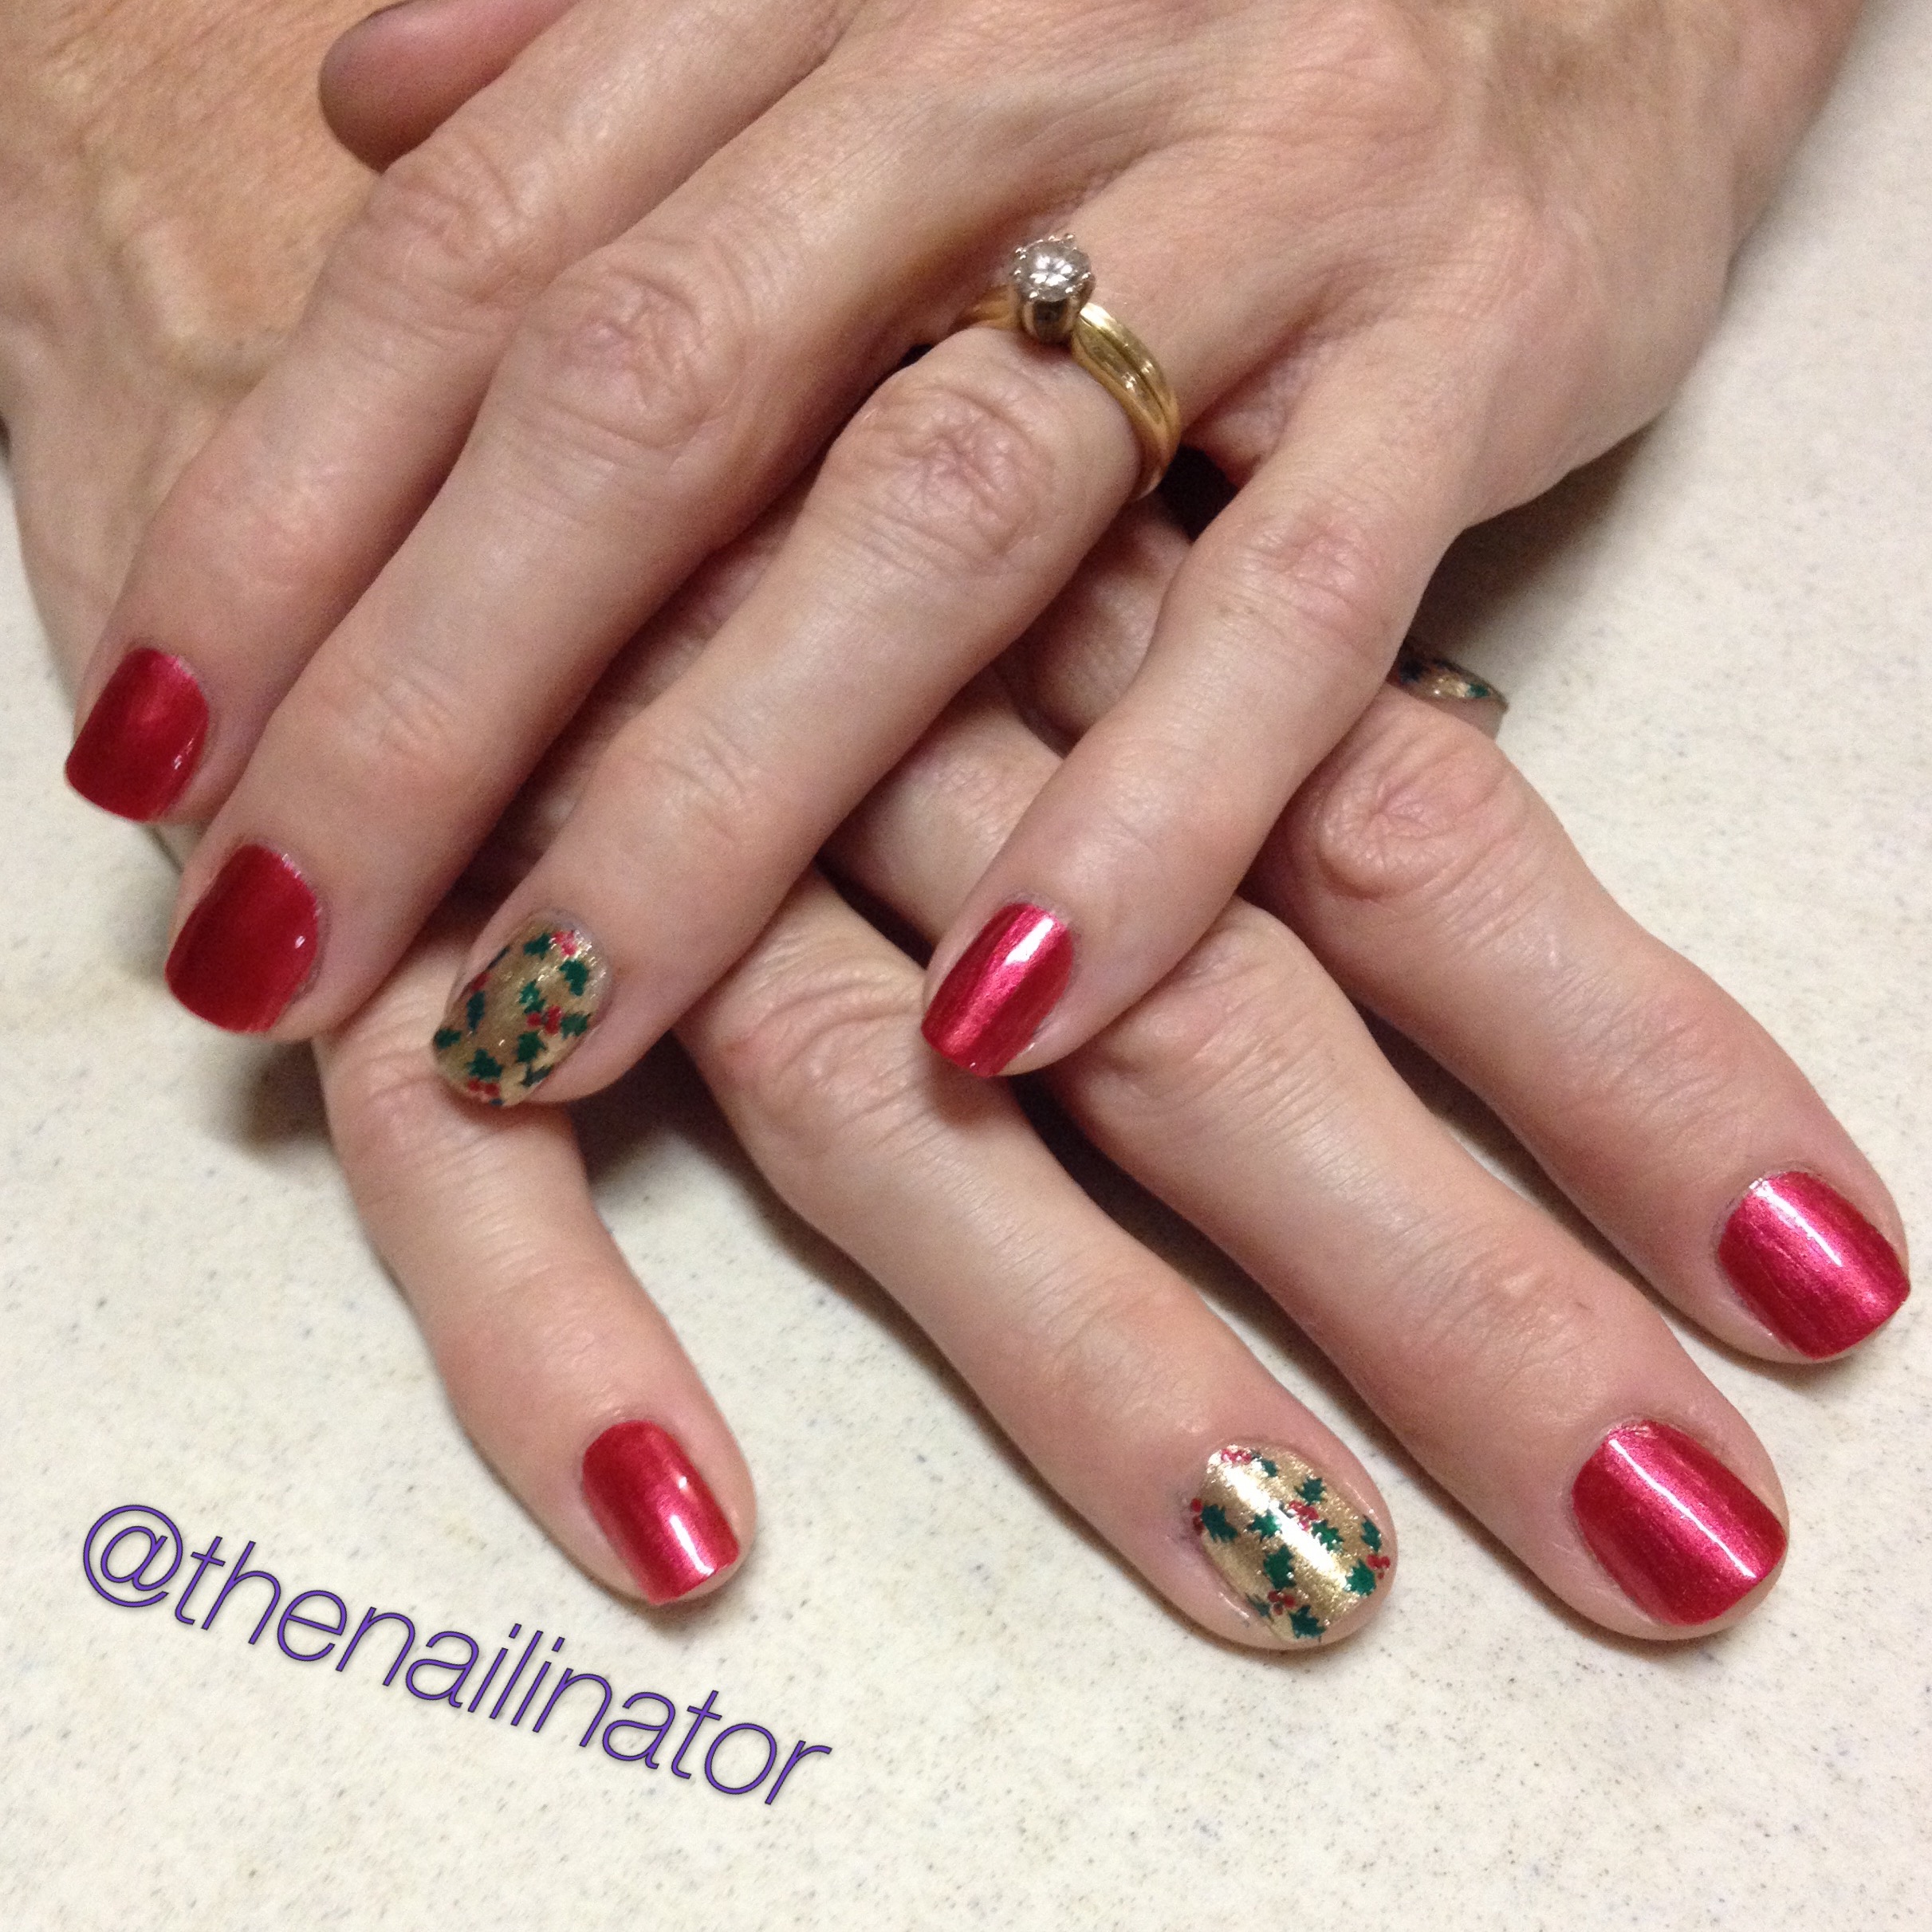
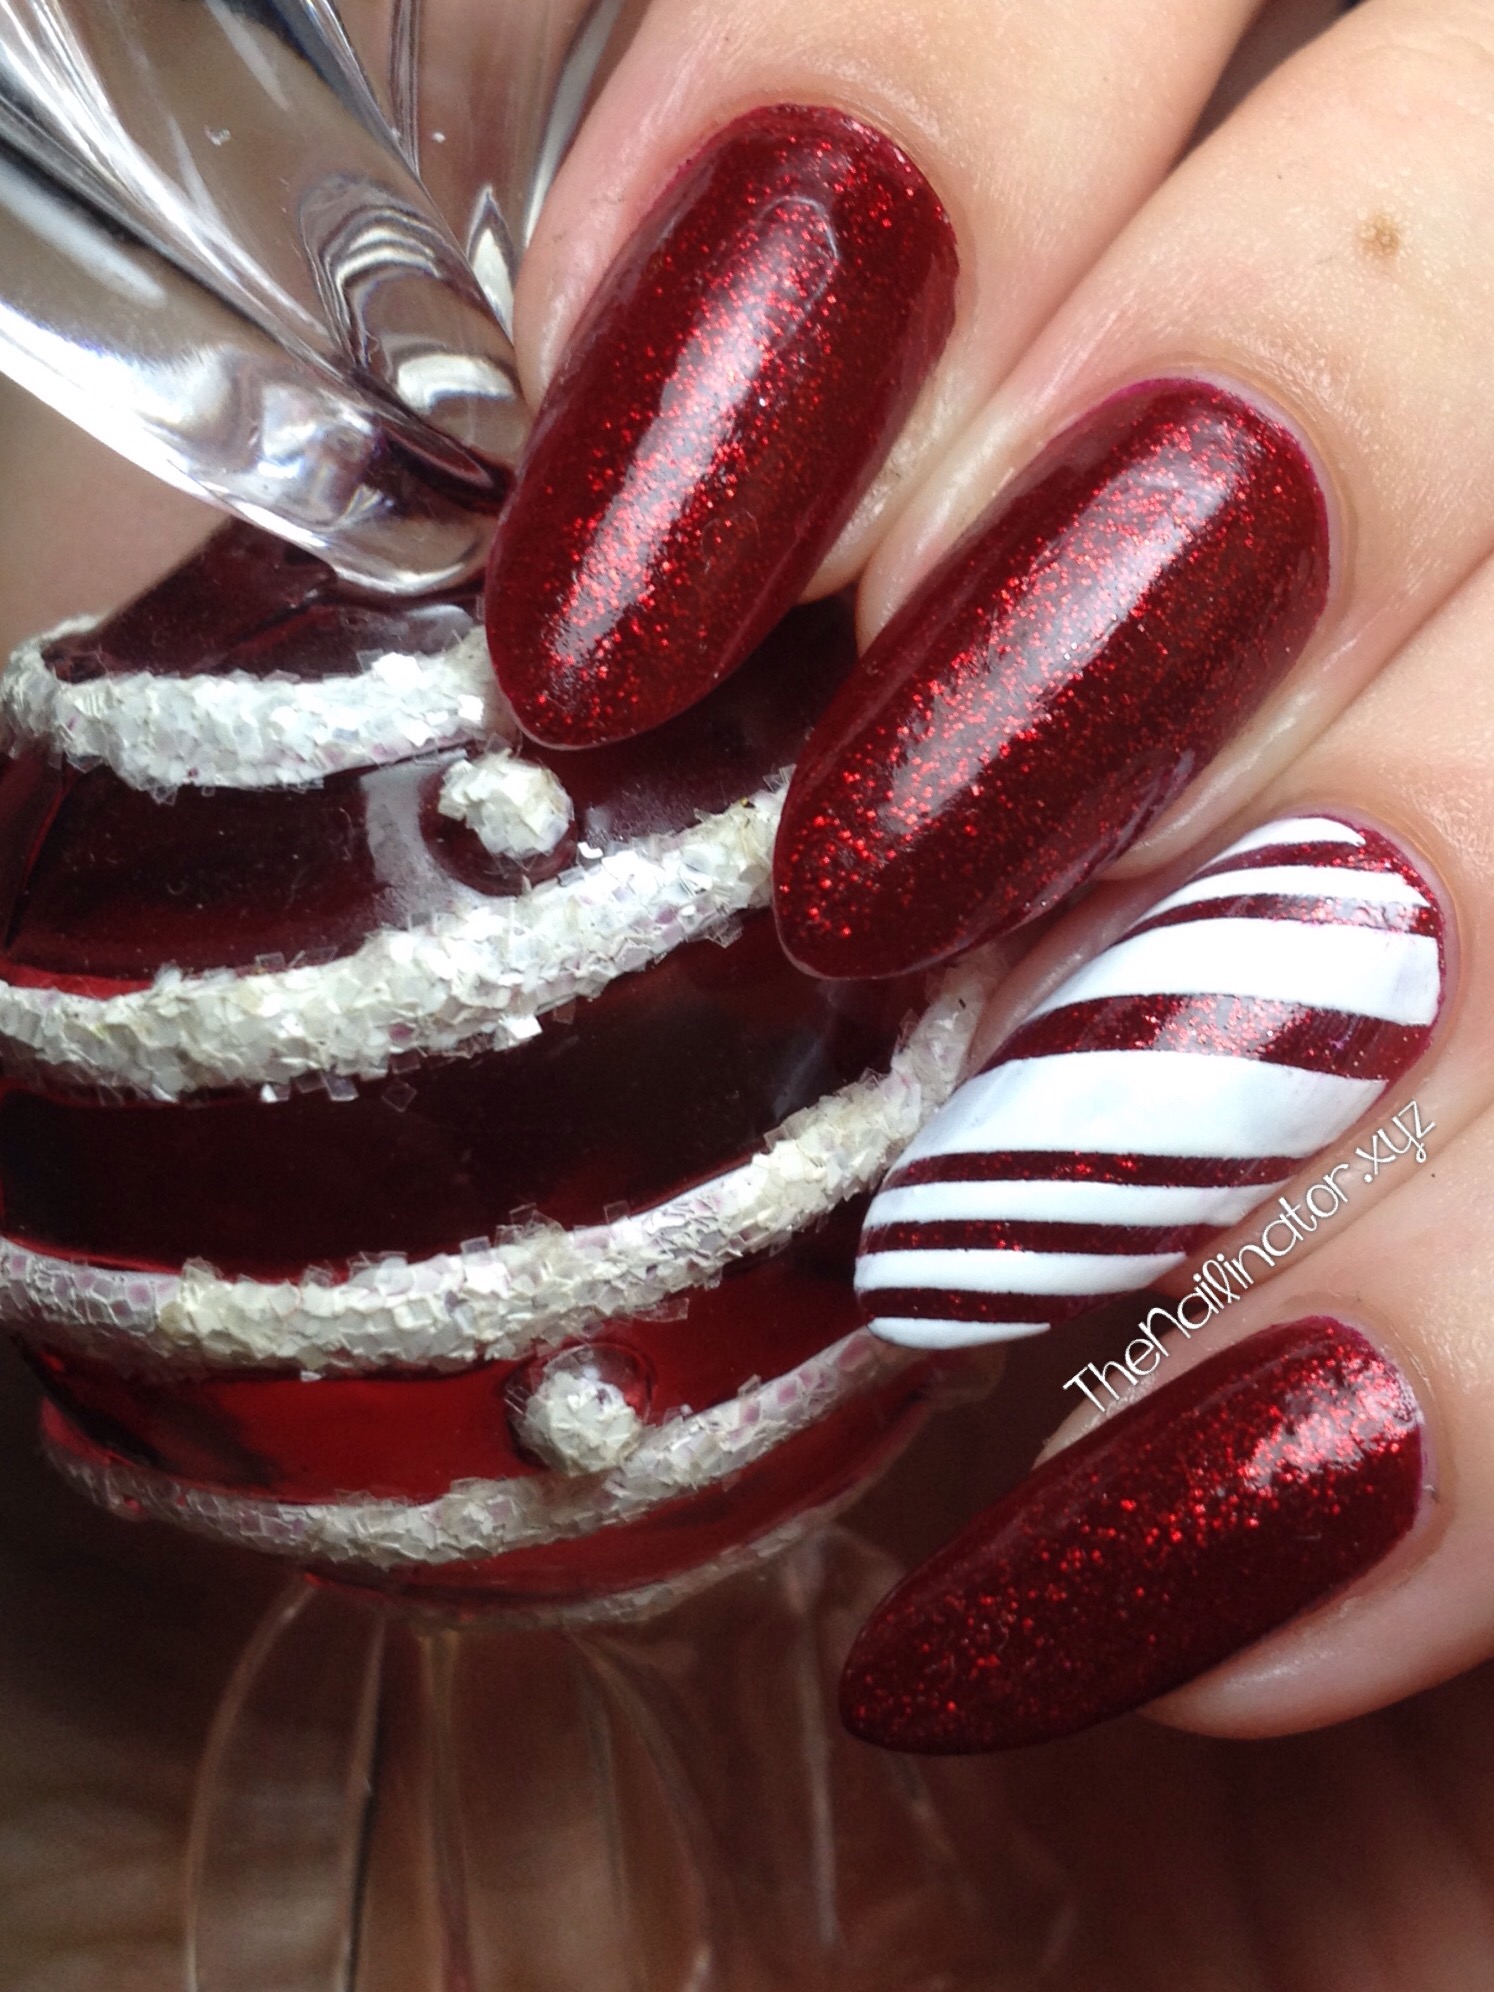
Next up is a look The Queen Mother requested after seeing my Holly Jolly nails. She wanted my holly stamped accent nail with all the other nails in red. I wish I could remember the name of the red she brought along. It is a stunner. I will check with her and update this (then I’ll probably go out and buy it!).

Holly Accent Nail

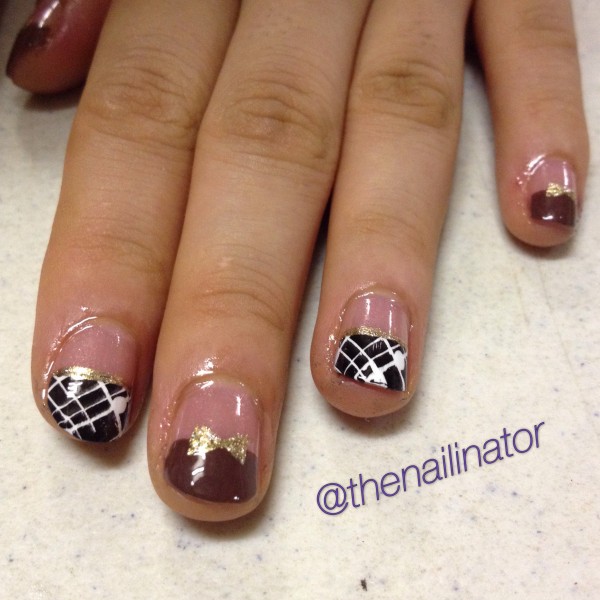
Next, I’m showing you a look that I was surprised to find I ended up really liking. A friend showed me a picture and I did my best to replicate what she was asking for. First I painted the whole nail in a very light jelly pink. Then I added color to just half of each nail (alternating brown and white). On each brown nail I painted a tiny gold bow. On each white nail I taped off the non-white part of the nail and stamped an image in black over the white. The tape kept the stamping on the white part I had painted before. I added a gold stripe across the nail and was finished. I had never tried a half nail design like this and had also never tried a stamping technique like this. It is always fun to try new things.

Gold Bow

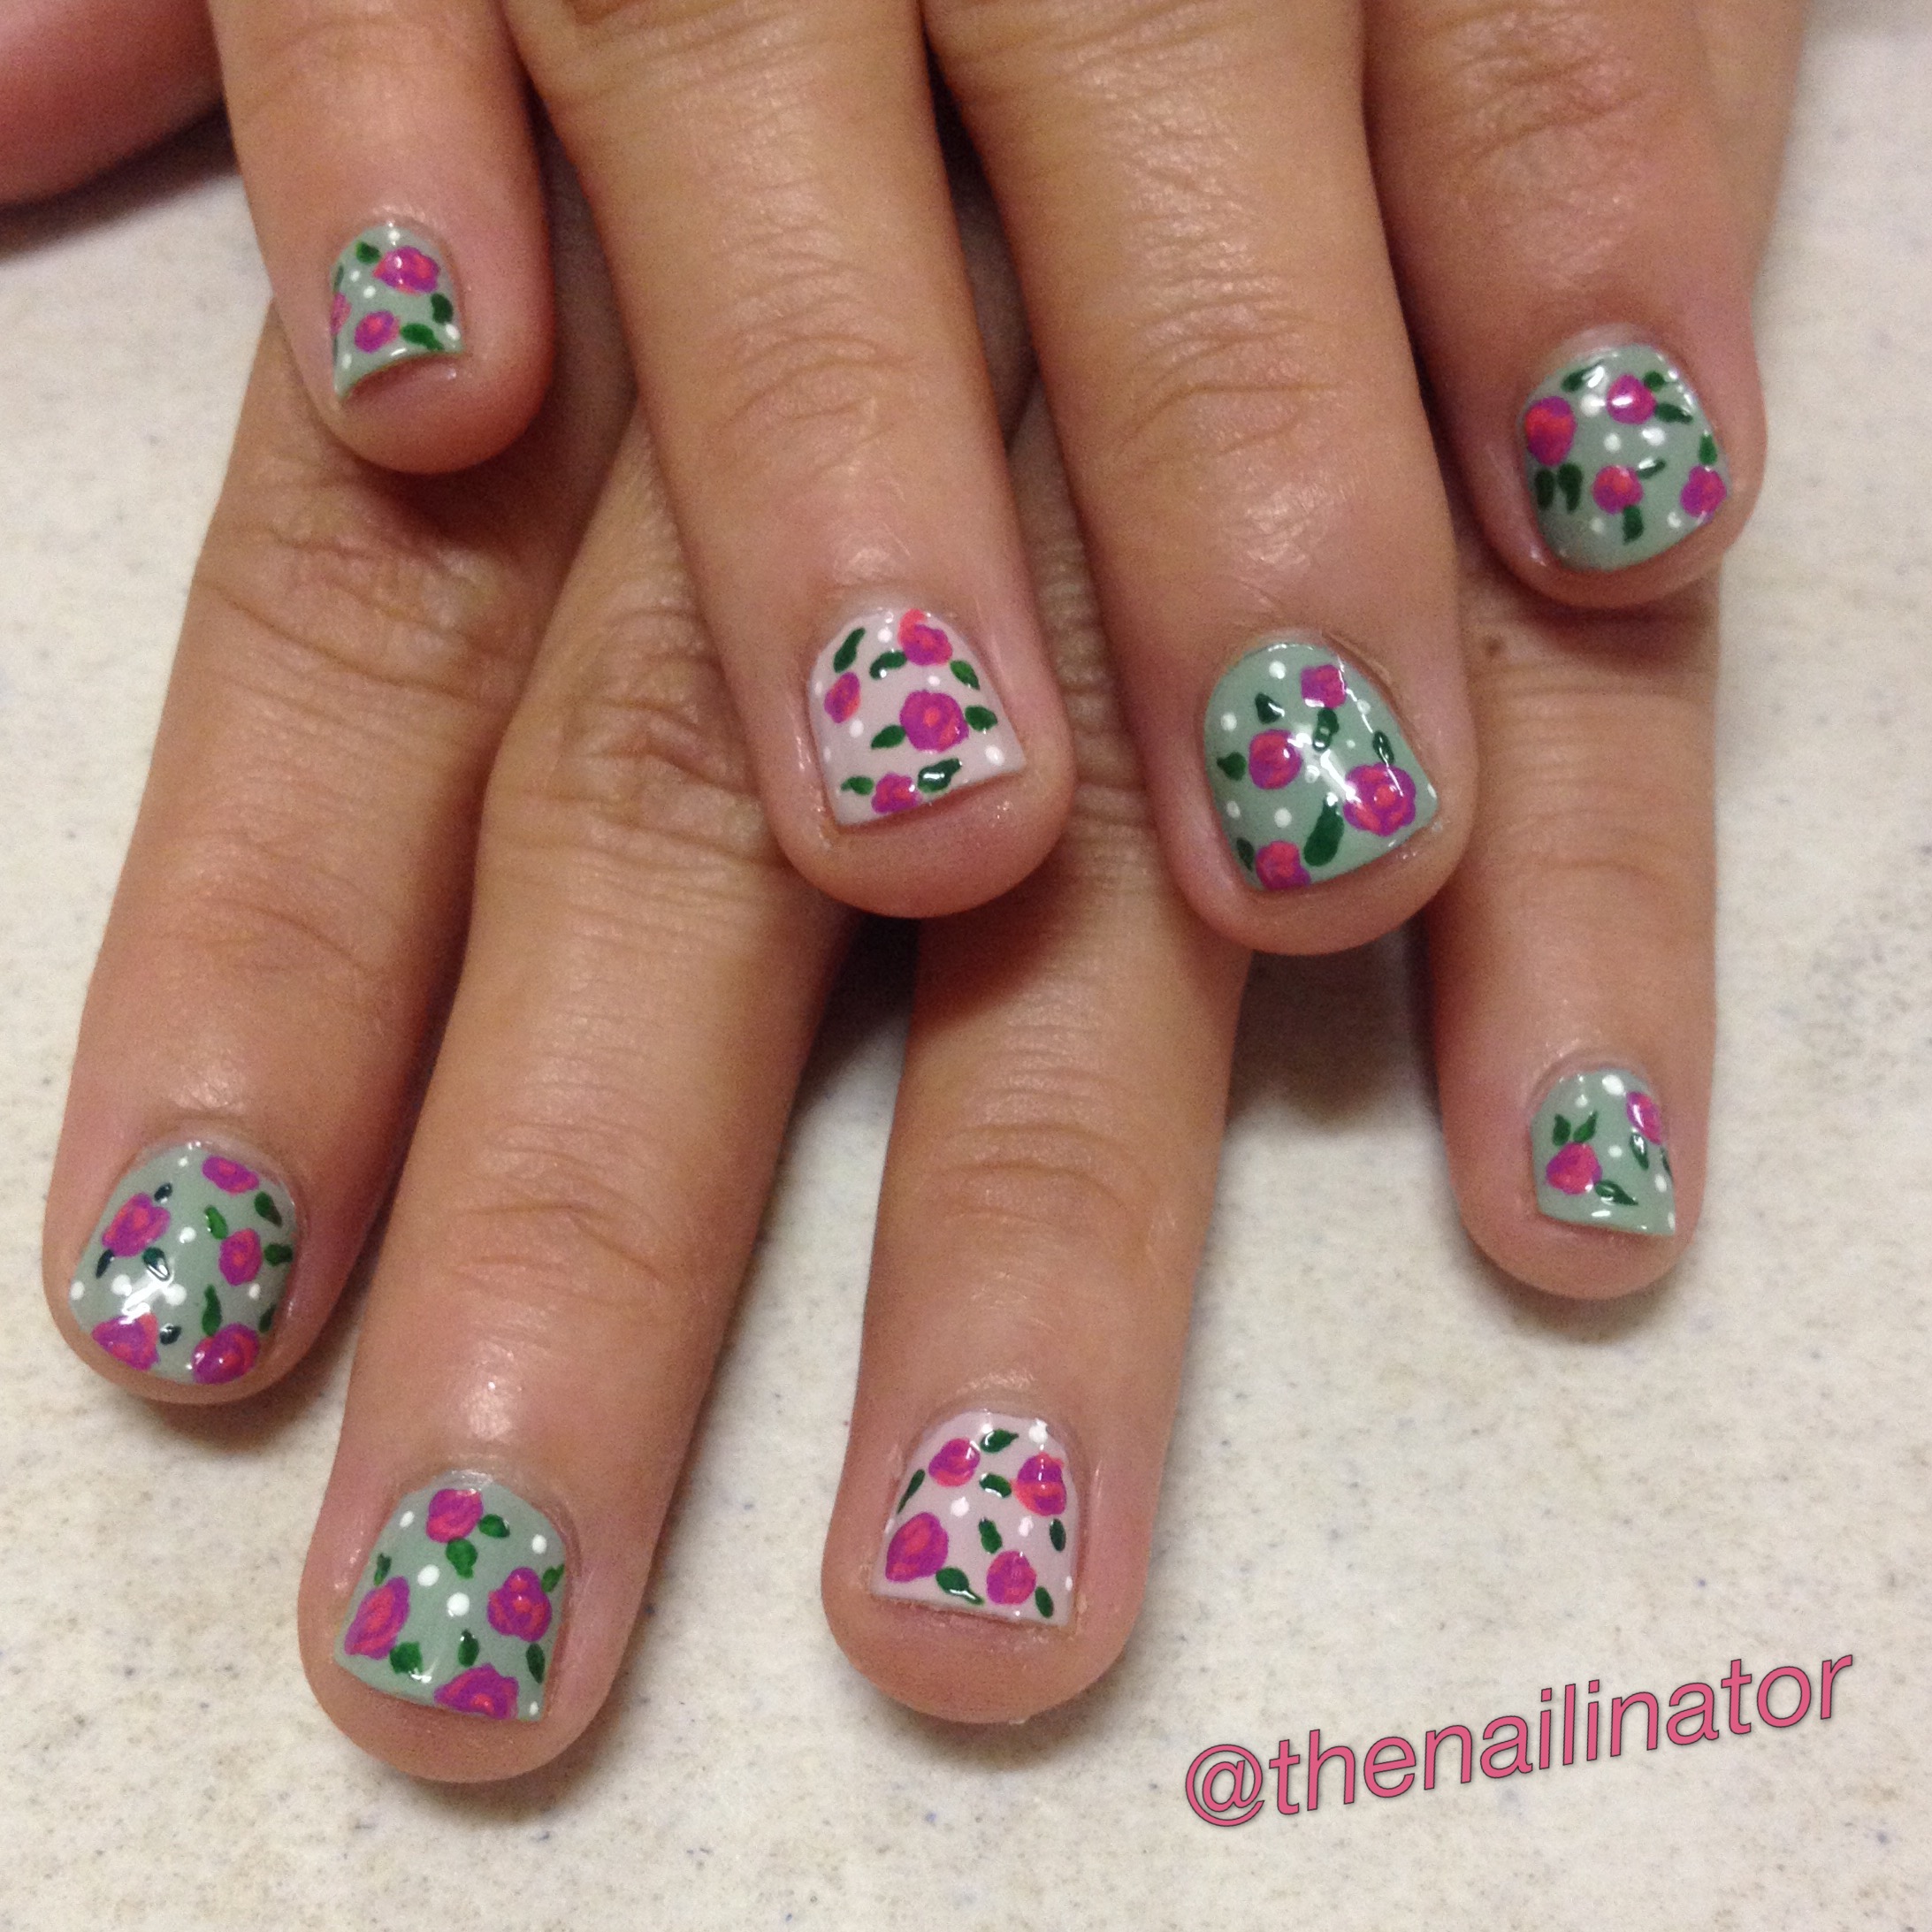
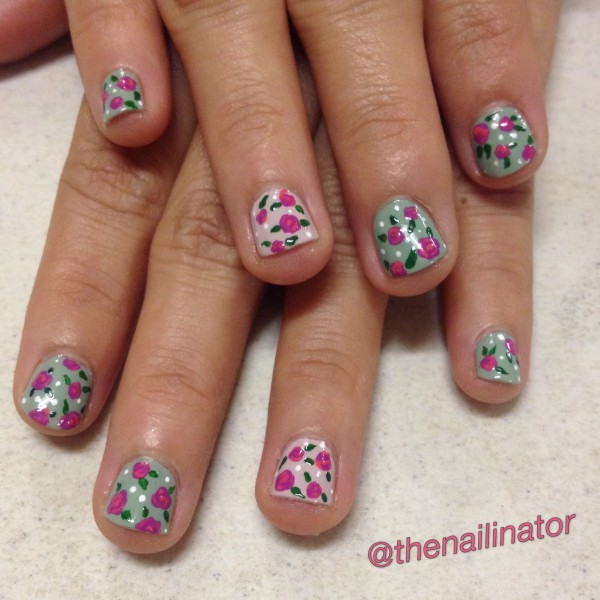
The next look is a floral design, something I’ve done several times before with different color combinations. This lovely lady picked mint green and off white as her base colors and wanted small roses and leaves. This was my first time painting such tiny roses which proved to be a challenge. I did my best, though, and she liked them so that is what counts after all.

Floral Nail Art

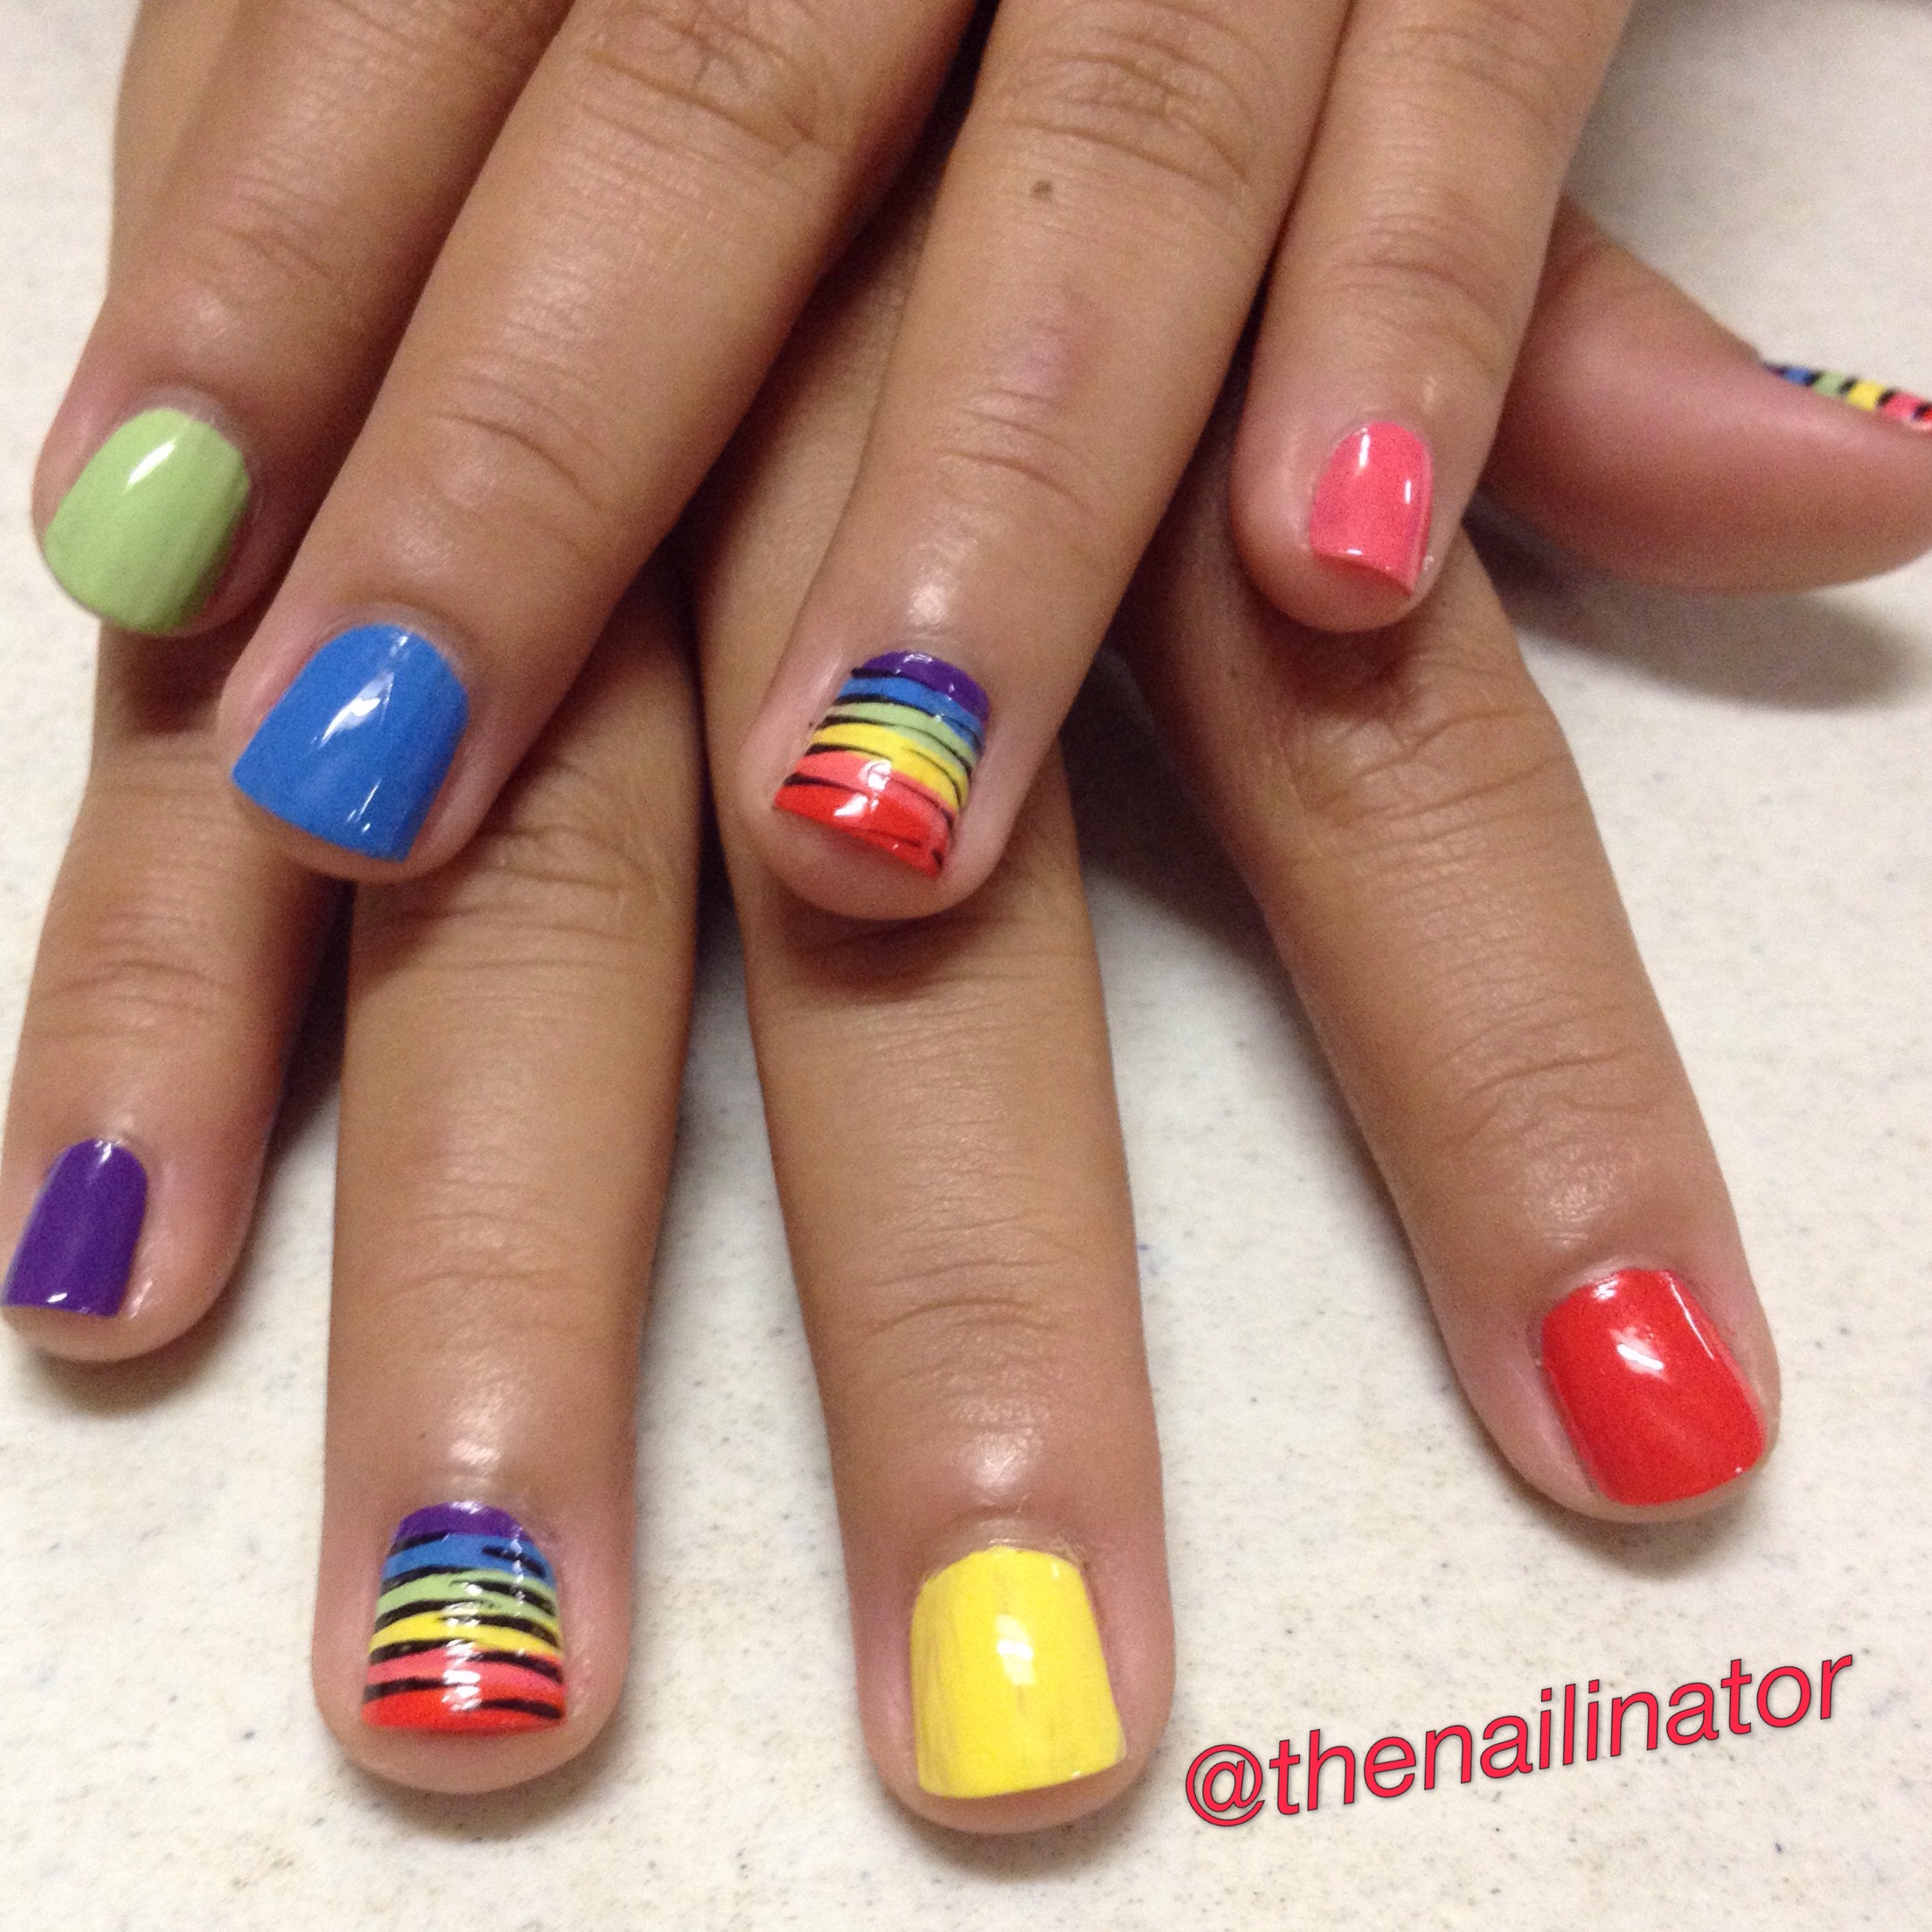
The last look I have to share with you is so fun and colorful! My friend wanted rainbow stripes with black strokes. I used a striping brush to paint each color in rows starting from the cuticle out toward the tip (purple, blue, green, yellow, pink and orange). I used black acrylic paint and added the black marks. We did this on her accent nails and thumbs. Since we used 6 colors I suggested we paint the other nails with those colors. They look suuuper cute!

Rainbow Nails

I love doing nails for other people. It is fun to take on the challenge of suggesting things that will suit them and colors that will go with what they have in mind. Do you do nails for family and friends? If you follow me on Instagram you have probably already seen these as I share them there most of the time.

I hope you have had a wonderful holiday vacation so far. Mine has involved lots of food and laughs with my family which is just the way I like it. I’ve been under the weather with a crazy cold that won’t go away. But on the bright side, my hubby has been a darling taking care of me and the kids most of the time. I’m a lucky lady for sure!  Whatever you ended up doing for the New Year, I hope you have had a great time and blessed year ahead!

Hugs!
Rach

26 Dec

OPI Alcatraz Rocks with Snowflake Stickers

Hello Lovely  People!

I hope you all had a merry Christmas with your nearest and dearest. I’ve been so busy the past two weeks baking goodies to give away, doing nails for some friends and family, and finishing up school with my kiddos. We’ve also been dealing with some sniffles in the house so that slows things down a bit. There is my explanation for why is has been a bit quiet around here. We had a wonderful day with the family yesterday, though. We fixed Mexican food and had everyone over at our house. It was a lovely day for sure! God has blessed us so!

Today I’m showing you one of my favorites, OPI Alcatraz Rocks. This is another polish I saw swatched by Jemma of Eeeek! Nail Polish! and I just HAD to have it. The super sweet Jacqui of Crafty Nail sent me this in our nail swap last year and I have worn it before but I haven’t posted it with any nail art yet. So here it is in all its pretty glittery goodness. Thanks again Jax!

Alcatraz Rocks with snowflake stickers

I added some snowflake stickers to make the look more festive. The stickers are super cute but they peeled up a bit along the edges when I added topcoat. I really like having smooth nails so little bits sticking out really annoy me. I usually end up picking at stickers that peel up. So these didn’t last too long.  I do have a tip to share for using nail stickers. Do NOT apply them to wet polish thinking that they will stick better since they will dry with the polish. It doesn’t work. What I figure is that the solvent in the polish messes with the adhesive on the stickers and just makes them gooey and not stick properly. It is much better to wait until the polish is dry.

OPI Alcatraz Rocks

Alcatraz Rocks takes two coats for full coverage. It is a gorgeous blurple (bluish purple) liquid sand polish which means it dries  to a very textured finish. I added two coats of topcoat for this smooth finish. I prefer Alcatraz Rocks with topcoat as it really brings out the glitter. I’m ALL about the glitter y’all! That being said, since it is a glitter polish, this takes a bit of effort to remove. So worth it though!

Well, that’s all for me today. I’m off to play with the kids and I’ve still got a bit of cleaning up to do. I hope you are all having a great holiday and that you get to spend some quality time with those you love most.

Happy holidays from my family to yours!
Hugs,
Rachael

15 Dec

Ruby Pumps Candy Cane Nail Art (with tutorial video)

Hi gals!

I’m sorry that I didn’t get this posted during the weekend as I had planned. It took longer to prepare the post than I had anticipated, and we had a very busy weekend.

Only 10 days to go until Christmas! I’ve got some serious baking to do this week! My boy has been learning fractions in math, so we will to work together on the recipes and baking as an extra fun school activity. Homeschooling rocks!

While I was in the US this summer, I got my hands on China Glaze Ruby Pumps which has been a lemming of mine since I saw Jemma of Eeeek Nail Polish post her swatch of it. I have been saving it for Christmas time. I added a nice little candy cane accent nail just for fun. I planned to do all the nails like this, but I just couldn’t find the time.

Ruby Pumps Candy Cane 2

I have seen loads of nail art using Ruby Pumps. It really is the perfect red! I would describe it as a dark red jelly loaded with teeny tiny red glitter. The glitter is not as dark as the jelly so it has a nice bright shine from within. I love a good red, but red with gorgeous glitter is even better!

Ruby Pumps Swatch

I’ve got a little extra for you today. A tutorial video! Please be forgiving as I am a complete novice at these types of things. Mr. Nailinator deserves a huge round of applause for being such a darling, I would never have even tried this if  he hadn’t promised to help me figure out how to get it edited and uploaded on YouTube. I’ve received a lot of requests for tutorials so, I figured I’d give it a try. Let me know what you think.

1. Place striping tape over dry base color.
2. Use orange wood stick to secure tape to nail edge.
3. Apply white polish.
4. Quickly and carefully remove tape.
5. Allow to dry then apply topcoat.

What is your favorite holiday inspired nail art? I’m looking forward to something extra flashy for the New Year!

Have a great day!
Rachael

11 Dec

Girlstuff Blues with Icicle Tips

Hi everyone!

Just a quick snippet tonight as I’m trying to get to bed at a somewhat decent hour. I posted a little teaser for these on my Instagram last night and now I’m happy to share this lovely nail art.

Girlstuff Blues with Icicle Tips

I started with two easy coats of Girlstuff Blues. Blues was a dream to apply. It evened itself out nicely and dried quickly to a very shiny finish. I used a striping brush and Jocarste’s silver glitter to add the icicles on the tips of my nails. Pretty cool, huh? (Pun intended!)
These are the only icicles I’ll be seeing this holiday season as it is always warm here near the equator. Oh well, I still enjoy wintry nail art.

Macro Shot of Blues with Icicle Tips

I’ve got a little tutorial video I made for my next nail art post, but I’m still trying to figure out the best way to edit it. I’m hoping to share it this weekend. Are y’all having a great week so far?
Keep smiling!
Hugs,
Rach

%d bloggers like this: