30 Dec

Review: Girlstuff Forever Holiday Collection 2014 (Love, Hope, and Peace)

Howdy!

Any grand plans for the New Year? We were supposed to leave Cebu early yesterday morning to go out of town to be with some family on the next island over. But a tropical depression is passing through and has put a damper on our plans. The coast guard (wisely) has suspended ferries and boats between islands in the areas affected by the winds and rain. Perhaps we will be given the green light sometime today to go. Fingers crossed!

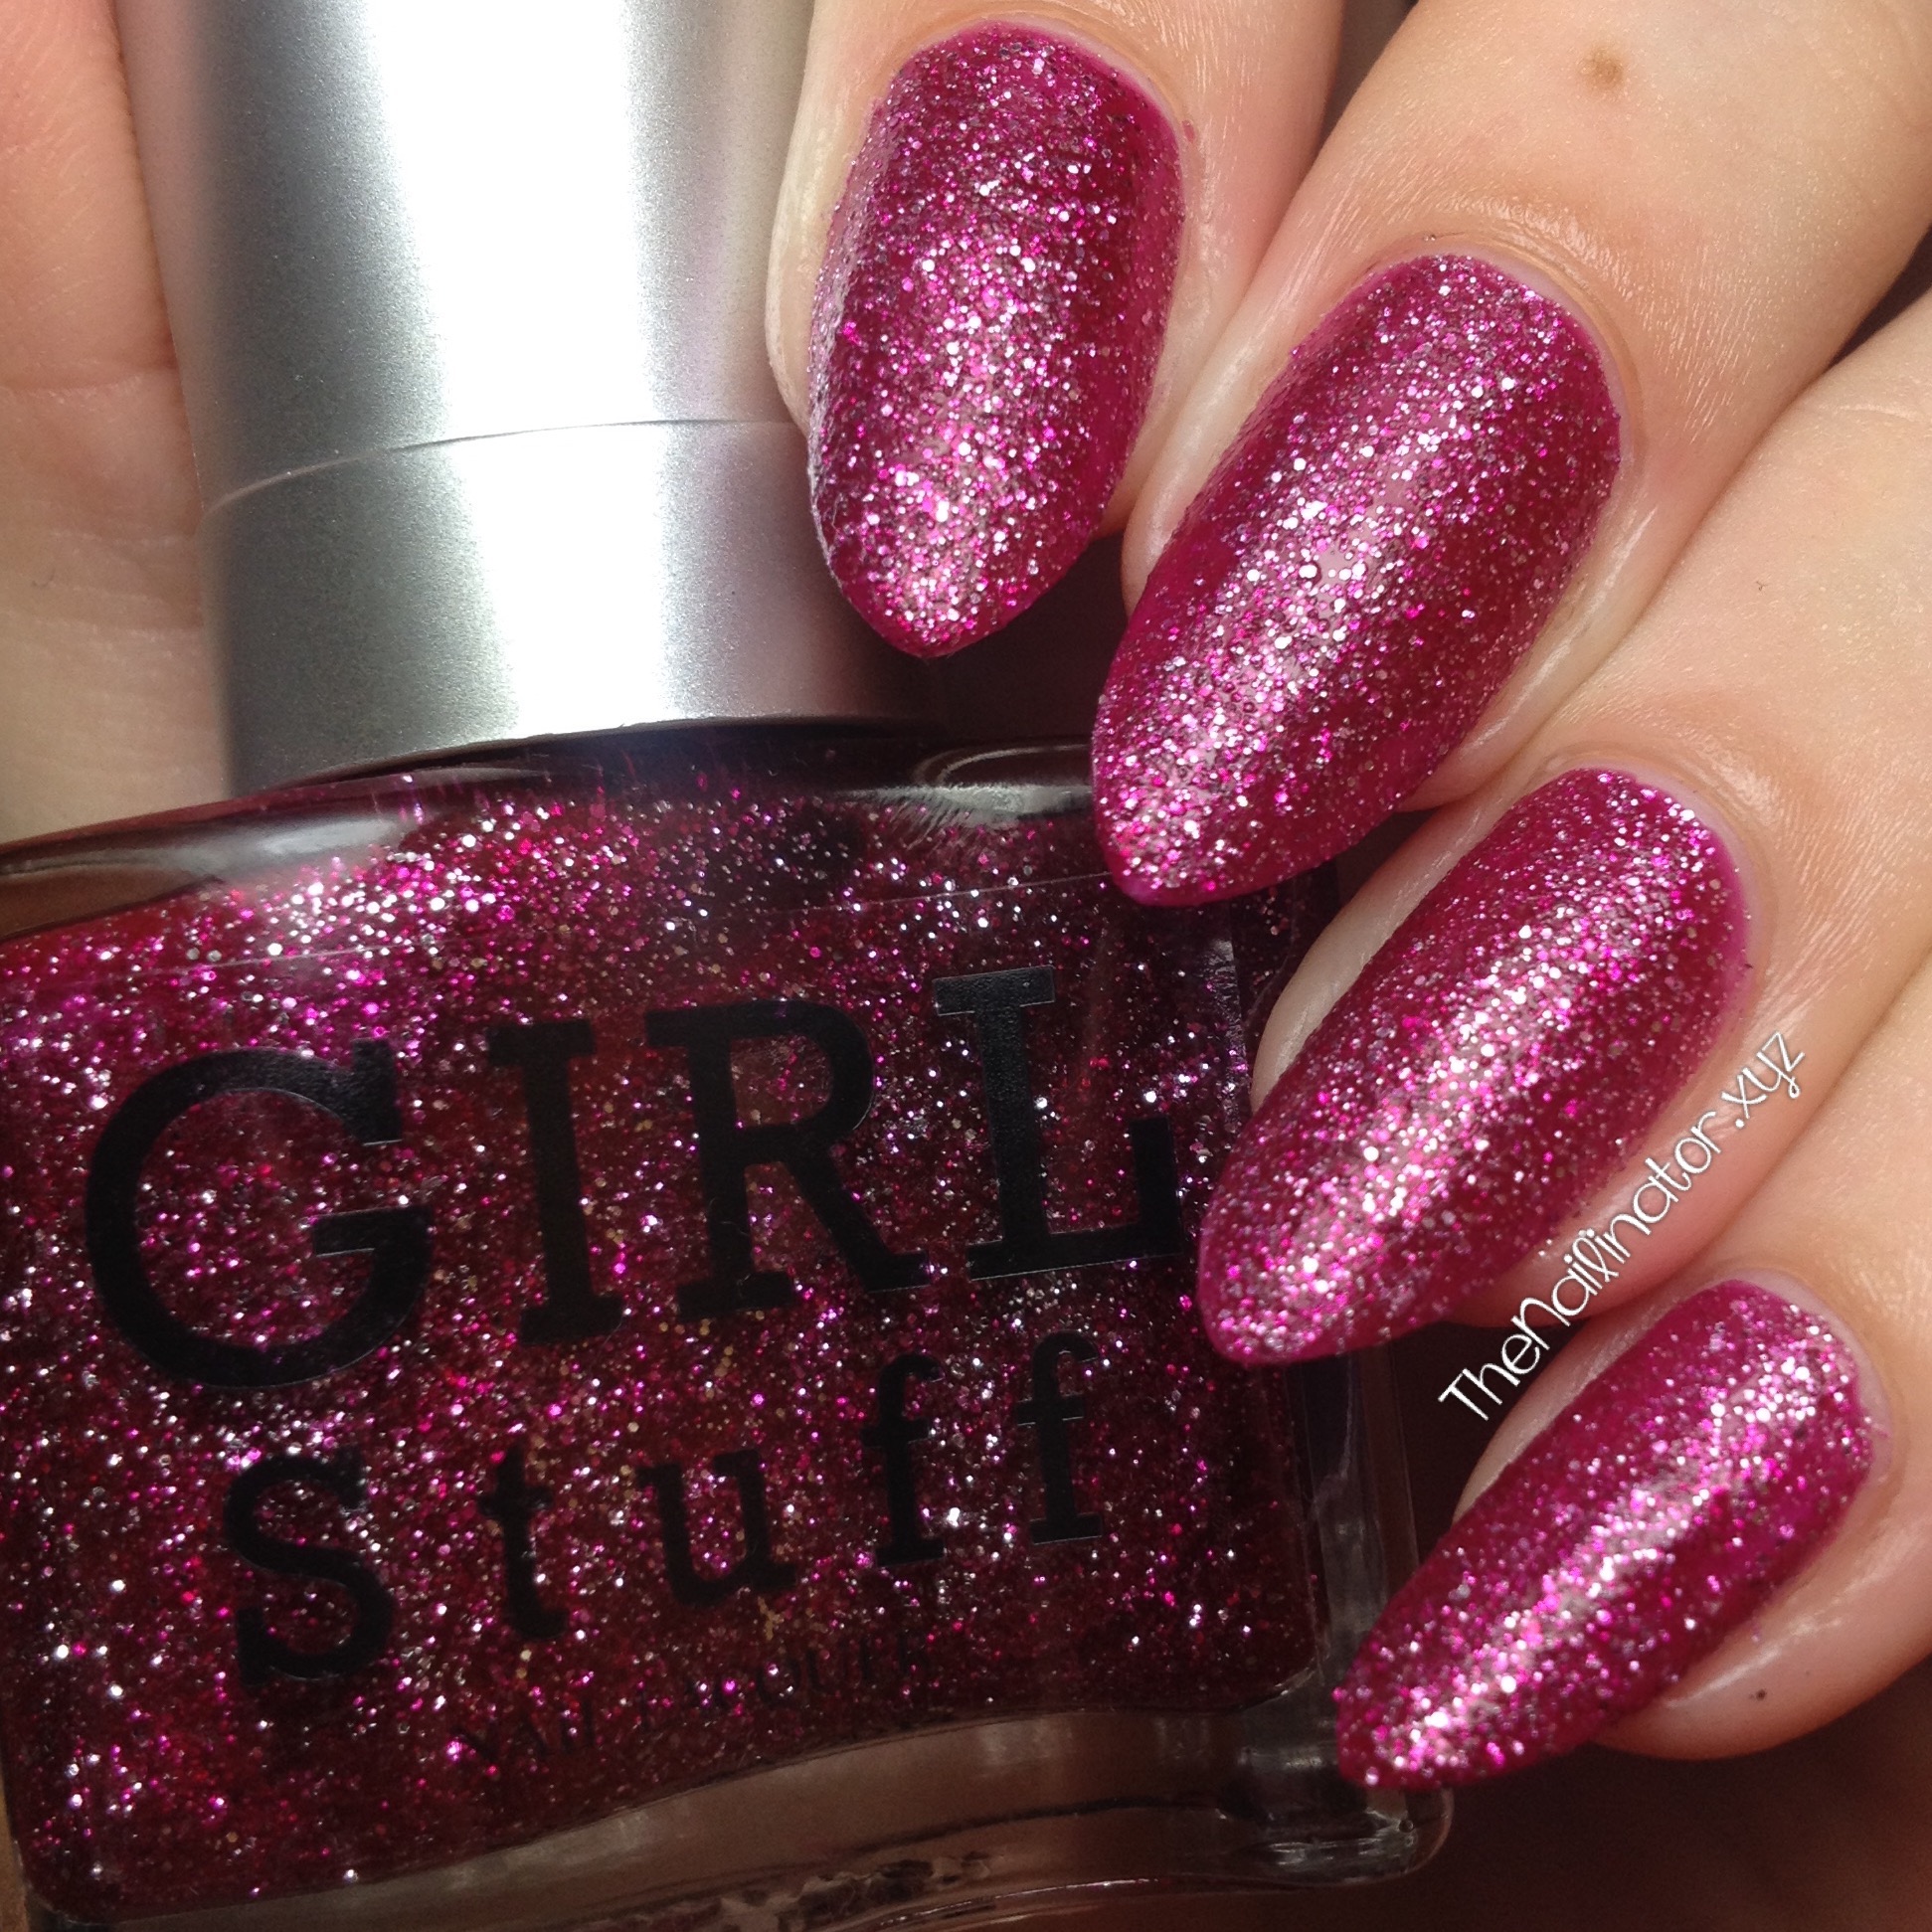
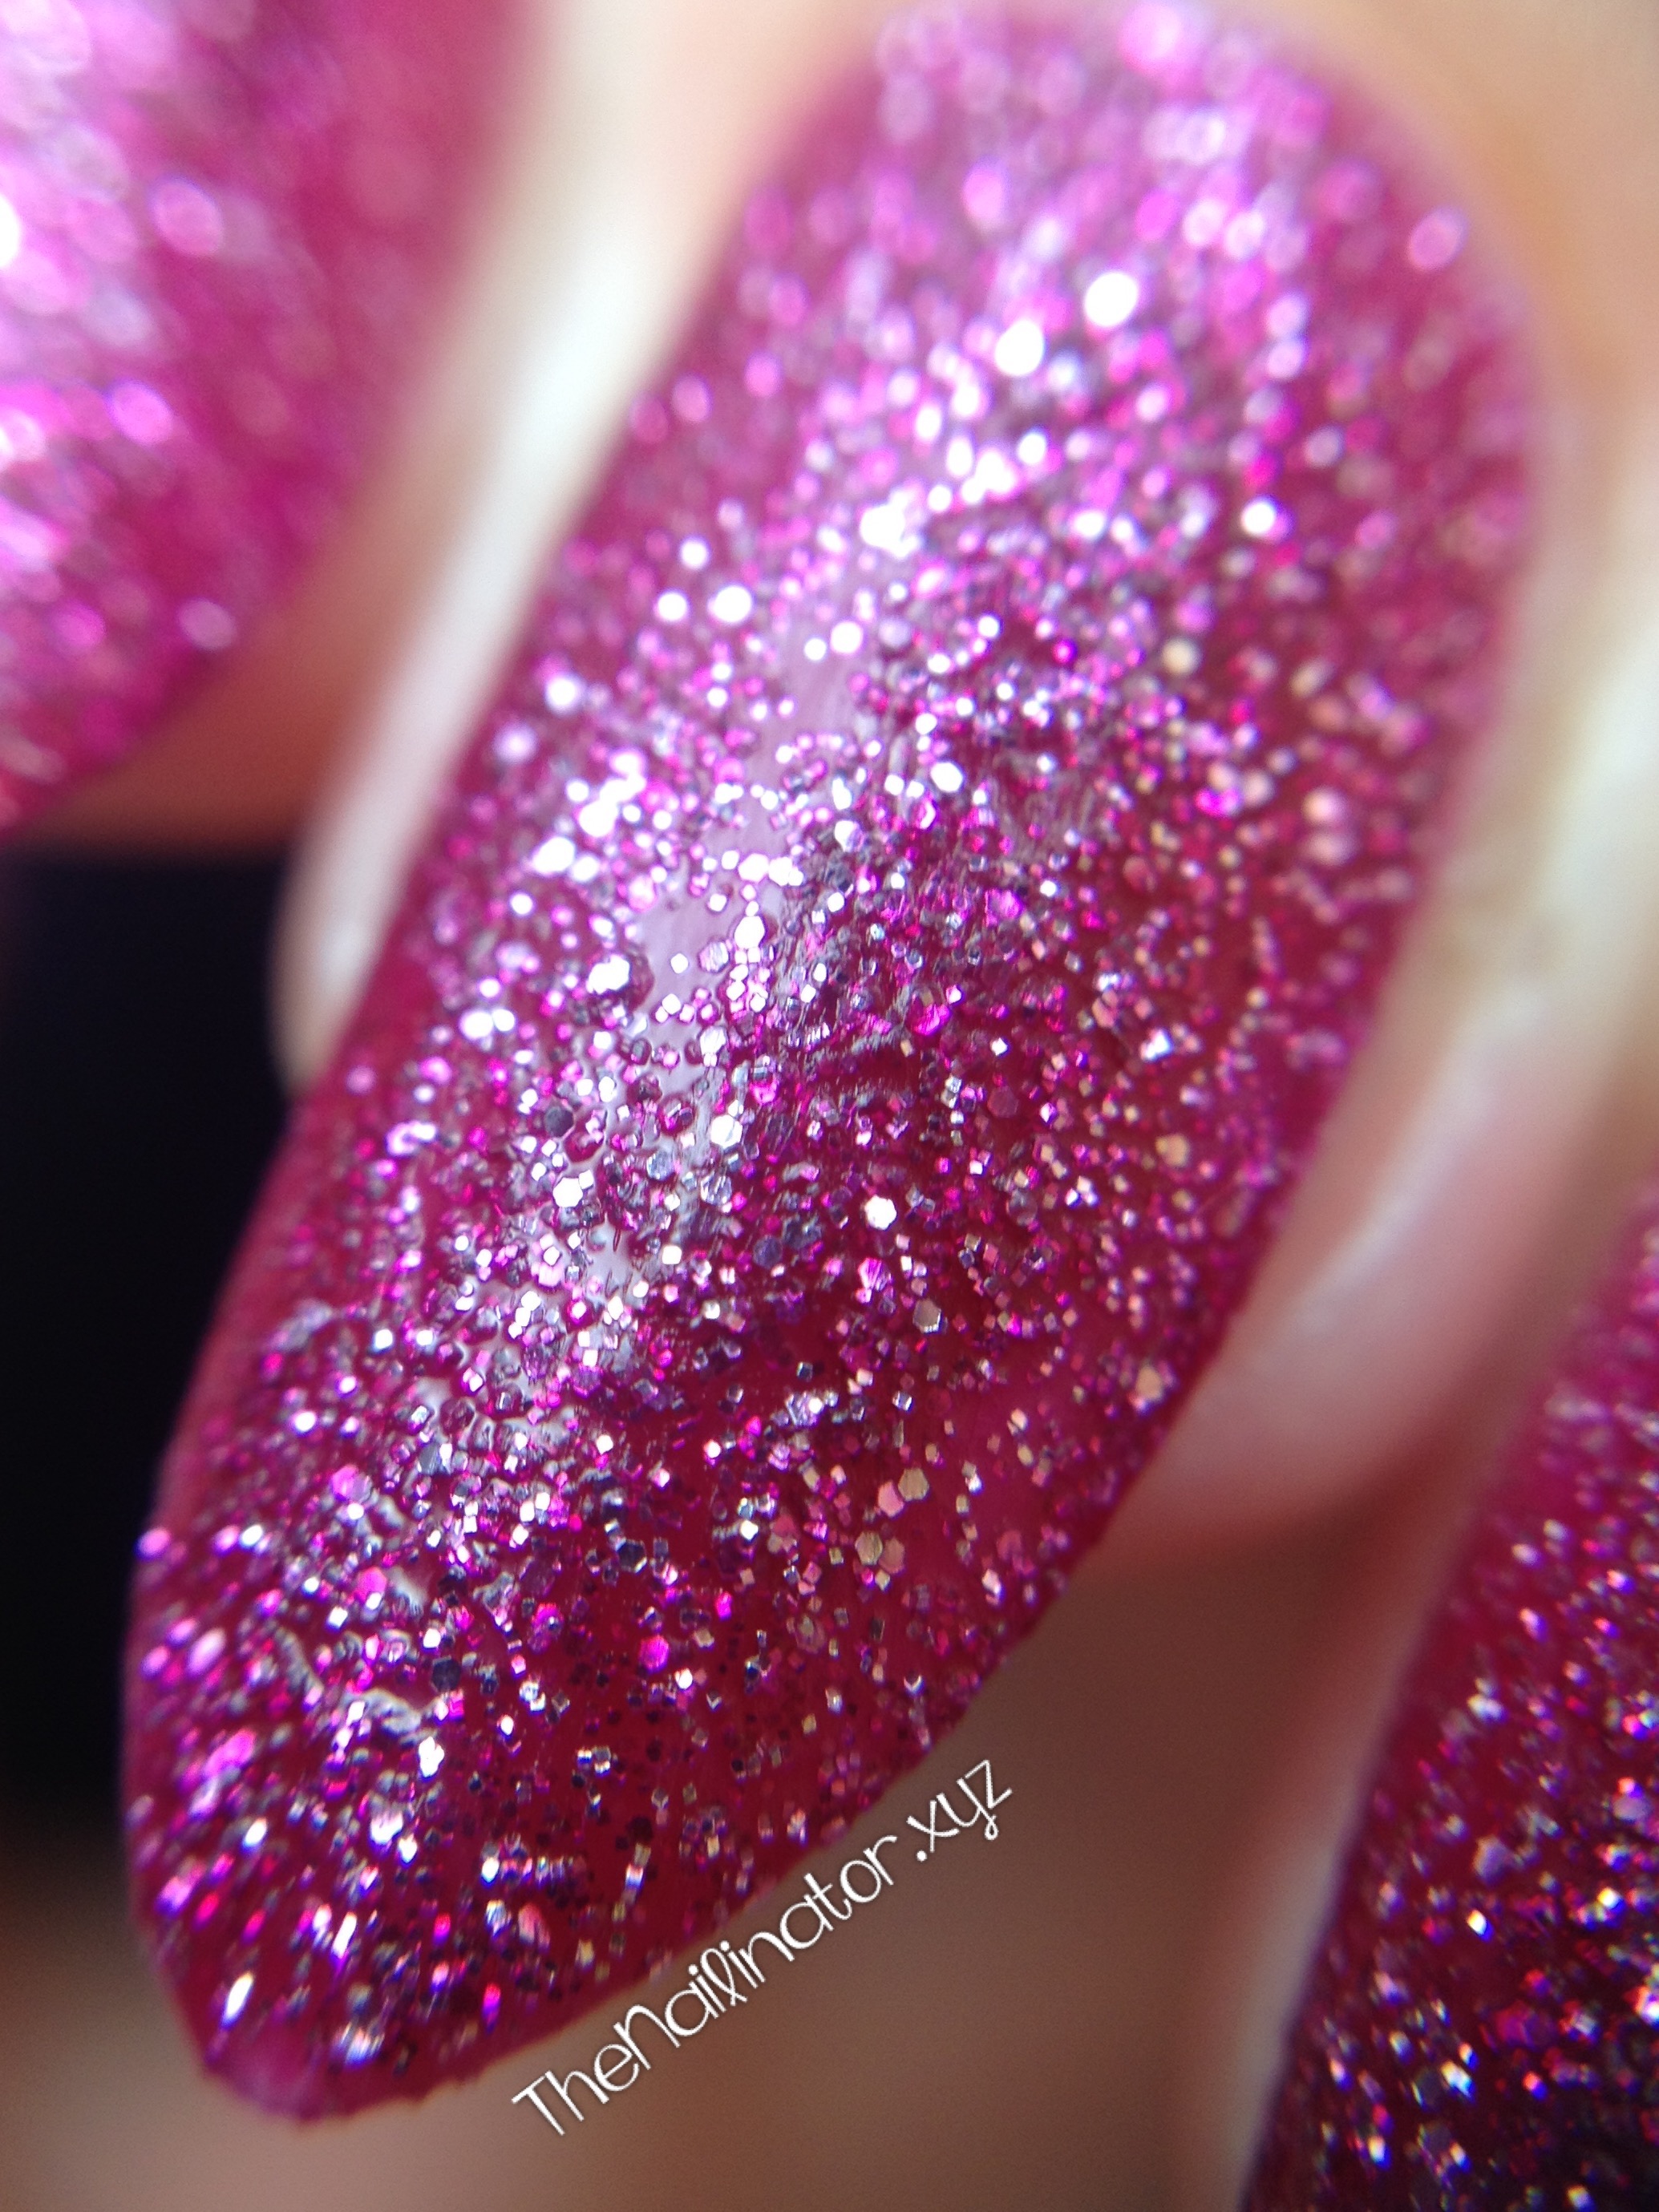
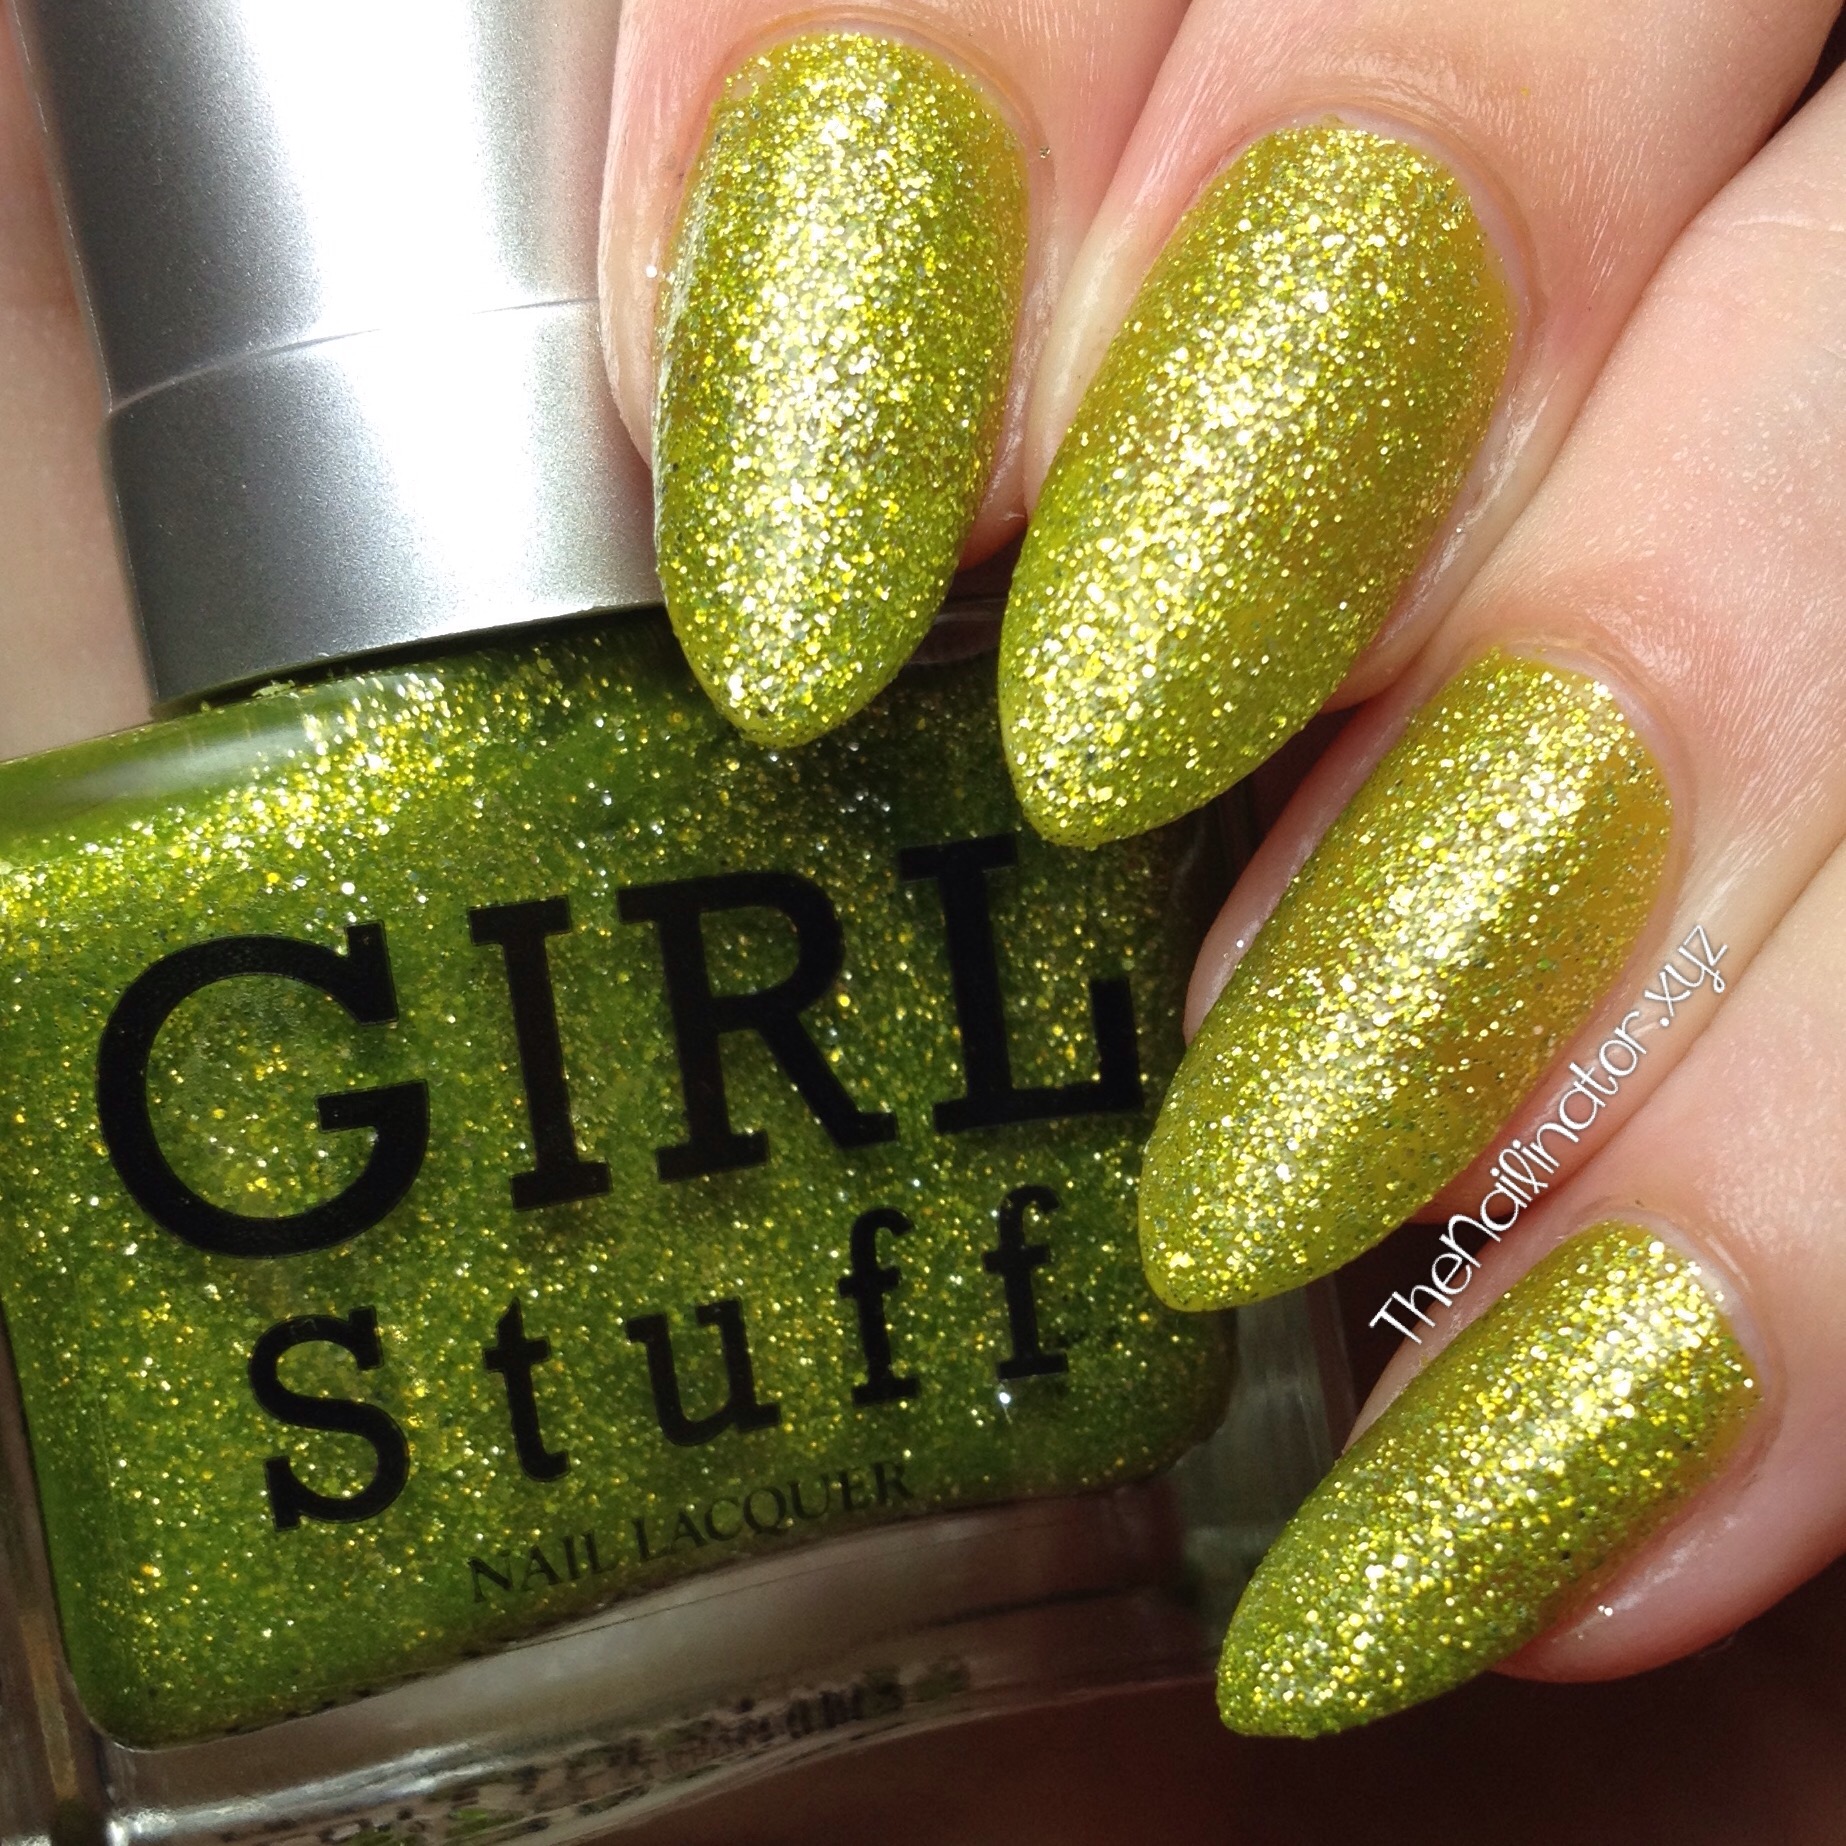
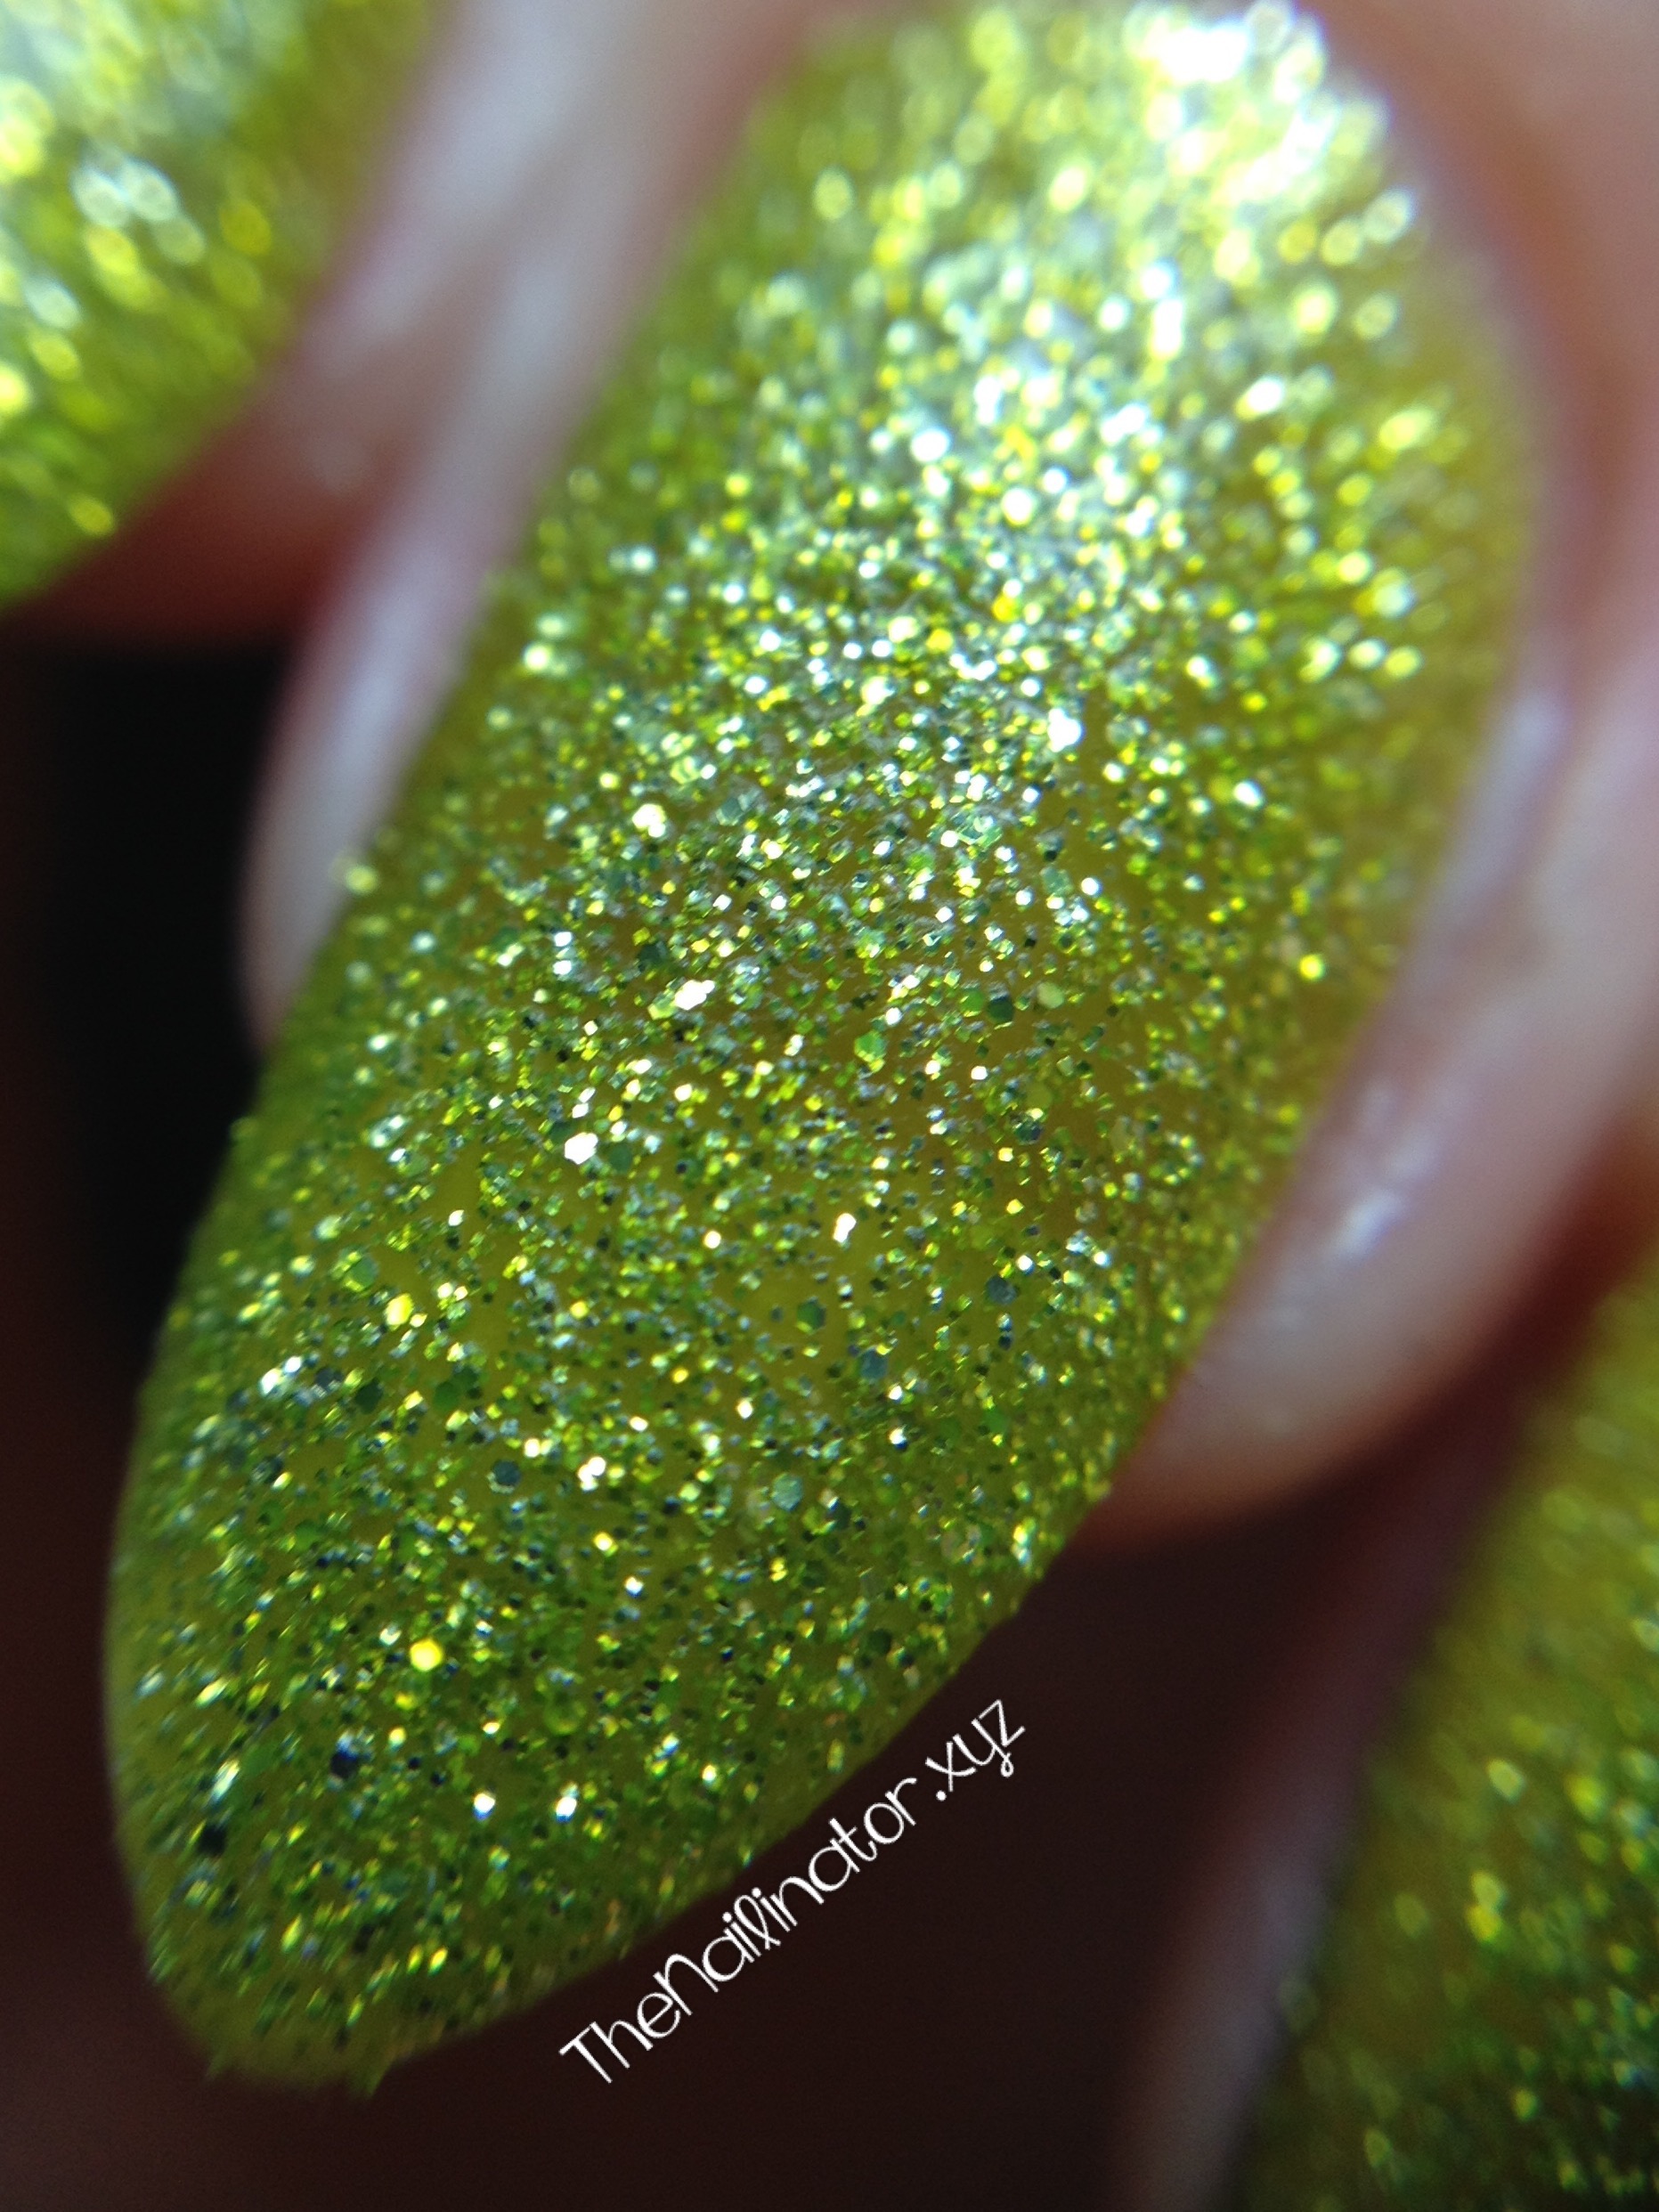
I’ve got a lovely collection to share with you today. Girlstuff Forever has released a glitter-packed, textured trio for the holidays, and I’ve got swatches right here! For each swatch, I applied a base-coat and two coats of polish. I didn’t apply topcoat since these polishes dry to a textured finish, but you could add topcoat for extra sparkle. I’ve included macro shots so you can see the glittery, textured goodness close up as well. Enjoy!

First up  in the Girlstuff Forever Holiday Collection is Love. Love is a pink jelly packed with tiny silver hex glitters and even smaller square glitters. This is the most girly shade of the collection, and I can see me rockin’ this on Valentine’s Day.

Swatch of Girlstuff Love Girlstuff Love macro shot

Hope is a very unique color. It is a greenish-yellow jelly base with the same tiny hex glitters and square glitters as Love. It is, sadly, not the most flattering color for my pinkish (cool) skin tone but I know that ladies with a warmer skin tone could really rock this. It is so pretty despite not being so flattering on me.

Swatch of Girlstuff Hope

Girlstuff Hope macro shot

Peace is my favorite of the trio. I guess I’m just a huge fan of blue polishes. Ha! Peace is a blue jelly base loaded with the same glitters as the other two, but it also includes a sprinkling of some bigger hex shaped glitters.

Swatch of Girlstuff Peace

Girlstuff Peace macro shot

As can be expected with glitter polishes, these take more work to remove than a crème polish would. Cleanup around the cuticle was very easy. Each of these polishes retails for Php 140.00. Girlstuff Forever is a cruelty-free brand which means they do not test on animals. The polishes are all quick-dry and are also 5-free which makes them perfect for our miniature fashionistas. Check out the Girlstuff Forever website to find a kiosk near you or to order directly online.

I hope your new year is filled with much love, hope, peace, laughter, and many smiles and fun manicures!

Hugs,
Rachael

26 Dec

OPI Alcatraz Rocks with Snowflake Stickers

Hello Lovely  People!

I hope you all had a merry Christmas with your nearest and dearest. I’ve been so busy the past two weeks baking goodies to give away, doing nails for some friends and family, and finishing up school with my kiddos. We’ve also been dealing with some sniffles in the house so that slows things down a bit. There is my explanation for why is has been a bit quiet around here. We had a wonderful day with the family yesterday, though. We fixed Mexican food and had everyone over at our house. It was a lovely day for sure! God has blessed us so!

Today I’m showing you one of my favorites, OPI Alcatraz Rocks. This is another polish I saw swatched by Jemma of Eeeek! Nail Polish! and I just HAD to have it. The super sweet Jacqui of Crafty Nail sent me this in our nail swap last year and I have worn it before but I haven’t posted it with any nail art yet. So here it is in all its pretty glittery goodness. Thanks again Jax!

Alcatraz Rocks with snowflake stickers

I added some snowflake stickers to make the look more festive. The stickers are super cute but they peeled up a bit along the edges when I added topcoat. I really like having smooth nails so little bits sticking out really annoy me. I usually end up picking at stickers that peel up. So these didn’t last too long.  I do have a tip to share for using nail stickers. Do NOT apply them to wet polish thinking that they will stick better since they will dry with the polish. It doesn’t work. What I figure is that the solvent in the polish messes with the adhesive on the stickers and just makes them gooey and not stick properly. It is much better to wait until the polish is dry.

OPI Alcatraz Rocks

Alcatraz Rocks takes two coats for full coverage. It is a gorgeous blurple (bluish purple) liquid sand polish which means it dries  to a very textured finish. I added two coats of topcoat for this smooth finish. I prefer Alcatraz Rocks with topcoat as it really brings out the glitter. I’m ALL about the glitter y’all! That being said, since it is a glitter polish, this takes a bit of effort to remove. So worth it though!

Well, that’s all for me today. I’m off to play with the kids and I’ve still got a bit of cleaning up to do. I hope you are all having a great holiday and that you get to spend some quality time with those you love most.

Happy holidays from my family to yours!
Hugs,
Rachael

15 Dec

Ruby Pumps Candy Cane Nail Art (with tutorial video)

Hi gals!

I’m sorry that I didn’t get this posted during the weekend as I had planned. It took longer to prepare the post than I had anticipated, and we had a very busy weekend.

Only 10 days to go until Christmas! I’ve got some serious baking to do this week! My boy has been learning fractions in math, so we will to work together on the recipes and baking as an extra fun school activity. Homeschooling rocks!

While I was in the US this summer, I got my hands on China Glaze Ruby Pumps which has been a lemming of mine since I saw Jemma of Eeeek Nail Polish post her swatch of it. I have been saving it for Christmas time. I added a nice little candy cane accent nail just for fun. I planned to do all the nails like this, but I just couldn’t find the time.

Ruby Pumps Candy Cane 2

I have seen loads of nail art using Ruby Pumps. It really is the perfect red! I would describe it as a dark red jelly loaded with teeny tiny red glitter. The glitter is not as dark as the jelly so it has a nice bright shine from within. I love a good red, but red with gorgeous glitter is even better!

Ruby Pumps Swatch

I’ve got a little extra for you today. A tutorial video! Please be forgiving as I am a complete novice at these types of things. Mr. Nailinator deserves a huge round of applause for being such a darling, I would never have even tried this if  he hadn’t promised to help me figure out how to get it edited and uploaded on YouTube. I’ve received a lot of requests for tutorials so, I figured I’d give it a try. Let me know what you think.

1. Place striping tape over dry base color.
2. Use orange wood stick to secure tape to nail edge.
3. Apply white polish.
4. Quickly and carefully remove tape.
5. Allow to dry then apply topcoat.

What is your favorite holiday inspired nail art? I’m looking forward to something extra flashy for the New Year!

Have a great day!
Rachael

11 Dec

Girlstuff Blues with Icicle Tips

Hi everyone!

Just a quick snippet tonight as I’m trying to get to bed at a somewhat decent hour. I posted a little teaser for these on my Instagram last night and now I’m happy to share this lovely nail art.

Girlstuff Blues with Icicle Tips

I started with two easy coats of Girlstuff Blues. Blues was a dream to apply. It evened itself out nicely and dried quickly to a very shiny finish. I used a striping brush and Jocarste’s silver glitter to add the icicles on the tips of my nails. Pretty cool, huh? (Pun intended!)
These are the only icicles I’ll be seeing this holiday season as it is always warm here near the equator. Oh well, I still enjoy wintry nail art.

Macro Shot of Blues with Icicle Tips

I’ve got a little tutorial video I made for my next nail art post, but I’m still trying to figure out the best way to edit it. I’m hoping to share it this weekend. Are y’all having a great week so far?
Keep smiling!
Hugs,
Rach

04 Dec

Holly Jolly Christmas Stamping with OB19

Hello loves!

I’ve got another quick post for you this evening to share these super cute nails I have been sporting for almost a week now.

Holly Jolly Christmas Stamping nail art

Don’t  you think they look like Christmas wrapping paper? They turned out so cute and were very easy to do. I applied my gold polish then added stamping using a no name brand opaque green polish I have in my stash. I used a small dotting tool to make the red holly berries. The holly image is part of the OB19 stamping plate which I purchased last year from Myonline Shop. This image is just perfect for Christmas nail art. It is loaded with great images. I used the two snow flake images for some nail art last December. I also used the Christmas tree image for some simple nail art on The Bookworm last night. You can see those if you check out my Instagram account.

OB19 Stamping plate - Christmas images

As you can tell, I chose to stamp the holly image multiple times to cover each nail. I did start off with this as a simple accent nail (see below). It was a couple of days and several compliments later that I decided I needed holly on all my nails.

Gold nails with Christmas Holly Stamping Accent Nail

I finally got my hands on a clip-on macro lens for my phone. So I took a shot of these just for fun!

Holly Jolly Christmas Macro

Well, I hope you like these as much as I do and that they give you some inspiration for some fun holly-day nails. 🙂
Have a great day!
Hugs,
Rach

%d bloggers like this: