Guest Post by Eeeek! Nail Polish!

Hey gals!
I am ridiculously excited about today’s post. I’m welcoming my very first guest blogger to the blog and boy is she a good one! If you don’t already follow Jemma’s blog, Eeeek! Nail Polish!, then you are missing out on some of the best nail art out there! I was so excited when she agreed to do a guest post for me. On top of her nail art talents, she is a sweetheart. Now I’ll stop my waffling (did I use that word right Jemma?)and let you see her work her magic.
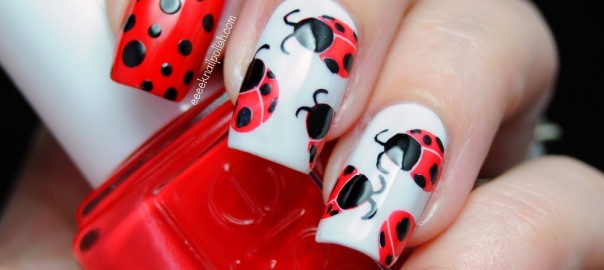
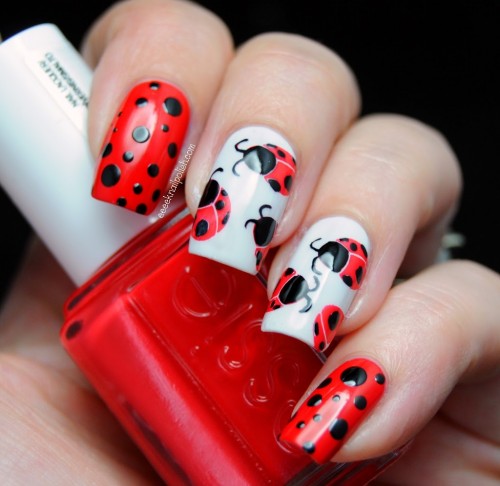
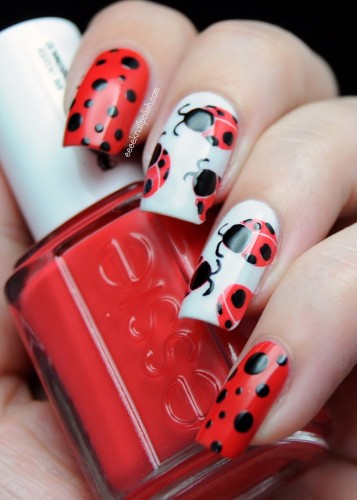
Hey there fellow Nailinator fans! My name’s Jemma aka Eeeek Nail Polish! and I’m so pleased to be here! When Rachael asked if I’d like to do a guest post for her lovely blog I said yes immediately! Not only are Rach’s manis awesome (if you missed her Van Gogh Starry Night mani for the OMD challenge do it right now as it’s just amazing!) but Rach is one of the most sweetest bloggers I’ve had the good fortune to meet! I asked Rachael if there was any particular theme she would like me to do and she cleverly suggested that as it was her Daughter’s birthday in August perhaps I could do a mani based on one of her favourite things and Rach’s little one loves….ladybugs! Or ladybirds as we call them in the UK – don’t know why as they look nothing like birds lol ?!
Ladybugs for a Little Lady
For this mani I used
- Essie ‘Hip-anema’ (red base coat) 2 coats
- O.P.I ‘My Boyfriend Scales Walls’ (white base colour) 2 coats
- Bundle Monster Stamping plate BM 13 ( ladybug design)
- BarryM Gelly ‘Blood Orange’ (stamping colour)
- China Glaze ‘Liquid Leather’ (black detailing)
- Dotting tool and fine paint brush
- Seche Vite
First of all I painted my base colours; My Boyfriend Scales walls is probably my favourite off white creme. It only takes 2 coats and isn’t streaky or patchy at all 🙂 Essie’s Hip-anema (it’s probably just me but I keep reading that as anaemia :-/ …) was pretty much a one-coater, I only did two as there was just the slightest visible nail line after the first coat. I then added a layer of Seche Vite. I did this for two reason, firstly to speed up drying time and secondly to allow me to wipe off any stamping mistakes; if you get a cotton pad with some remover on it and swipe once over the nail it will remove the stamping mishap without taking off the base colour. It won’t be as shiny as before but as you would put more topcoat over the finished stamping it doesn’t matter :-).
The BarryM Gelly Range of polishes are mostly all highly pigmented (there are a couple that aren’t) but this means they are great for stamping! So I used Blood Orange to stamp the ladybugs onto my nails. However this did leave me with a problem; all of the ladybugs were red and were missing their black spots and black antenna and heads. So, using a fine paintbrush and a dotting tool, I added the black details using Liquid Leather . To finish it off I used a dotting tool again and made different sized dots on my index and pinky fingers. Then I added another coat of Seche Vite to seal it all in.
I hope you liked it and big thank you to Rachel for giving me the chance to guest post!
Take care!
EeeekNP x
What did I tell you? I cannot get over how cute these little lady bugs are! Great work Jemma! When my little lady saw them she said “Ooooh! Pahlish nails! Pretty ladybugs. Pretty dot dots (that’s what she calls polka dots).” Then she asked me to do her nails too. Thanks so much Jemma!
You can see much more of Jemma’s brilliant work on her blog or on Facebook.
Have a great weekend!


Oh wow! These are gorgeous! And also prettier than the ladybugs nail strips I tried a while ago.
(^o^)
This is so sweeeeeet!!!! I love it! I very rarely use regular polish when stamping. I need to try that!!!
Oh well done! Very nice 🙂
So sweet and so bright!!!!Great job <3
These are super duper cute!! <3
These are so cute!
Wow! These are so fun….
So beautiful. Perfect!!
wow these are gorgeous
Pingback: Day 31 Honour nails you love… | Break rules, not nails