15 Dec

Ruby Pumps Candy Cane Nail Art (with tutorial video)

Hi gals!

I’m sorry that I didn’t get this posted during the weekend as I had planned. It took longer to prepare the post than I had anticipated, and we had a very busy weekend.

Only 10 days to go until Christmas! I’ve got some serious baking to do this week! My boy has been learning fractions in math, so we will to work together on the recipes and baking as an extra fun school activity. Homeschooling rocks!

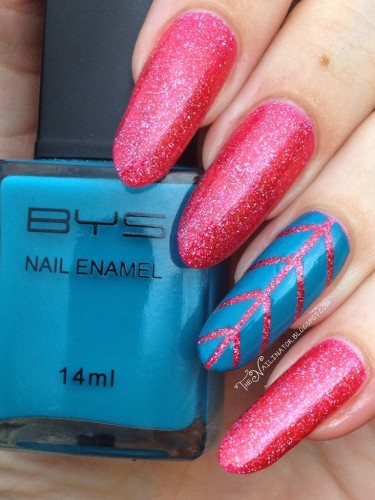
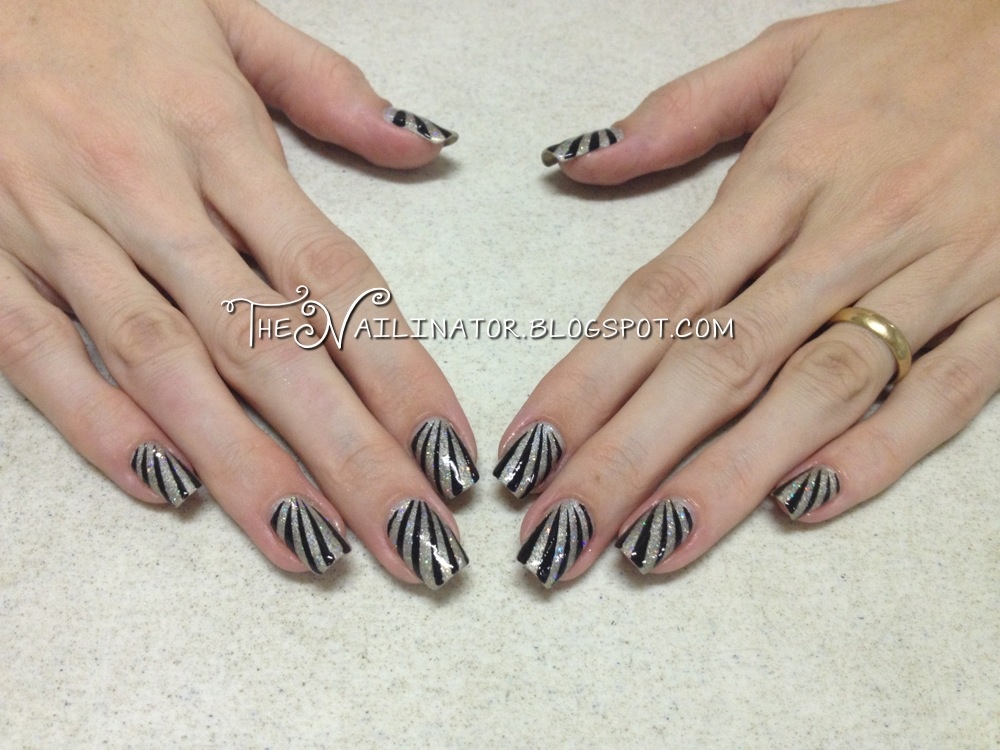
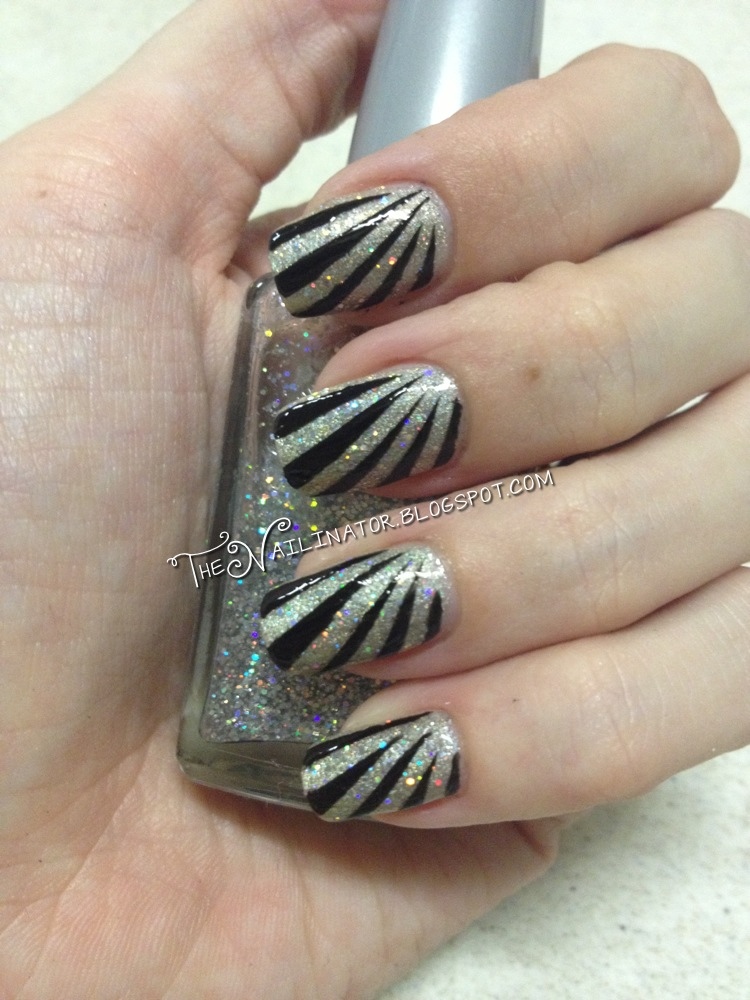
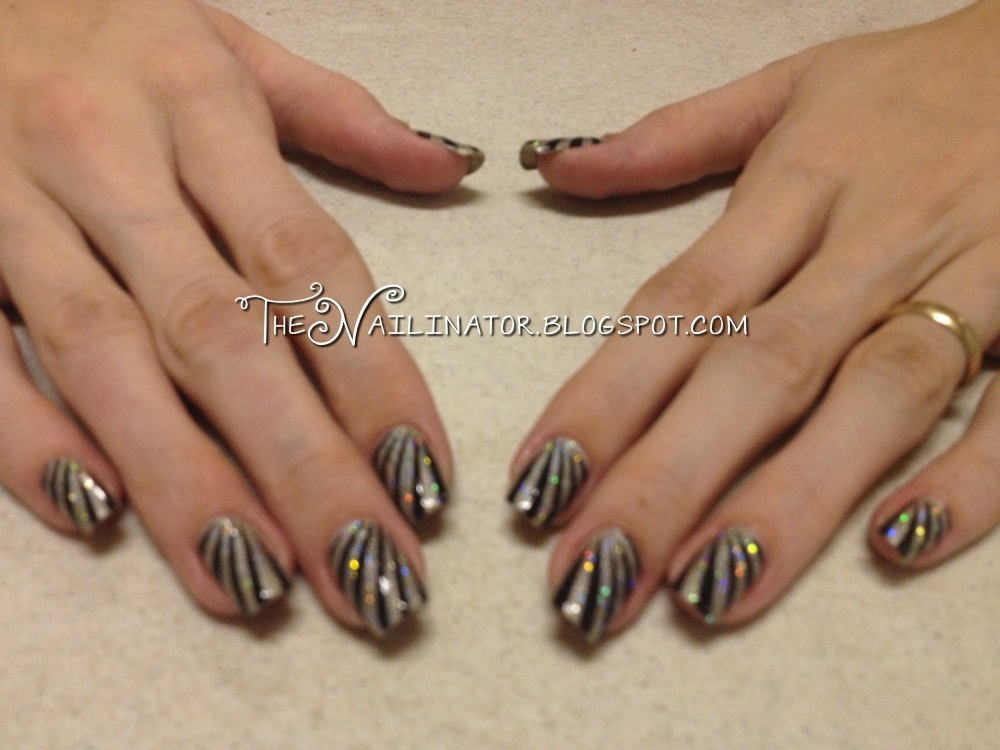
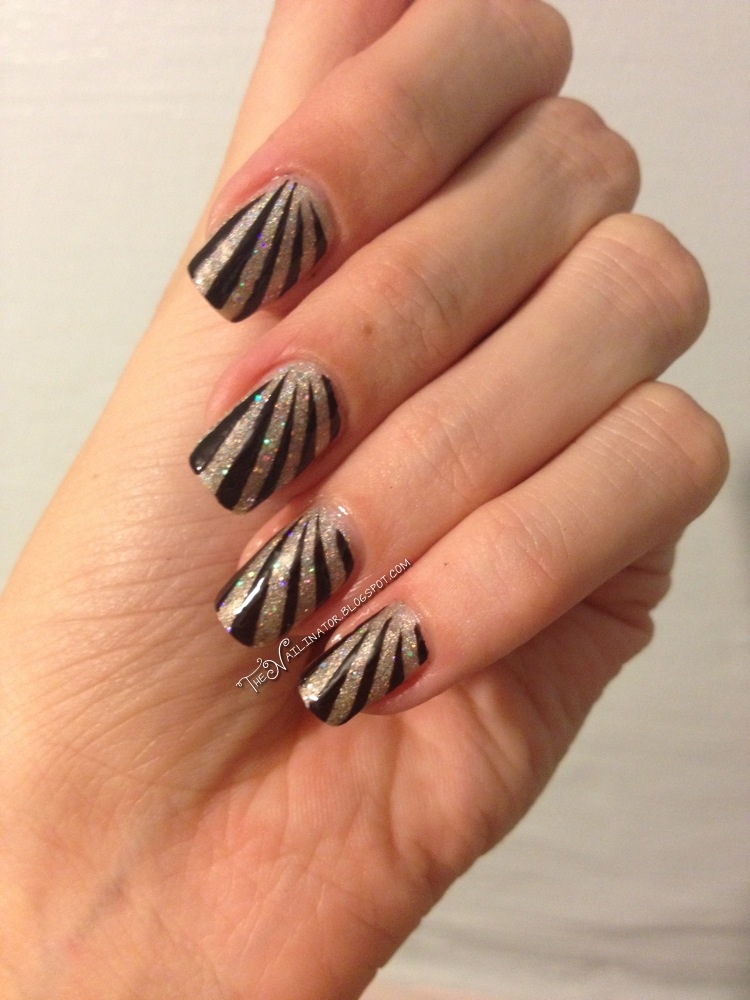
While I was in the US this summer, I got my hands on China Glaze Ruby Pumps which has been a lemming of mine since I saw Jemma of Eeeek Nail Polish post her swatch of it. I have been saving it for Christmas time. I added a nice little candy cane accent nail just for fun. I planned to do all the nails like this, but I just couldn’t find the time.

Ruby Pumps Candy Cane 2

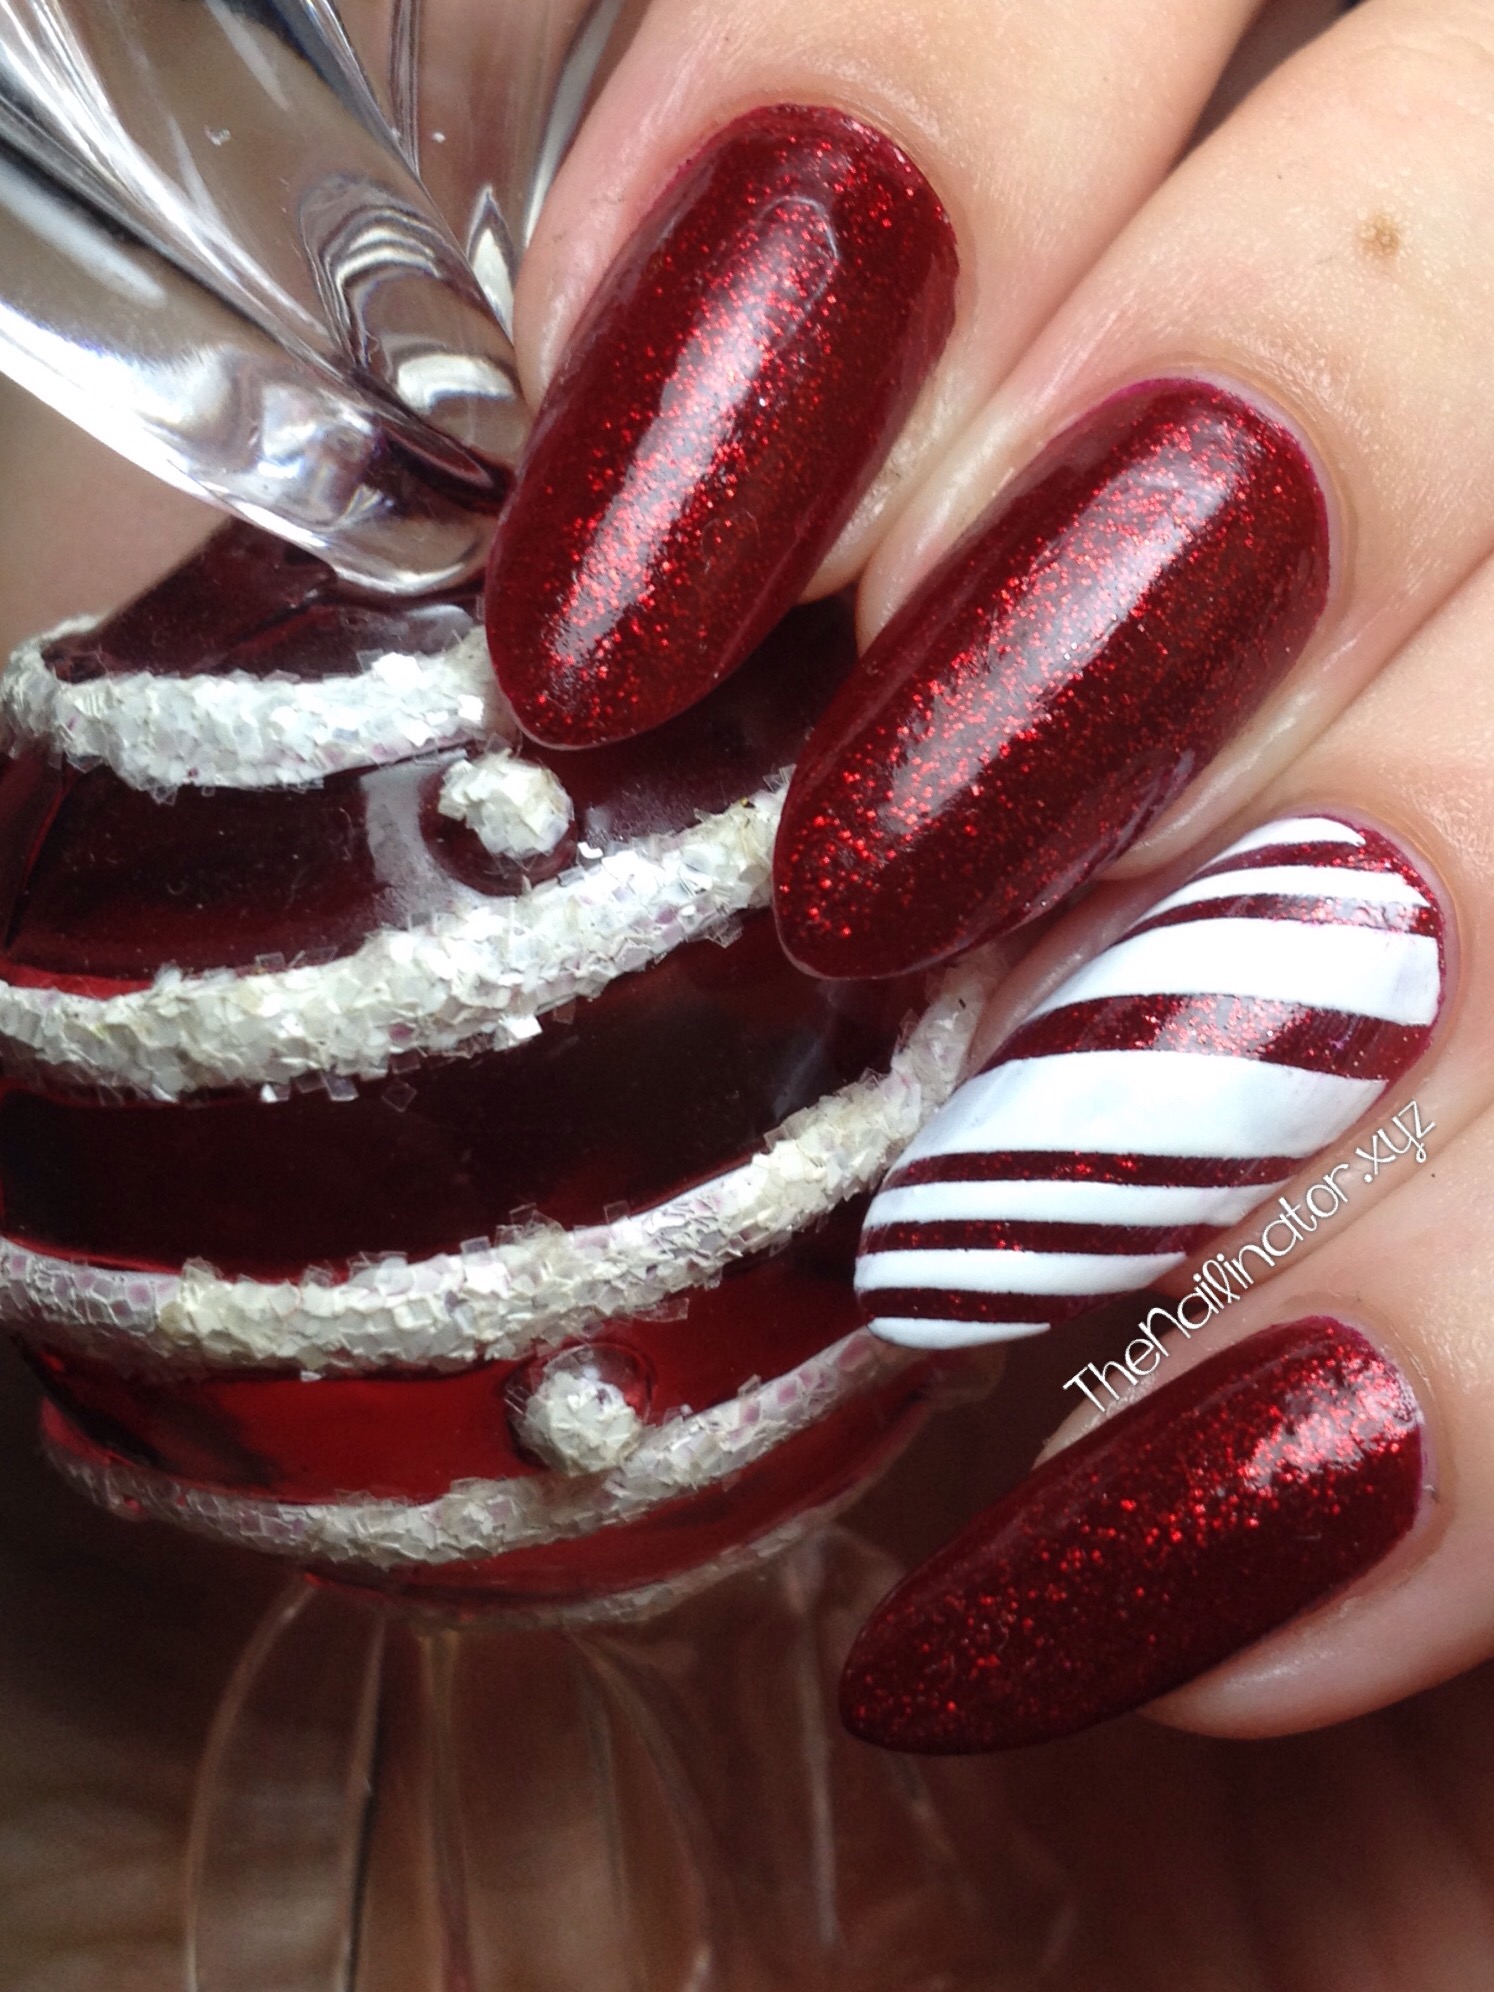
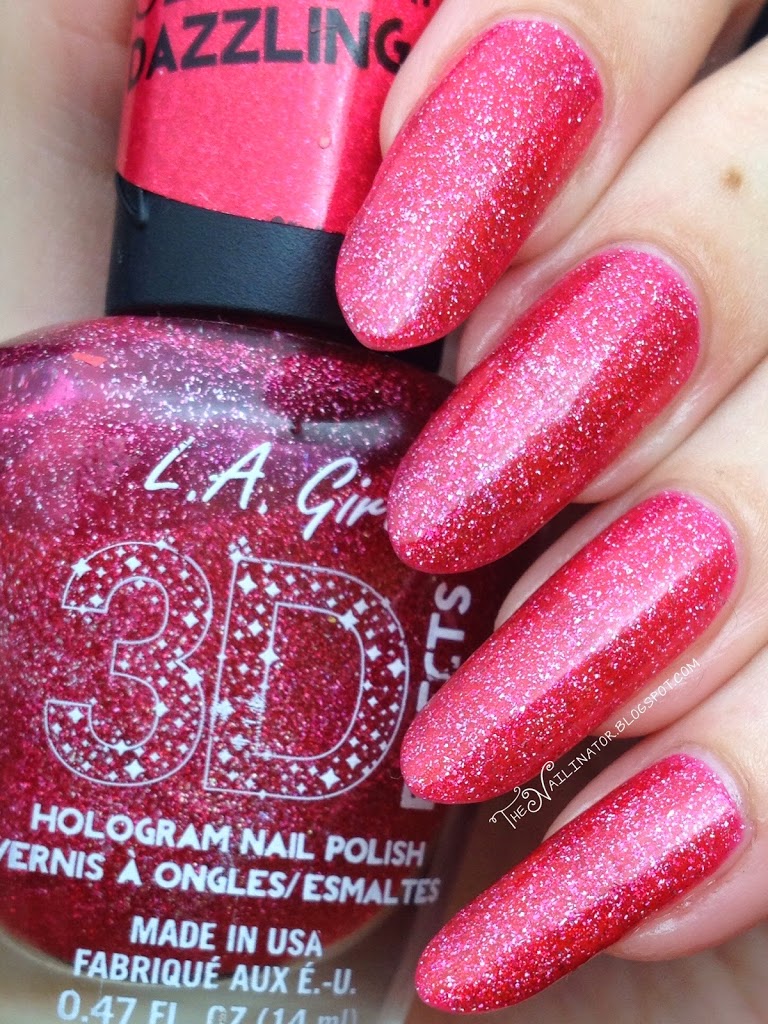
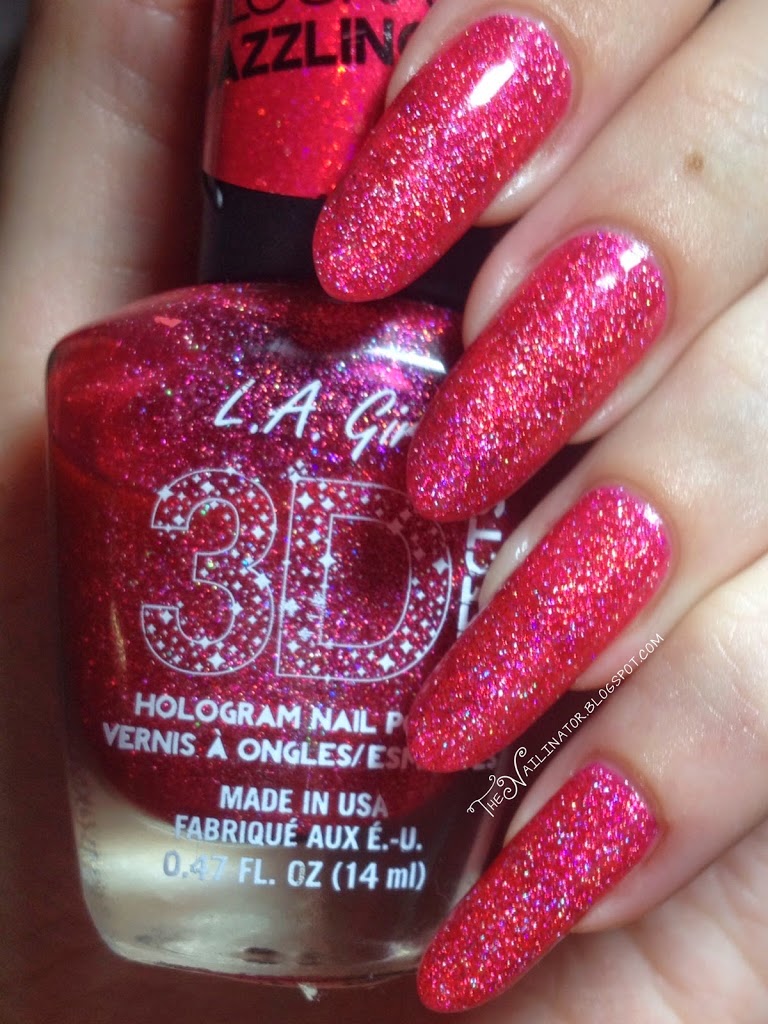
I have seen loads of nail art using Ruby Pumps. It really is the perfect red! I would describe it as a dark red jelly loaded with teeny tiny red glitter. The glitter is not as dark as the jelly so it has a nice bright shine from within. I love a good red, but red with gorgeous glitter is even better!

Ruby Pumps Swatch

I’ve got a little extra for you today. A tutorial video! Please be forgiving as I am a complete novice at these types of things. Mr. Nailinator deserves a huge round of applause for being such a darling, I would never have even tried this if  he hadn’t promised to help me figure out how to get it edited and uploaded on YouTube. I’ve received a lot of requests for tutorials so, I figured I’d give it a try. Let me know what you think.

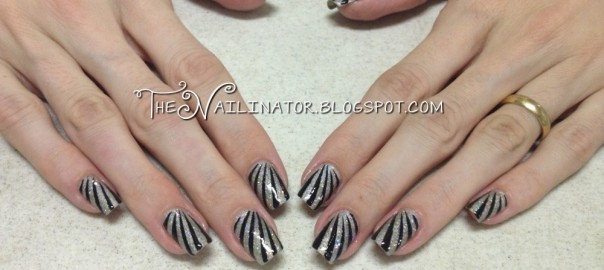
1. Place striping tape over dry base color.
2. Use orange wood stick to secure tape to nail edge.
3. Apply white polish.
4. Quickly and carefully remove tape.
5. Allow to dry then apply topcoat.

What is your favorite holiday inspired nail art? I’m looking forward to something extra flashy for the New Year!

Have a great day!
Rachael

31 Jul

I’m back!

Hello ladies!

I decided to take a blogging hiatus as we visited our family and loved ones in Texas. We had an amazing trip filled with much fun, laughter and lots of love. We are back in Cebu now, and have (mostly) gotten over the jet lag. I’ve been unpacking, dusting and cleaning everything! I’m about ready to get back to blogging. I’m going to have to find a new rhythm as we also just started our school year. I am continuing to home school and my boy is starting 1st grade. Fun, fun, fun!

Anywhoooo… While the blog has been on stand-by, I HAVE been posting stuff on my Instagram account. In case you don’t follow me on Instagram, I thought I would share some of the very simple looks I have been sporting the past 3 months. I appreciate you sticking around despite my absence on the blog. I decided to soak up as much family time as possible with those we see so rarely. I have lots of new goodies to share with you as I get back into the swing of things. Lemmings were CRUSHED!

Have a fabulous day and thanks for tuning in!
Hugs,
Rach

Girl Stuff – Wild Berries
L.A. Splash Tailscales
I Love Nail Polish Brand  (ILNP) Molly – So stunning!
Color Club – Harp On It
Nail Ritz Nail art Pens and Pueen Stamping
L.A. Girl Purple Effect
16 Apr

Girl Stuff Soirée (with Wild Berries)

Hi gals!
I feel sad that I haven’t been able to post as much as usual lately. I’ve been nursing a cough/cold for 2 weeks now, and we have been preparing for our trip to Texas. We leave in the morning, and while I am not looking forward to the long trip, I am looking forward to being with our family and friends there.

I’m so thrilled to finally have Girl Stuff Soirée in my collection. It’s been on my lemming list since I saw it in December. I finally ordered it a couple of weeks ago, and of course, I had to use it immediately. It’s a teal jelly base loaded with teal, green, purple and gold glitter. There is also a splash of holo in it that is lovely. I applied 2 coats and enjoyed the sparkly, textured finish for a couple of days. Then I applied top coat and loved it even more. The glitter really sparkles like crazy with top coat. It needed two coats to make it smooth.

Girl Stuff Soirée with Wild Berries and top coat

For my accent nail, I placed striping tape on the nail and then added one coat of Wild Berries (which Girl Stuff sent me as a bonus from their new Summer Collection. Thanks again, Girl Stuff!) and peeled off the tape before it could dry. Wild Berries is a pinkish purple that is very flattering.

Girl Stuff Soirée swatch


Here is a shot of Soirée on its own, without topcoat. Both Soirée and Wild Berry dried quickly and were easy to use. Girl Stuff polishes are 3 free too so that is great! Check out their FB page or Instagram to see more of their pretty polishes.

I think you will see Wild Berries again soon as it made in into my luggage for the trek across the globe. Believe it or not, I’ve only packed a few polishes to bring. I am planning to pick up a few in the US, so I tried to limit myself to about 10. Success!

That’s all from me for now. I’m going to try to get a bit of sleep before we have to load up and head to the airport. I’m excited because the hubby bought me an awesome “Greatest Hits of the 1950’s” album for me for the trip in honor of our anniversary which is also today. Nine years baby! Woohoo! Next time you hear from me, I should be in Texas enjoying some Mexican food, Dr. Pepper, and shopping (with coupons!) at Kohl’s!

I hope you have a fabulous day!
Hugs,
Rach

06 Apr

L.A. Girl 3D Effects Dazzling Pink with BYS Fool’s Paradise Accent

Hi Gals!
Happy weekend! I’ve had an annoying sinus headache all day (all week off and on actually) but it has still been a nice day. The kids spent the afternoon with my parents and they are spending the night so I’ve had a little extra dose of peace around here. I spent it well this evening watching the 2nd half of The Fellowship of the Ring with Mr. Nailinator. He’s got the “platinum extended edition” so we watched all the extra scenes. I just recently decided to read the trilogy and I am enjoying them so much. I read the Hobbit as a young girl and it wasn’t my cup of tea back then. But I am loving the books now.

I’ll stop babbling now and get on to the main event. This isn’t a book blog after all. I’ve got a simple but fun look to show you today. I started with 3 thin coats of L.A. Girl 3D Effects Dazzling Pink. For my accent nail, I placed striping tape over the pink in the pattern seen below and polished over it with one thick coat of BYS Fool’s Paradise which was gifted to me by the lovely Rina of Simply Rins. (Thanks again Rins!) I quickly and carefully peeled off the striping tape and ended up with this.

L.A. Girl 3D Effects Dazzling Pink with accent

Cool huh?  I am loving accent nails these days. I have tried some edgy things I feel I might not yet be able to pull off on all ten nails. It’s easier to commit to something bold on two nails than on ten when you are unsure if you can handle it.

I’ve got to tell you more about my base color. I’ve raved about these LA Girl polishes before, and I’ll keep doing so because they really are some of the best out there. Dazzling Pink is the least opaque of the ones I’ve worked with so far. (I’ve used all but the purple, silver and orange) Three coats builds nicely, dries quickly and is just gorgeous. The sparkle and depth in this (and all the polishes in this line) is to die for. I’ve included a fuzzy picture in direct lighting so you can see the holo sparkle. Additionally, I wore this for a whole week with minimal tip wear. Two Dazzling Pink thumbs up from me!

L.A. Girl 3D Effects Dazzling Pink swatch
L.A. Girl 3D Effects Dazzling Pink in different lighting

I hope you have a great weekend and that you get to spend it with those most dear to you.
Hugs!
Rach

24 Apr

Elegant Rays of Holo Goodness

Hello new followers!

Today’s challenge prompt is a tape manicures. I haven’t had much experience with tape manicures in the past but despite difficulties I persevered and came up with this look that I love, love, love!
I started off with two coats of BK Holo #1 and then added some Wet N Wild Kaleidoscope glitter. I went ahead and let that dry overnight and today I cut up some scotch tape and used my Chic Black Velvet to add the black. I think they turned out awesome! I have several pictures for you today including a fuzzy one to let you see the holo glittery goodness! My sweet hubby, who I enlisted to help take pictures this evening, keeps commenting on how great they look.

Let me know what you think in the comments. I know you are jealous! 🙂

%d bloggers like this: