Almond Blossoms Nail Art
Hi Girls!
Sorry for the break in our regular programming. I got hit by a nasty cold and suffered through a 6-day-long sinus headache. It was pretty horrible. I’m feeling better now though and only have a mild headache, so I thought I’d get on here and share these with you today.
Have you ever decided to do a design, get all excited and worked up to do it, only to start regretting it as you begin to nail it down? (See what I did there?) That’s what happened to me when I embarked upon this challenge.
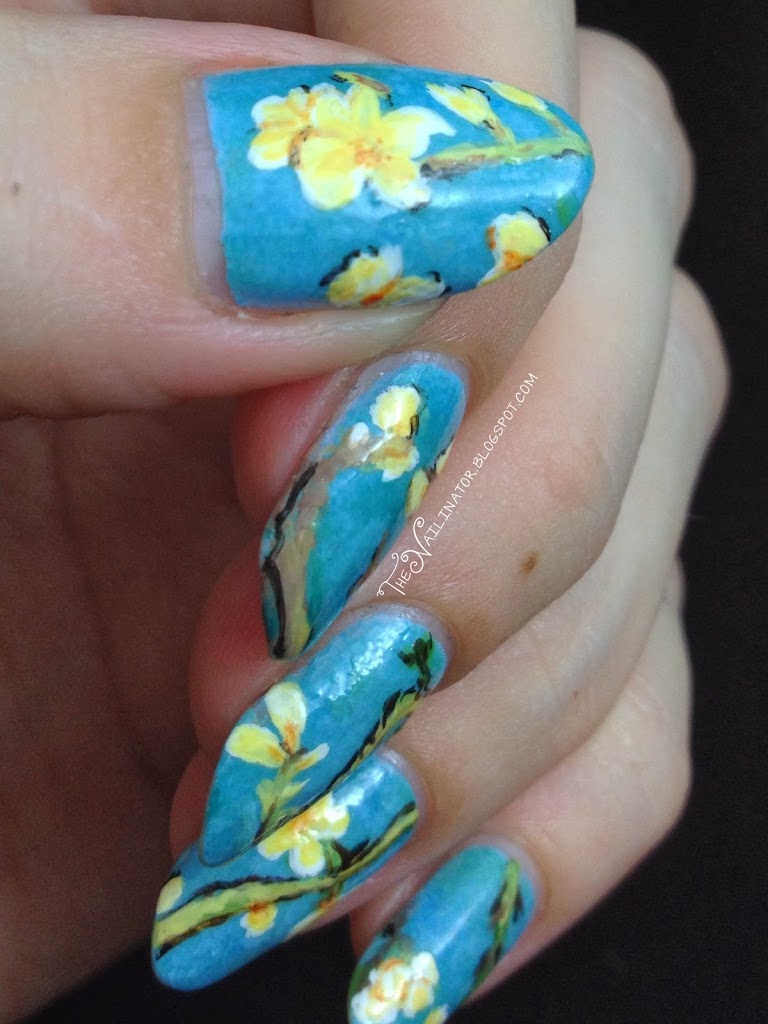
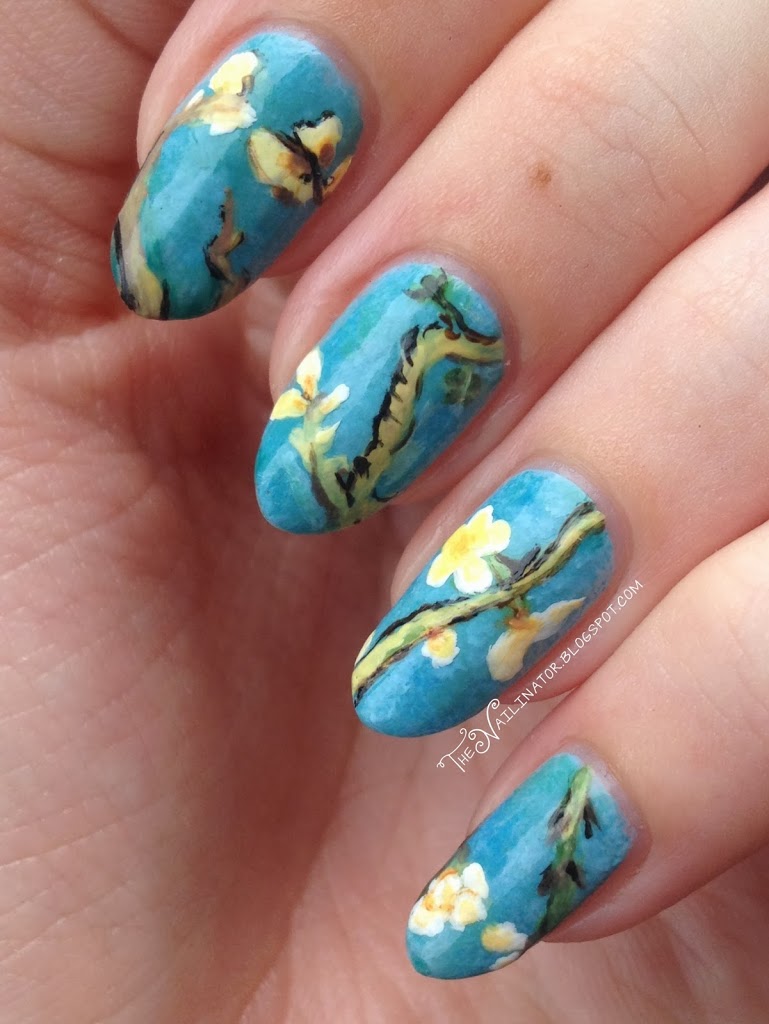
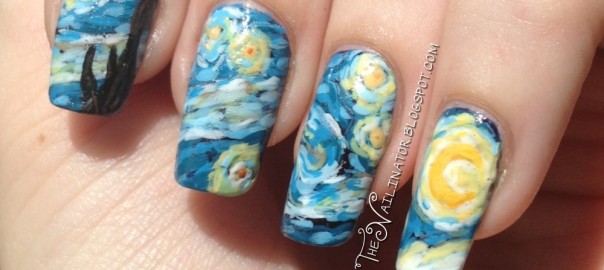
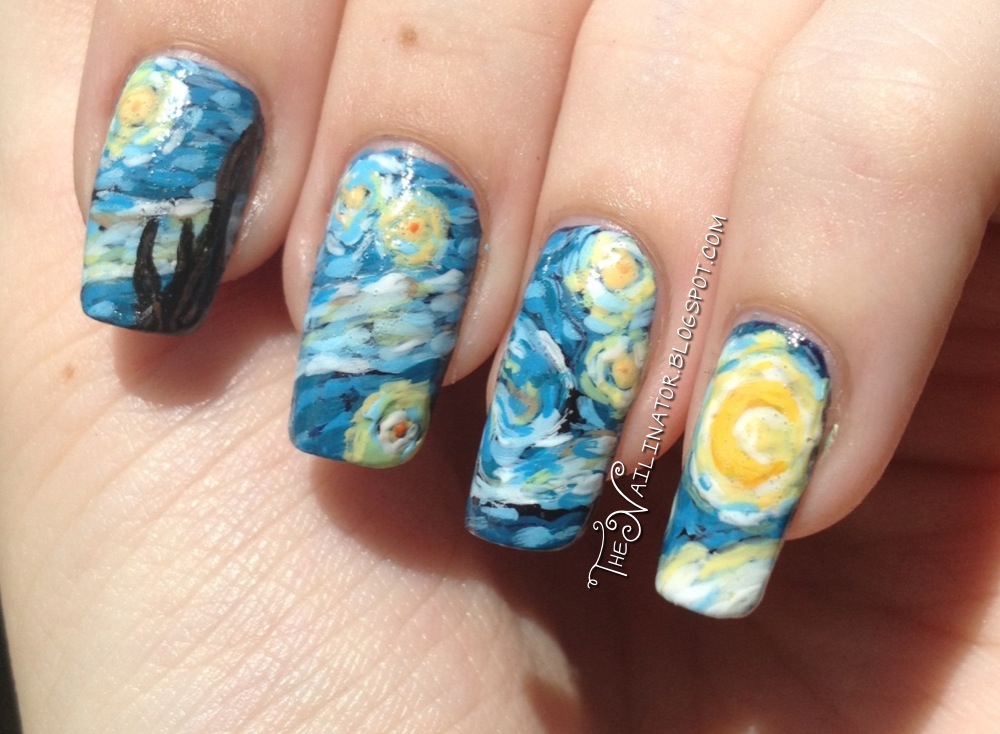
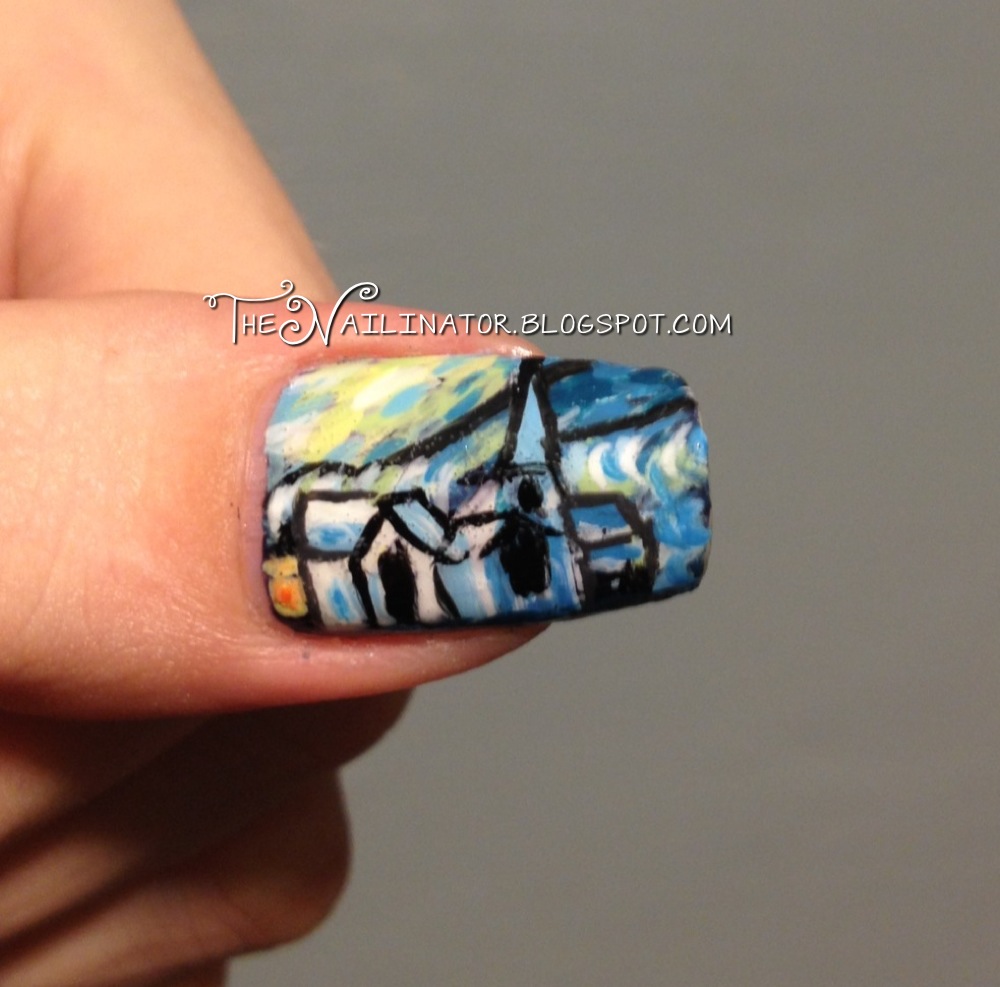
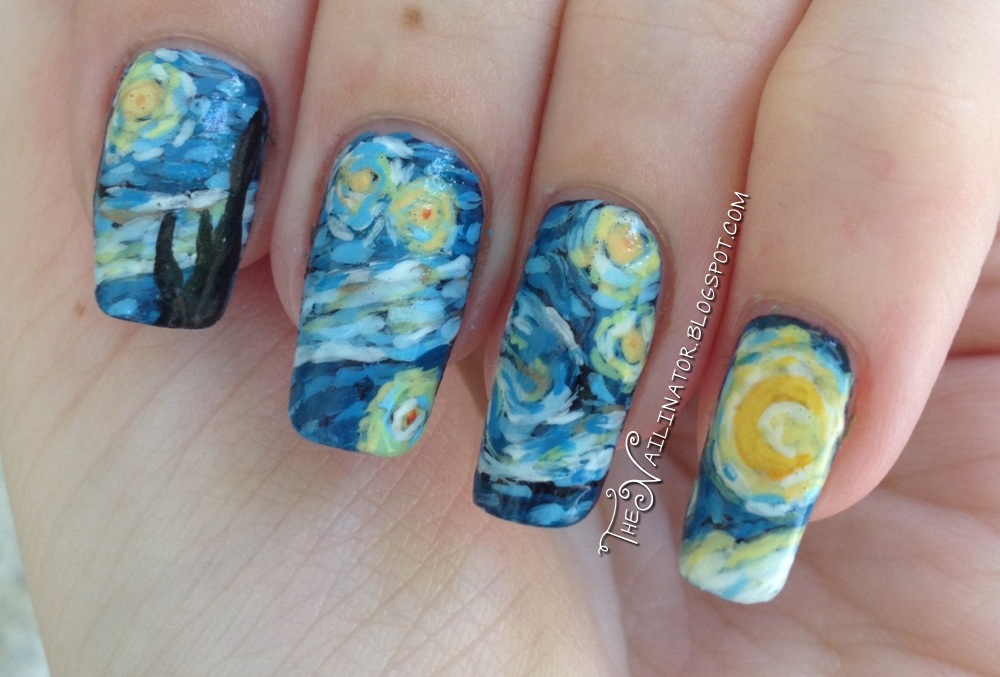
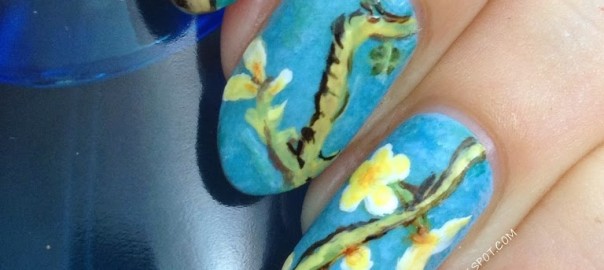
If you have been around a while, you know my favorite piece of art is Van Gogh’s Starry Night. I like it so much that I dedicated quite a bit of time to paint it on my nails. My next favorite is his Almond Blossom painting. The very talented Jacqui of Craftynail did a look inspired by this painting last year and it turned out lovely.
I wanted to challenge myself and see if I could do another forgery, and I kept coming back to Almond Blossoms because I just love everything about it. So I decided to go ahead and give it a shot too and let my OCD kick in and try to match the colors and technique as best I could to the original. See for yourself and tell me how you think I did.

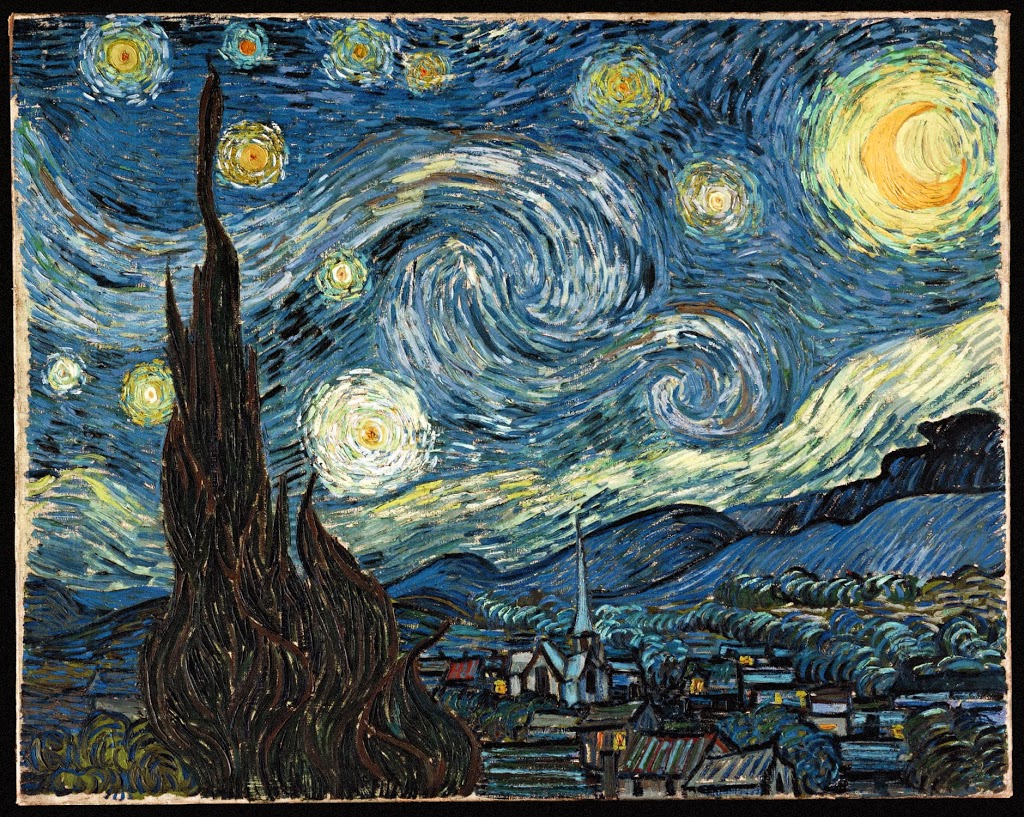
Here is the original just for reference. There’s nail art and then there is nail ART! Please do take a moment to notice the detail work. 😉
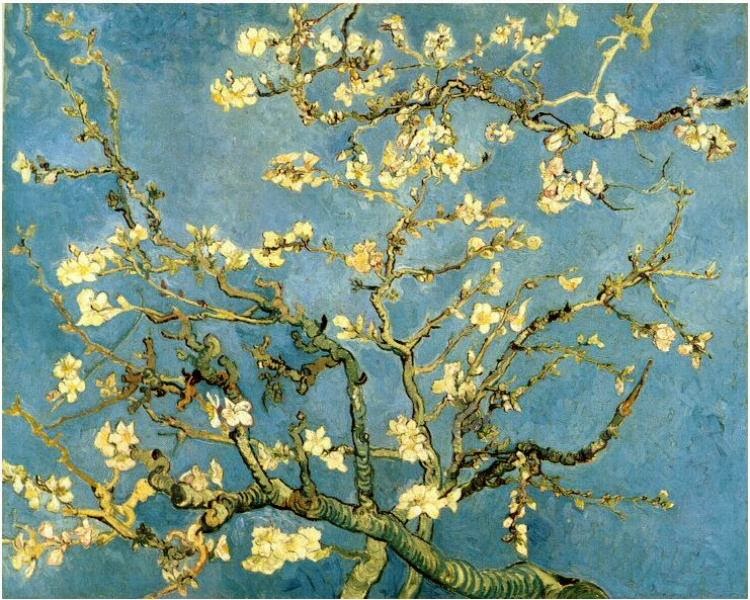 |
| Source Wiki |
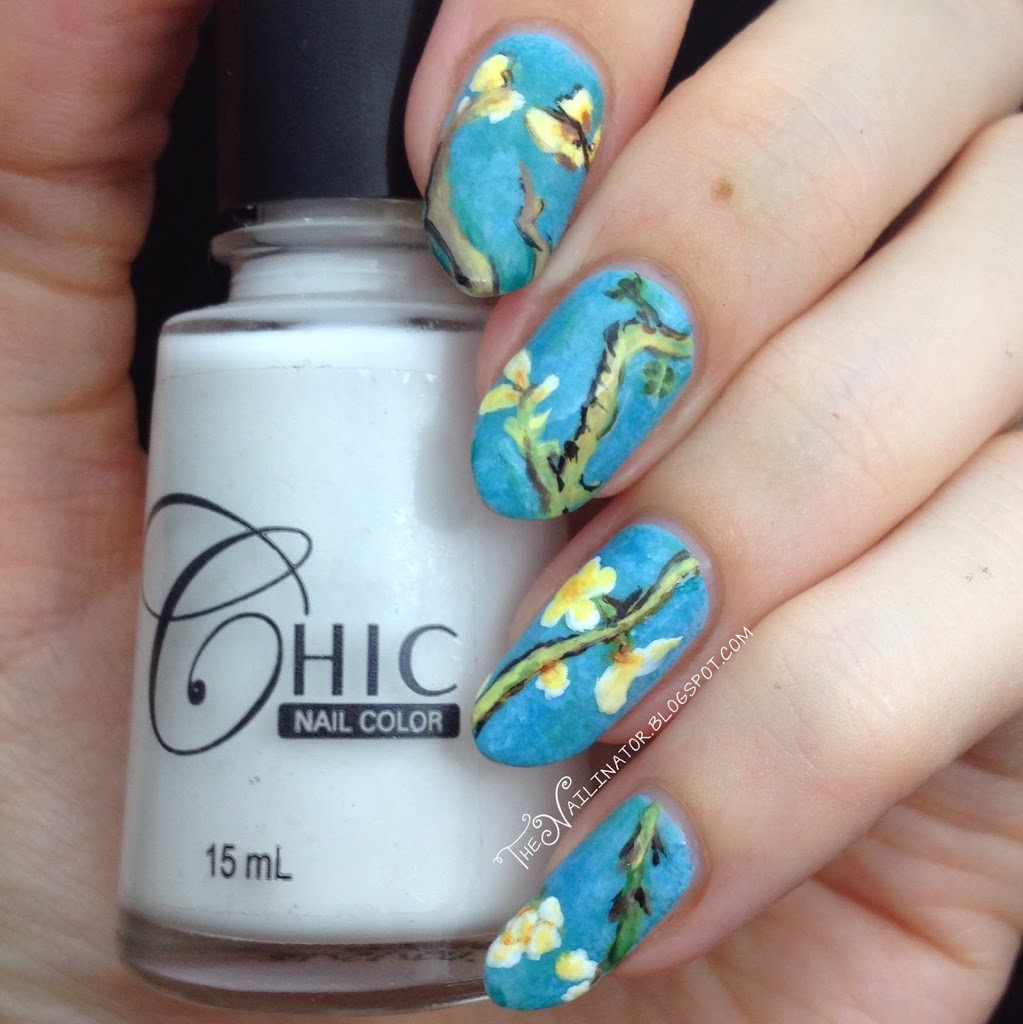
I had planned to feature this awesome design for my blogiversary, but I was so run down and tired that I only had time to get the background part done and had to add the details a couple of days later. I used 15 polishes total for this look, plus some black and dark brown acrylic paint for a few spots on the branches. That’s almost ALL polish! Acrylic is much easier to work with if you do detailed work as it doesn’t dry too quickly, but it also does not smooth out and blend with top coat like polish does. So polish is always my preferred medium.
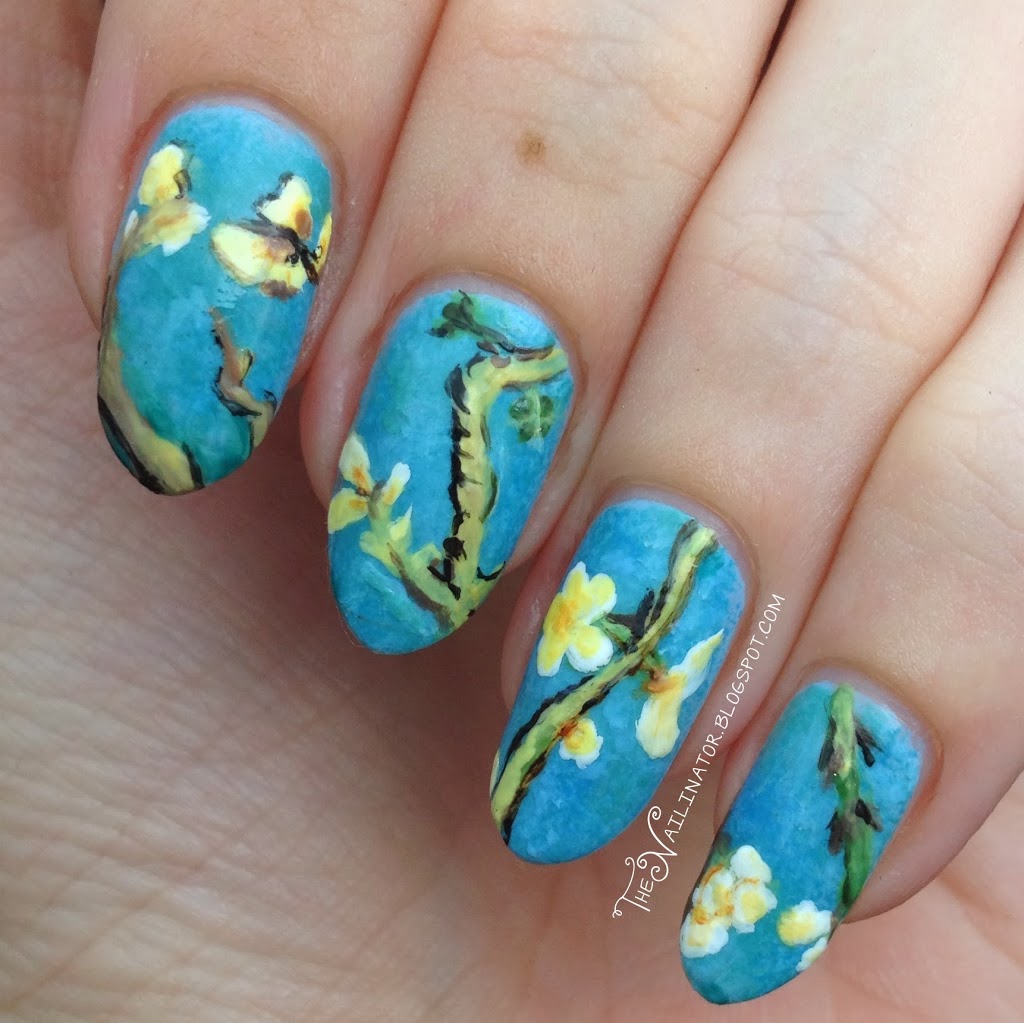
If you look closely, you will see that each of the nails on my left hand are copied from sections of the actual painting. (Bonus points if you can spot them!) I worked more loosely with the designs on the right hand as I didn’t want to be up all night trying to match it so closely.
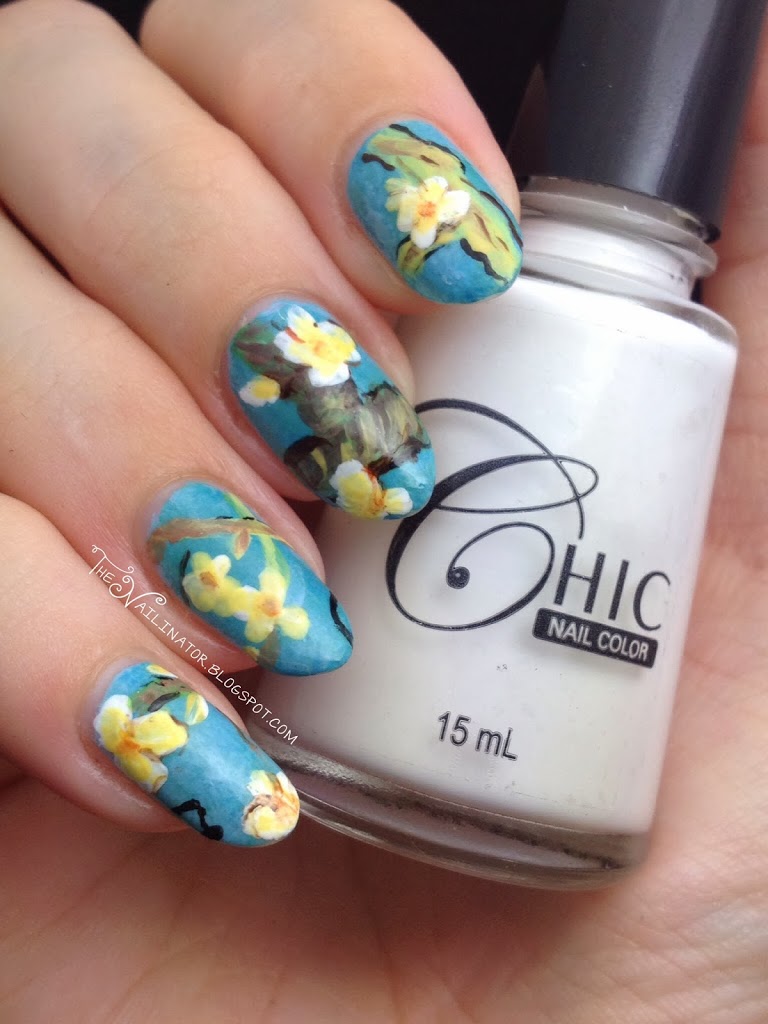 |
Well, I hope you love these as much as I do. I will leave you with a few more pictures as I just couldn’t bear to leave them out. What is your favorite work of art? Have you done any designs based on works of art? Please leave a link below because I would love to see. Have a fantastic day and don’t forget to make someone smile.
Hugs,
Rach