27 Dec

Caronia Tea Rose Christmas Nails (and My New Nail Shape)

Hi Gals!

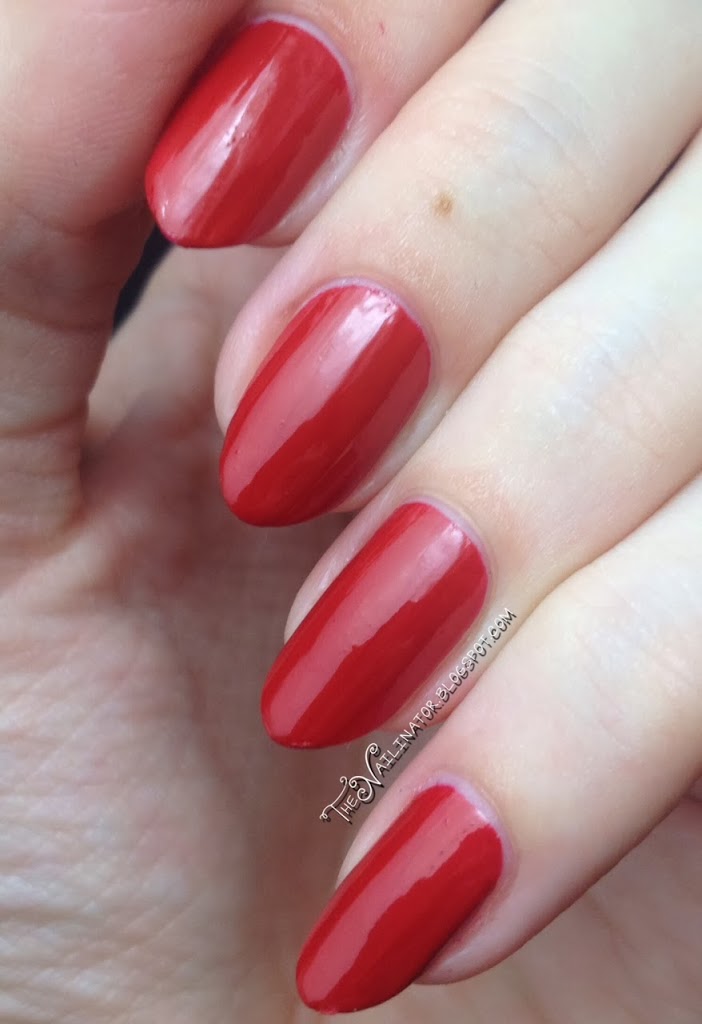
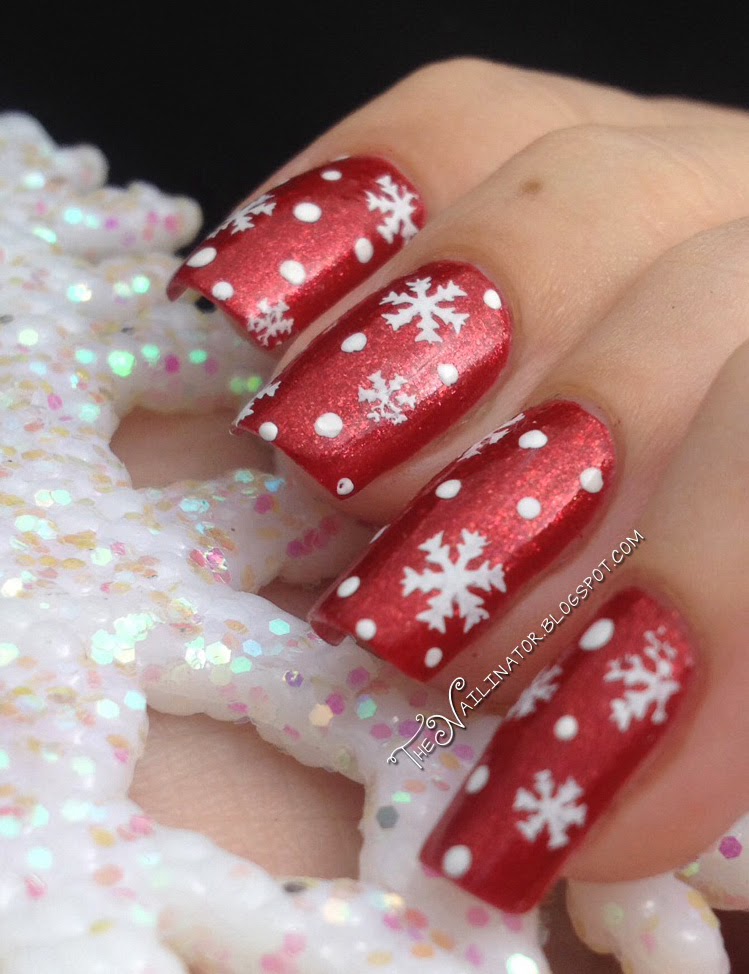
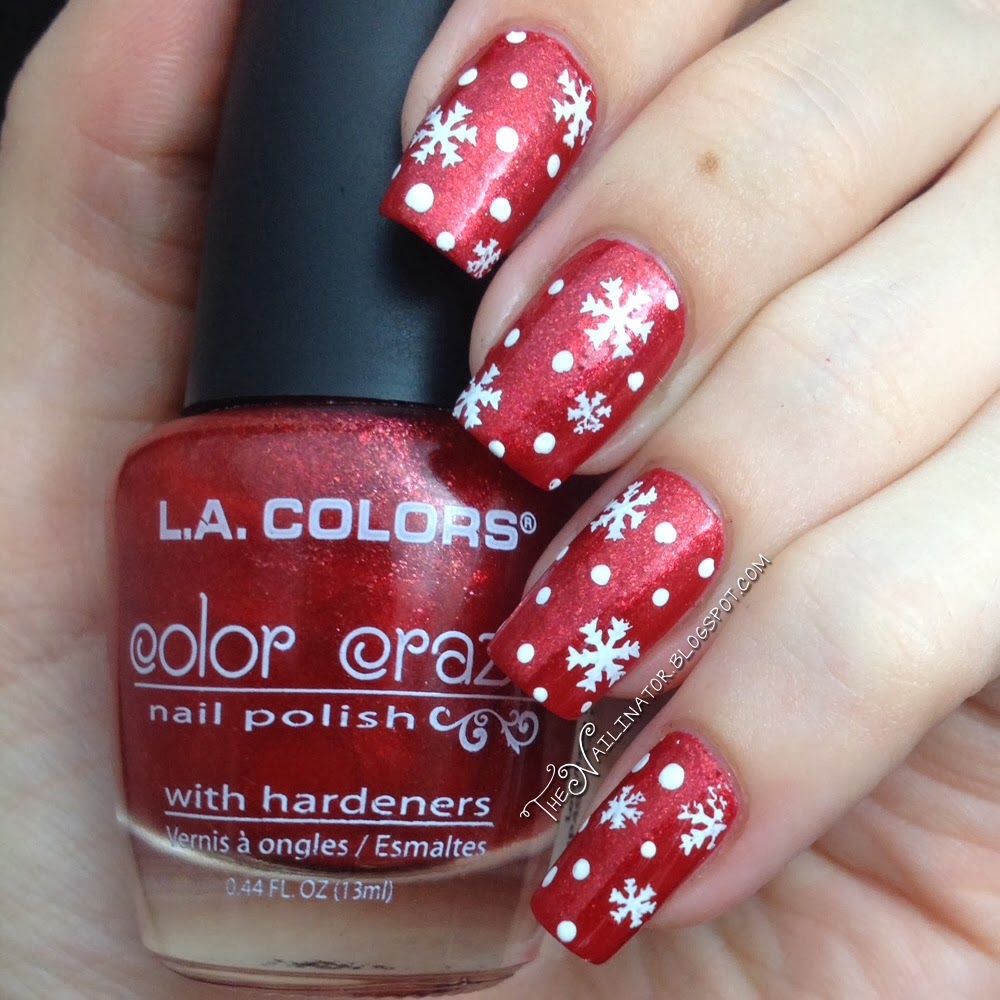
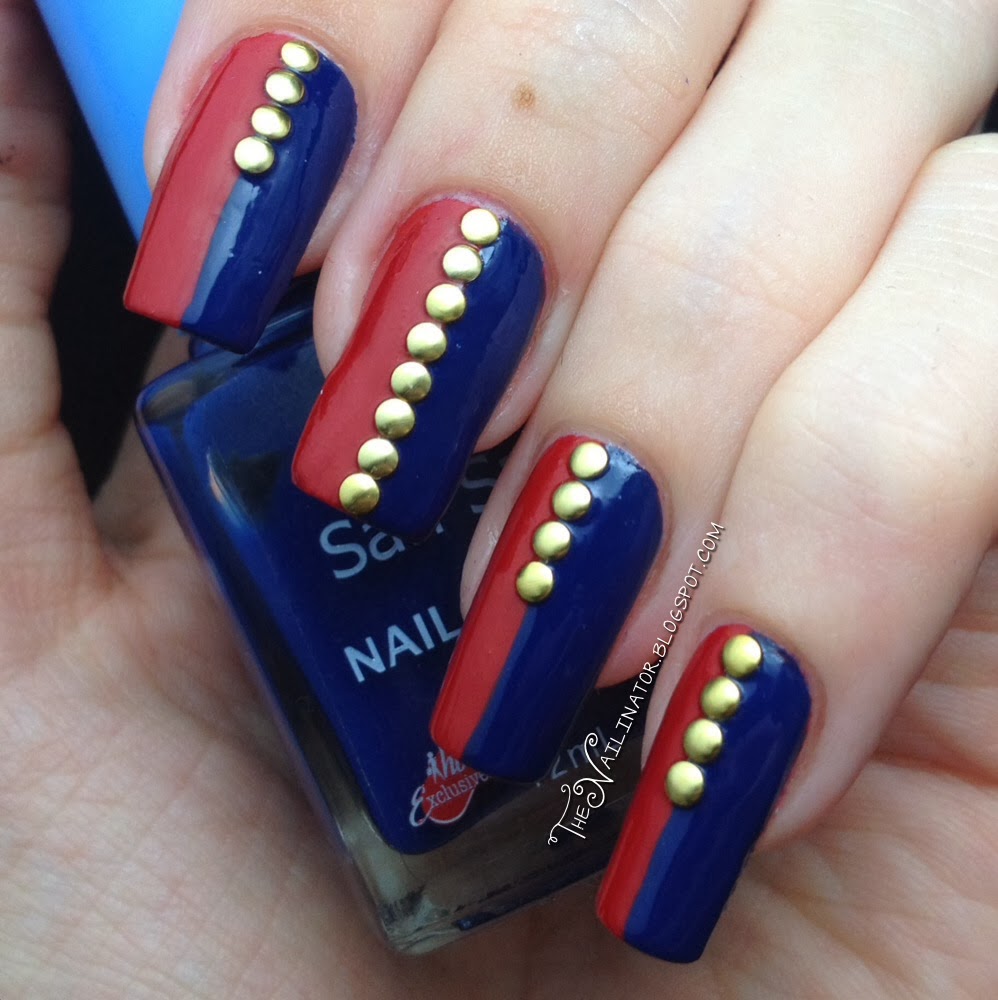
I finally did it! I have been wanting to try a different nail shape for such a long time. It has taken me months to work up the courage to take the plunge and file away, but I finally did it! When I initially finished filing these I had them pointier than this, but I wasn’t quite ready for that yet so I filed the points down a bit. These are definitely an easier transition point. Tadaaaaaa!

Caronia Tea Rose with green rhinestones and foil
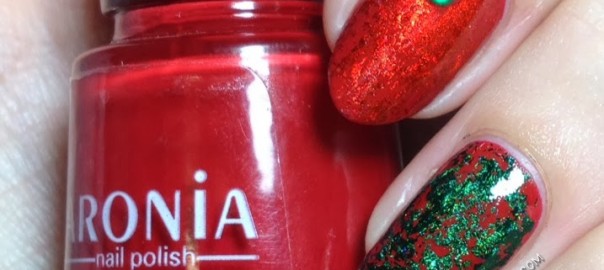
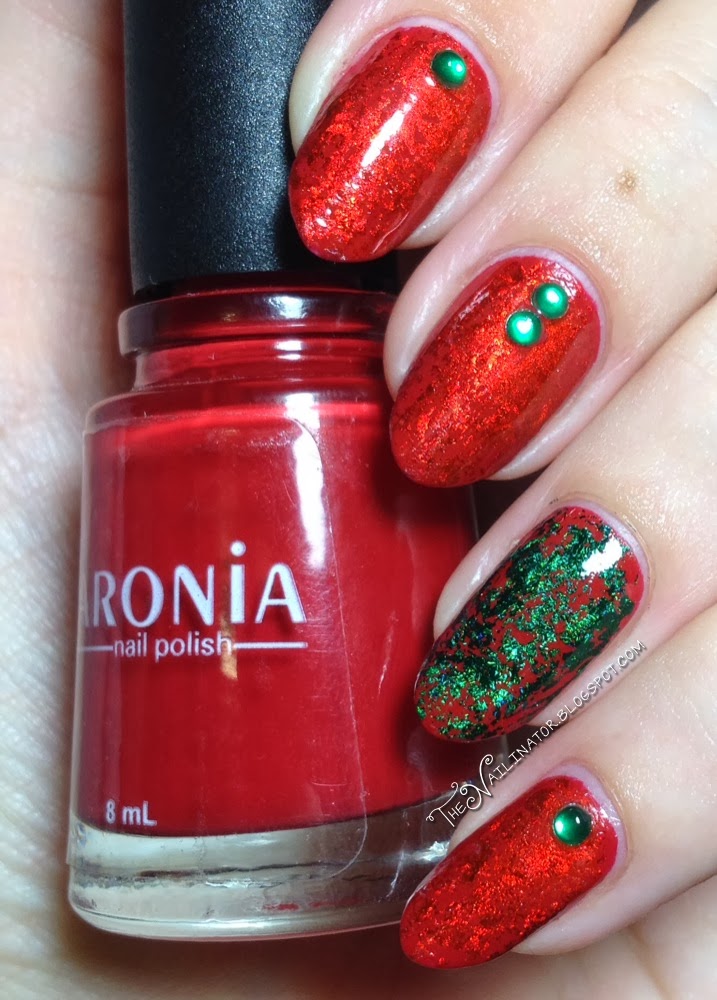
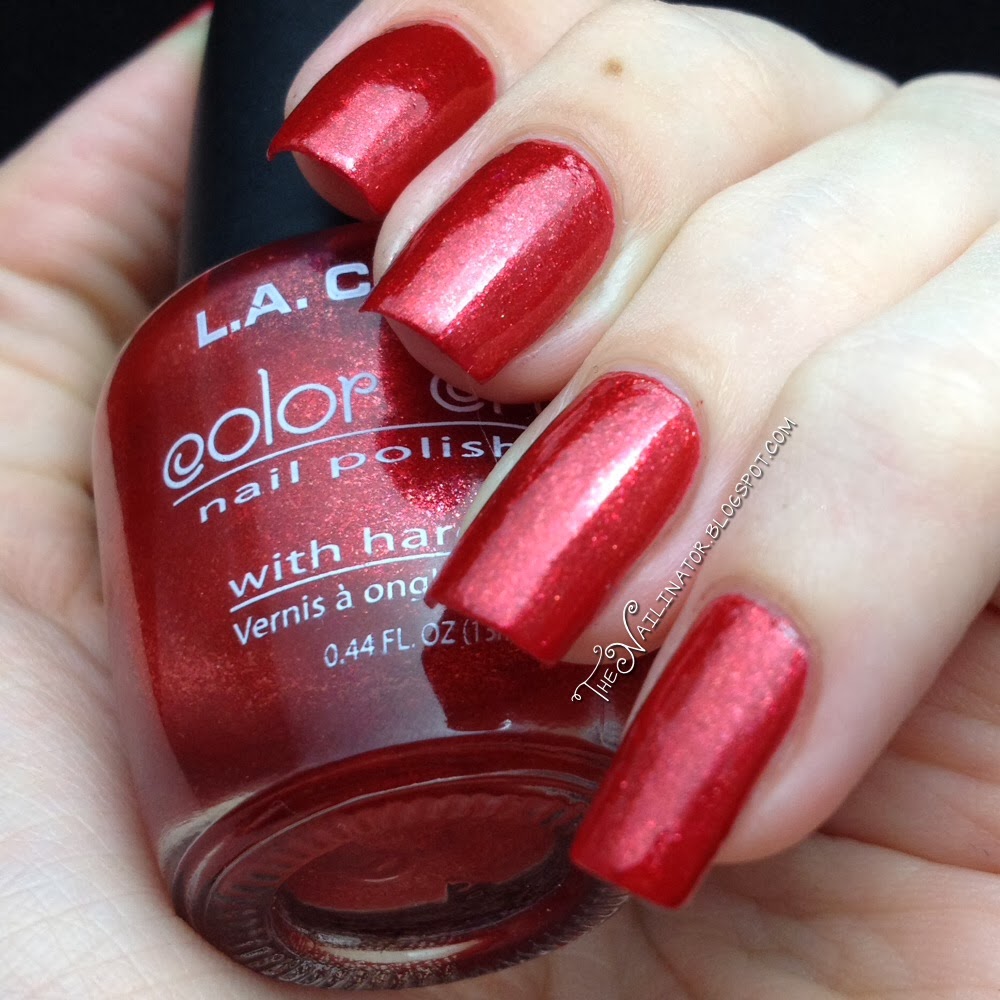
I do like them a lot, but I think I will like them even more when I get the shape just right. For this look, I started with just one coat of Caronia Tea Rose for my base. I have said it before and I’ll say it again… I LOVE this polish. How many reds are there out there that have this kind of coverage in one coat? Do you have one? Or a red that is a creme? All the other reds in my collection take 3 coats and are jelly-like or shimmery and thin. This is practically a one-coater. The formula is on the thick side so it makes application a bit tricky, but using a little care and taking your time makes all the difference. After Tea Rose dried, I took out my clear coat and after wiping most of the polish off the brush, I applied some over the red with random, splotchy strokes. Then after just a few seconds, I applied nail foils (#32-green on the accent nail and #17-red on the rest) that I purchased from Blooming Nail Cebu. I added some green rhinestones I purchased off Amazon quite a while back.
Caronia Tea Rose swatch
What do you think of my new shape? I’m not sure why the middle finger ended up looking so round compared to the others. Perhaps it’s due to my very limited skills in shaping nails. Here is hoping I will soon have perfected the shaping, and they will all look the same. A girl can dream, right?
These are the nails I sported on Christmas Day. They were perfect for the day, and my new nail shape was a big hit with the family. I wanted to share a couple of nail related gifts I received over the holidays too.
Colored feathers, glitter, and pearl studs
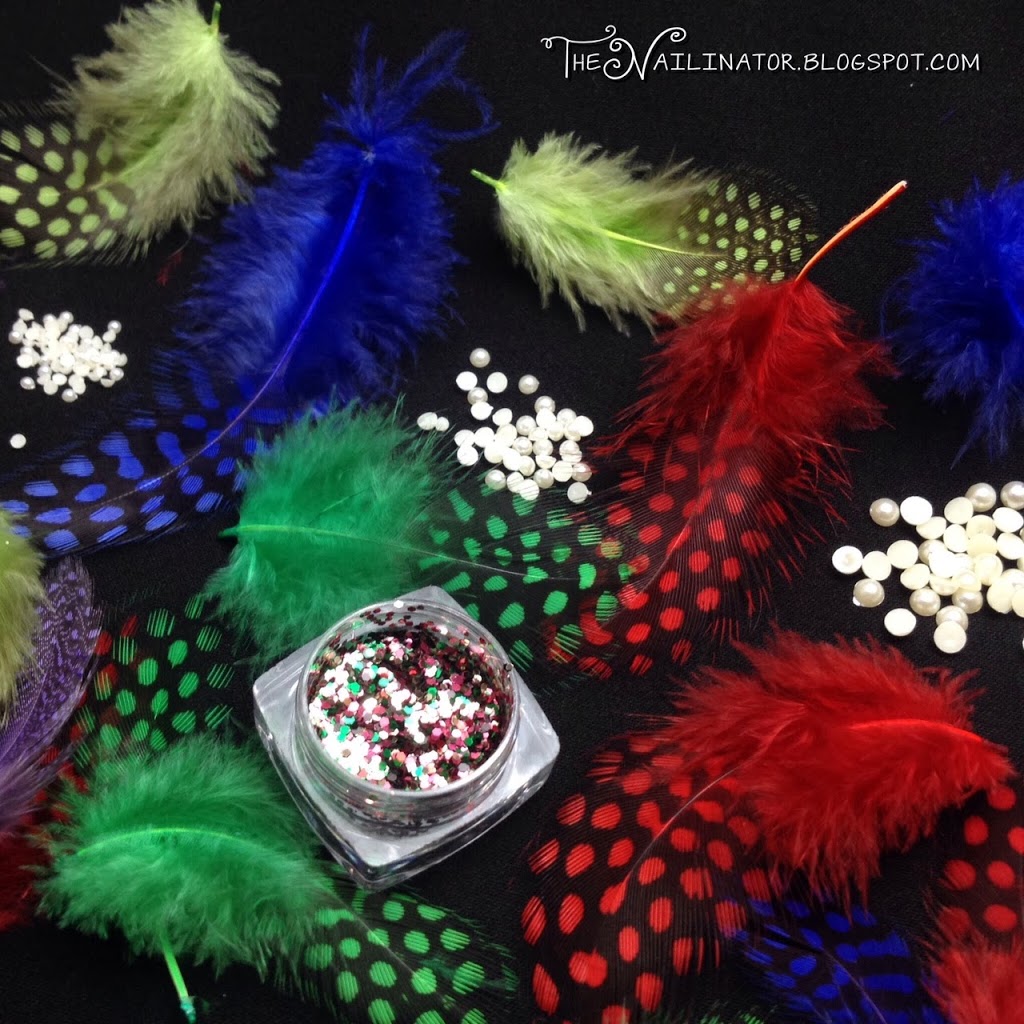
I was given these lovely nail art goodies by Blooming Nail Cebu. I am especially excited to try the feathers! Thank you Blooming Nail Cebu!
Nail polish racks built by Mr. Nailinator

Check out my new polish rack on the left! Mr. Nailinator was so sweet to make me another one since the one he made me in February was all filled up and even my overflow baskets were overflowing and cramping my style. As soon as he mounted it on the wall I filled it up and only had room for 2 more bottles. I bought my sister-in-law two polishes for Christmas, and she had them both already, so I let her trade them out for two polishes from my back up stash. I didn’t own either of the colors I picked for her so now my polish racks are completely full! Yikes! Believe it or not, those two are the only polishes I acquired for Christmas. I think I fit the category now where my friends and family don’t buy me polish because they don’t know if I already have a color or not.

Did you get any polishes for Christmas? I would love to hear what your favorite gift was that you received or gave to someone. I love getting little gifts, but I also love giving gifts.

I hope you have a blessed day.
Rach


12 Dec

Snowflakes on L.A. Colors Aztec Orange

Hey gals!

This has been a great day. My parents arrived today from their few weeks stay in the US and as if having them home safe and sound wasn’t great enough, they carried some epic nail mail with them from the lovely Jacqui of Craftynail (please do go check out her blog). My first nail swap was officially a smashing success! Thank you soooo much Jacqui! I love the polishes you sent… Especially Alcatraz Rocks! Lemming CRUSHED! 

It sure felt like Christmas opening up my package from Jacqui and I’ve got a Christmas themed mani to share with you today. Snowflakes! I’m so thrilled with how these turned out. What do you think of my artsy photo? I adore this snowflake ornament my wonderful mother-in-love sent me.

Snowflake stamping over L.A. Colors Aztec Orange
L.A. Colors Aztec Orange with snow stamping and dotting
Yeah, I know there are a lot of snowflake designs going around but I just had to do one of my own.
I started with one coat of Caronia Tea Rose which, by the way, I highly recommend if you are in search of  a great red for the holidays. (Note: Don’t confuse Caronia Tea Rose with Chic Tea Rose) I added two thin coats of L.A. Colors Aztec Orange which I received back in July when Pure Beauty came to Cebu for a promotional event. As soon as I laid eyes on it I knew I had to use it for a Christmas mani. Here it is by itself. Isn’t it gorgeous? 
 
Swatch of L.A. Colors Aztec Orange

I used the OB19 stamping plate which is full of Christmas themed images. I purchased mine from My Online Shop and I used the Fab Ur Nails white stamping polish which I won in a giveaway to add the snowflakes. I’m still getting the hang of stamping so it can be hit and miss with some attempts. I used a dotting tool and the same stamping polish to add the dots. With all that has happened in the past couple of months I have quite spaced out about taking pictures of the prizes I won the last few months. I will try to get them up soon. So much to do. 

I’ve also included a shot of the freehanded snowflakes I sported last year. I only have one shot of it as I wasn’t blogging yet at that time. I’m sharing in honor of throwback Thursday. Ha! So please bear with the poor quality photo. It’s nice to see how far I have come in the past year in the photo department. (By the way, I also post old manis and some non nail related stuff on my Instagram account. If you want to come check it out, the link is in my sidebar to the right.)
 

Well, that is it for me for today. I do hope you have a blessed day or evening depending on where you are in this big wide world. Make someone smile today if you can!

15 Nov

Philippine Flag Nail Art (and a plea from my heart)

Hello friends,

I mentioned in my last post that we were hunkering down for super typhoon Haiyan or Yolanda as it is locally called. Unless you have been living under a rock somewhere, you have heard about the catastrophic damage that the storm has left in its wake. Those of us in Cebu City were spared the brunt of the storm but many, many others in this beautiful country were not and they are suffering unimaginably. Thousands have lost their homes. Many are literally starving and suffering dehydration as relief goods are difficult to deliver through blocked roads. Clearing roads of fallen trees and buildings and other debris takes much time and there are many people in many places that need help badly! Many people have been evacuated to Cebu City and Manila and now the government is scrambling to find housing and daily sustenance for the thousands of people with nothing left! The casualty count is getting higher and bustling cities are now in ruins. It is absolutely heart breaking.

Needless to say, with all this going on, I find it hard to bring myself to do my nails. But I decided to do these to honor the strength of the Filipino people and to raise awareness of the situation here.

Philippine Flag Nail Art

These nails were inspired by the Philippine flag. I used two coats of Caronia Tea Rose (red) and then added San San Blue Sapphire to half the nail. I added gold studs I bought at Blooming Nail Cebu. These “flag nails” could have been more detailed as I could have added stars and the sun you see in the picture of the Philippine flag (below). But, I have been busy doing other things that mean more to me and I don’t have the heart to spend much time on my nails at all lately. I hope you can still see how it is inspired by the flag. One day I will do another design inspired by our flag.

Philippine Flag
Photo Credit: Mike Gonzalez
The nail art community is jam packed with AWESOME people. Seriously, you gals have hearts of gold and I feel like I can ask you to please PLEASE consider donating some money via any organization you feel comfortable with. You can donate through the Philippine Red Cross, UNICEF or another  big organization like that. You can also donate through many smaller organizations that are doing wonderful work and are effectively and QUICKLY helping people. May I suggest the non-profit organization Lilia’s Place? I know Doug and Lisa, who run this organization, personally. They are a great couple who have huge hearts for helping others. They gave up their comfortable lives and jobs in the US and left all their family behind and have been working with street families in Cebu City for over 4 years. Now they are working to help those affected by the typhoon as well. I can assure you that they will use your money immediately to purchase relief goods and take them to those in need. Just yesterday they brought a truckload up north of Cebu and provided food and water to a village of 300 families that hadn’t had a bite to eat in 4 days (pictures on their FB page)! Can you even imagine?!? Please consider sending some money through them if you would like to fund a smaller relief effort. If you choose to donate, please include a note that the funds are for typhoon relief.
I want to assure you that every dollar counts! Just one US dollar can buy 3 pounds of rice or 3 cans of sardines or 4 liters of drinking water. Do you think you could have PB&J or ramen for dinner just once this week or drink water instead of soda or  hold of on a polish lemming for a while and send a couple (or a couple hundred) dollars to help get some food to someone in dire need? Please?
If you are in the Philippines and want to help by volunteering but don’t know where to start, please contact me via email (rdrobins84@gmail.com) and I will do my best to find a place in your area where you can help in some way.

I don’t know how often I will be able to post in the next few weeks as my priorities right now are spending my free time volunteering packing relief goods. But I will be back and I hope you will stick around. Please pray for this country as we mourn and try to pick up the pieces and help those hardest hit as much as we can. Thank you for reading all this. I’m sorry for such a heavy post but I hope you will understand.
Hugs to you all!
Rach

14 Oct

Wheel Of Time Nail Art – The Stole of the Amyrlin Seat and The Flame of Tar Valon

Howdy!

Wow! That is quite a title huh? I decided to put all that in the title in hopes that this would be easily found by anyone searching for Wheel Of Time (WOT) nail art. I couldn’t find any when I Googled it although I know I have seen something somewhere a long time ago.
If you have read the EPIC 14 book (plus a prequel) series by Robert Jordan then you can probably interpret and enjoy this design easily. But in case you have not, I’ll give you a brief explanation.
In the WOT world, the Amyrlin Seat is basically the queen of the whole world as all kingdoms bow to her and submit to the will of the “White Tower”. The White Tower is where all women who can channel (do “magic”) go to be trained and when they graduate to a full fledged “Aes Sedai” they pick an “Ajah” based on their personal preference. Each Ajah goes by a color (Brown Ajah, Grey Ajah, White Ajah, Red Ajah, Yellow Ajah, Green Ajah and Blue Ajah) and they dress according to their Ajah’s color. The Amyrlin is head of all Ajahs. She is “from all Ajahs and yet of none” and to symbolize that, she wears a stole with a stripe of each of the 7 Ajah’s colors. That’s where I came up with the stripes. The accent nail is “The Flame of Tar Valon” which is the official symbol of the Amyrlin and the White Tower. That is just a tiny bit of info about the series. It is a REALLY long story!

I imagine if you haven’t read the books then this won’t be much of a manicure to you. But, even if you aren’t familiar with the MASSIVE back story behind the inspiration of these nails, consider how hard it was to free hand these stripes. Ha! It did take a while and I know they are not perfect. I planned to do both hands but it was so late after I finished these that my Cinderella hand just got skittles so I could get to bed at a decent hour. Then my topcoat bubbled in the middle of the nail. Oh well, sometimes topcoat kills the mani. I struggle at times to float the brush to avoid smudging and to avoid bubbling at the same time.

That’s all for now. I meant to get this up on Saturday but time got away from me. It tends to do that with two kids to run after. I hope you all have a great week.

26 Sep

Argyle Nail Art

Greetings!
I’ve got a short and sweet post for y’all today.

Day 26 of the 31 Day Challenge is “Inspired by a pattern”. I’ve chosen to go with an Argyle pattern. I saw a tutorial by Cute Polish for this nail art way back when I was just getting into nail art and I tried it out on a nail wheel right away and it looked very nice. So when I saw it on a nail wheel the other day I thought it was time to try it out on my nails. I learned that doing my nails while watching episodes of the Doris Day Show makes for some wobbly stripes. Definitely not my neatest work. :/ Whatever! I still think they turned out cute. Don’t you?

The colors I used are San San Cloudy Gray, Caronia First Crush (purple), China Glaze For Audrey (green) and Jocarste White.

If you are just starting out with nail art I strongly suggest you check out Cute Polish on You Tube. She has some pretty cute designs that are really easy to achieve. Have a great day!

Hugs!

%d bloggers like this: