21 Aug

Pretty Nifty Thrifty Nail Decals in Hippie Feathers (Review and Application)

Hello Ladies!

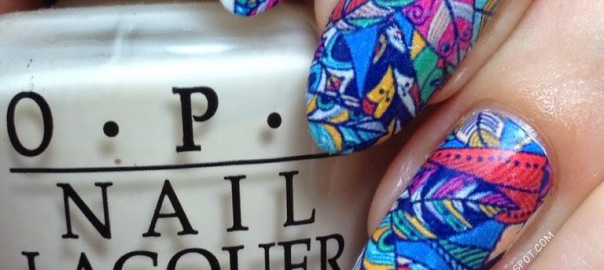
I’ve got something super cool to share with you today! If you don’t have a very steady hand for nail art or don’t have much time to spare but want some awesome looking nails, then full-nail water decals are a must try for you. Pretty Nifty Thrifty contacted me asking if I would like to try some of their nail decals. Of course, I said yes! They have so many gorgeous designs to choose from. Just look at how awesome these are! I’ve received a ton of compliments on them.

Hippie Feathers nail decal manicure

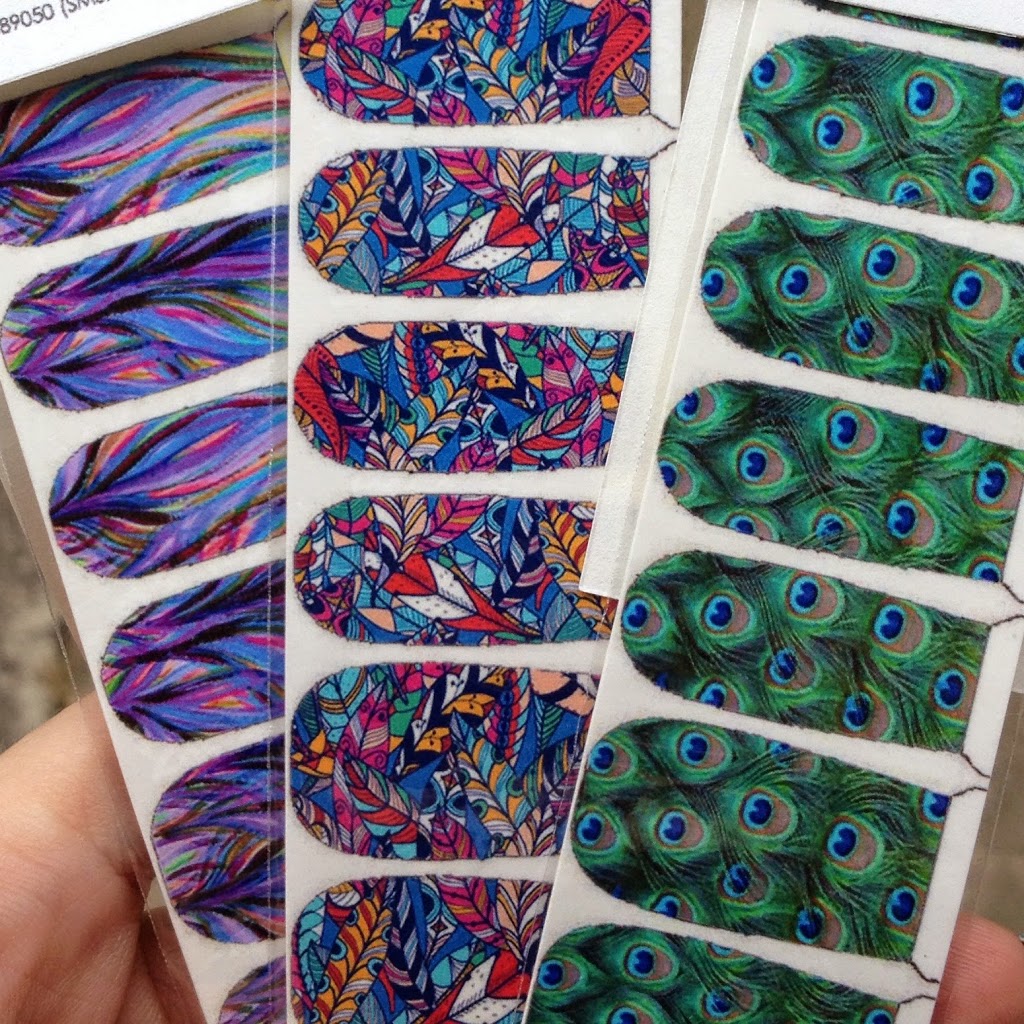
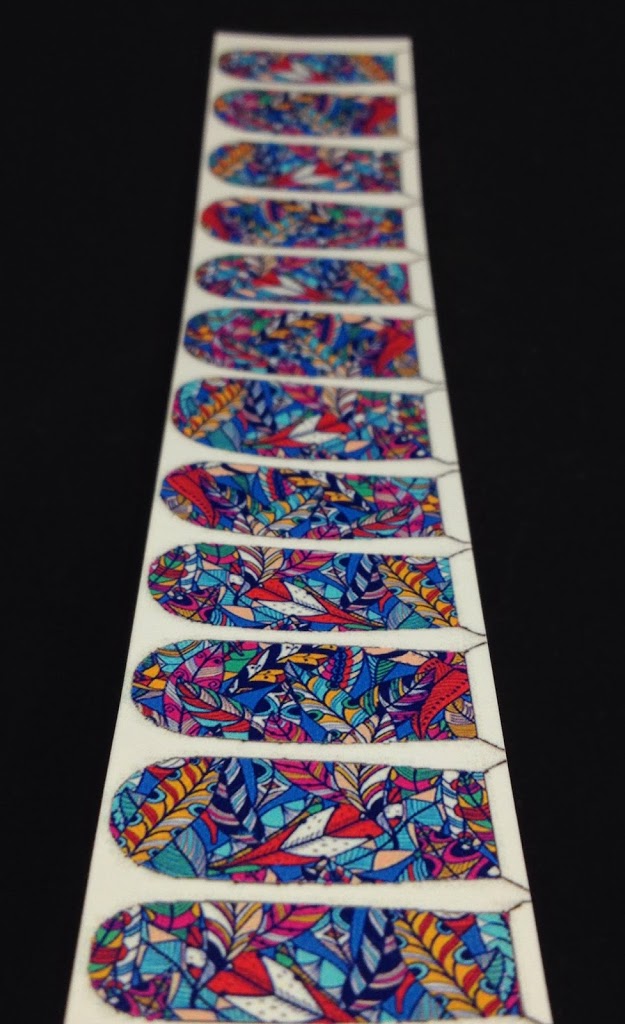
I chose these 3 designs to try: (L to R) “Streaks”, “Hippie Feathers”, and “Peacock 1”. Keep an eye out for the other two designs in the near future.

3 sets of nail decals from Pretty Nifty Thrifty

Pretty Nifty Thrifty sells each sheet of 12 nail decals for Php80 (about $2) and have a “Buy 6 get 1 free promo”. Twelve decals per sheet means you can get a full manicure from one sheet plus 2 extras to use as accent nails on another manicure. They will even do customizable decals (Php120 or $3), too, which means you could get practically any design you wanted made.

Hippie Feathers nail decals

The decals come with instructions but here’s the gist with a few tips from me.

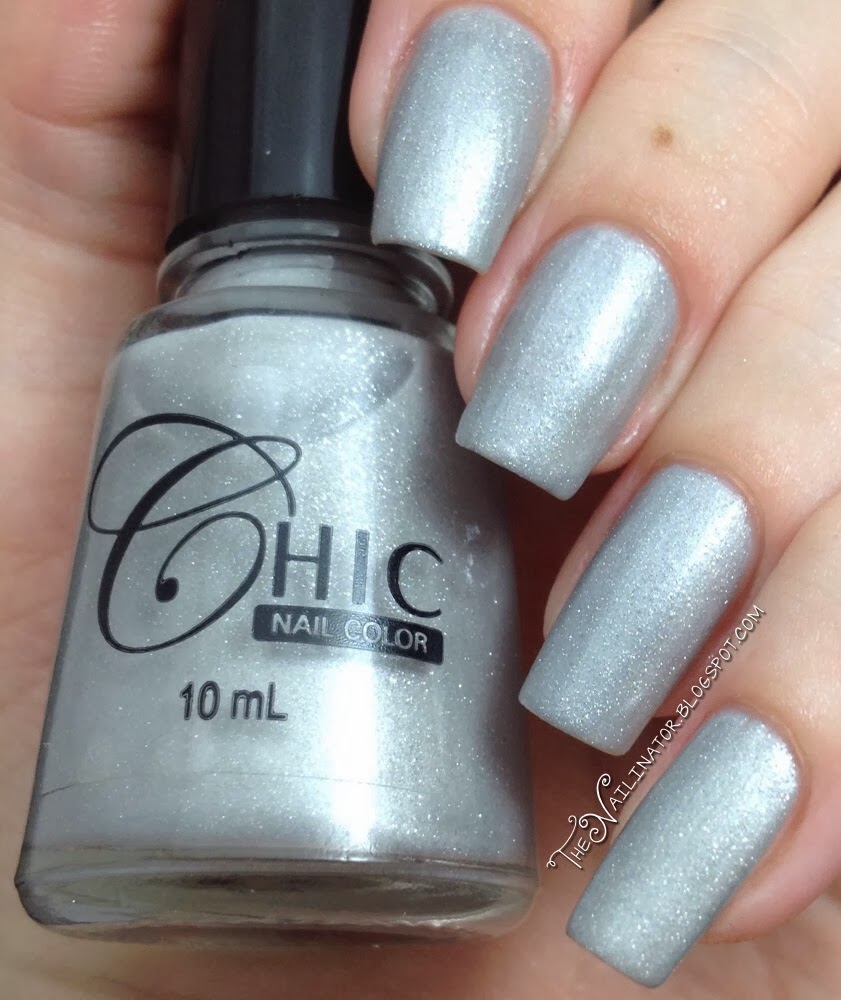
Base coat: The instructions say to start with a white base coat to keep the colors vibrant. The decals are not completely opaque so this is a must if you want the colors right.

Prepping your decals: There are 3 sizes of decals. Use scissors to cut along the thin black outline and check the size against your nail. The smallest size fit my pinky nail perfectly, the middle size fit my middle fingernail and the biggest fit my thumb nail. For my index and ring finger, I used scissors to trim a little bit off the sides of the middle sized strips and that worked just fine.

Getting those pretty decals on your nails: Each decal needs to be dipped in a bowl of water for a few seconds. This allows the decal to slide off the paper. They should not be hard to slide off. If it gives you trouble, soak a bit longer. These decals are thin so handle with care. Before placing the decal on your nail, wipe off any excess water to prevent bubbling under the design Then place the decal on your nail and line it up along the cuticle line. Press down along the length of nail to keep it in place. The decals are not sticky but will cling to your base coat. If one gets put on crooked, just get it wet again to pull off and reposition.

Finishing up: The instructions say to use nippers to clip any excess hanging over the free edge of your nail. I highly recommend doing this if you have pair of sharpened nippers. If you use nippers that aren’t sharp, you may end up tearing your decals. If you don’t have nippers, you can just cut it close to the edge with scissors and apply your top coat. The top coat will melt the design to the base color and any part of the decal hanging over the edge will melt enough to use an orange wood stick to pull off any excess. Or you can wait for the top coat to dry and file off any excess and touch up the clear coat on the tips to make sure your decals don’t try to peel up.

Wear time: I’ve been wearing these for 5 full (and very busy) days now and they wear about the same as my regular nail art. Add another coat of top coat after 2 or 3 days to make it last longer.

Hippie Feathers nail decals manicure 2

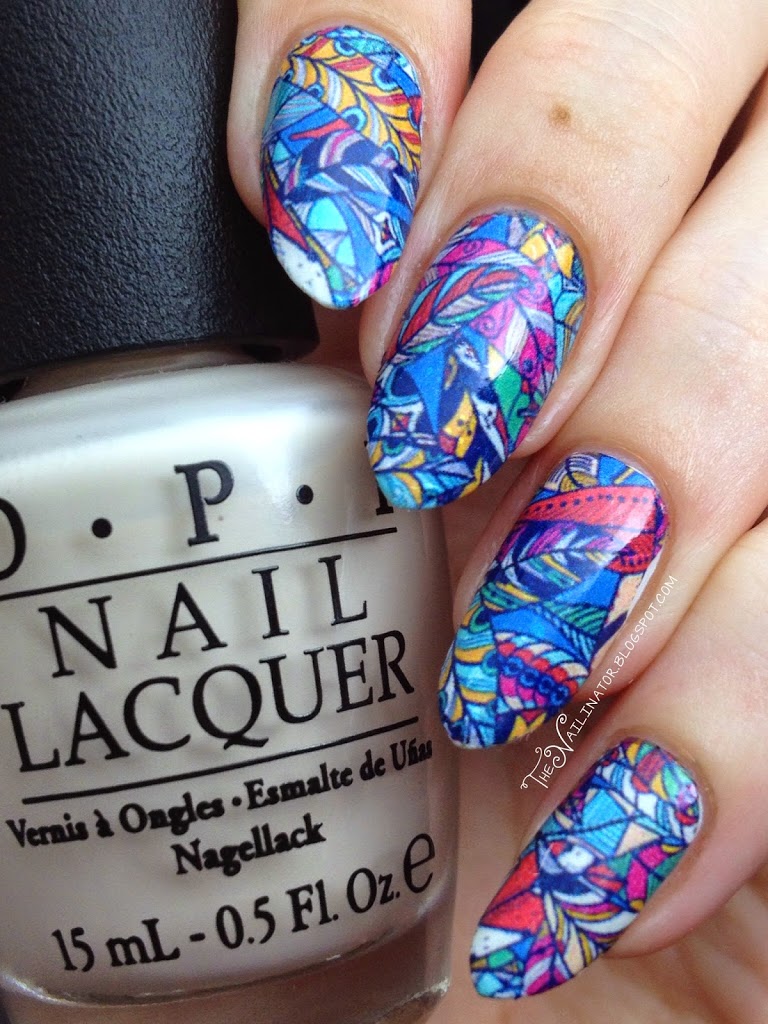
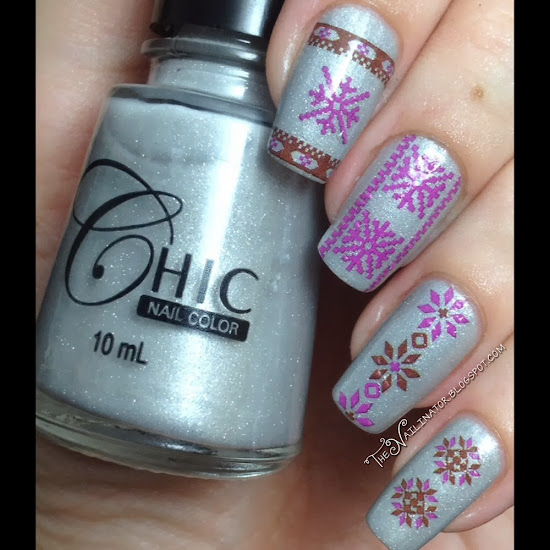
Over all, I am very impressed!
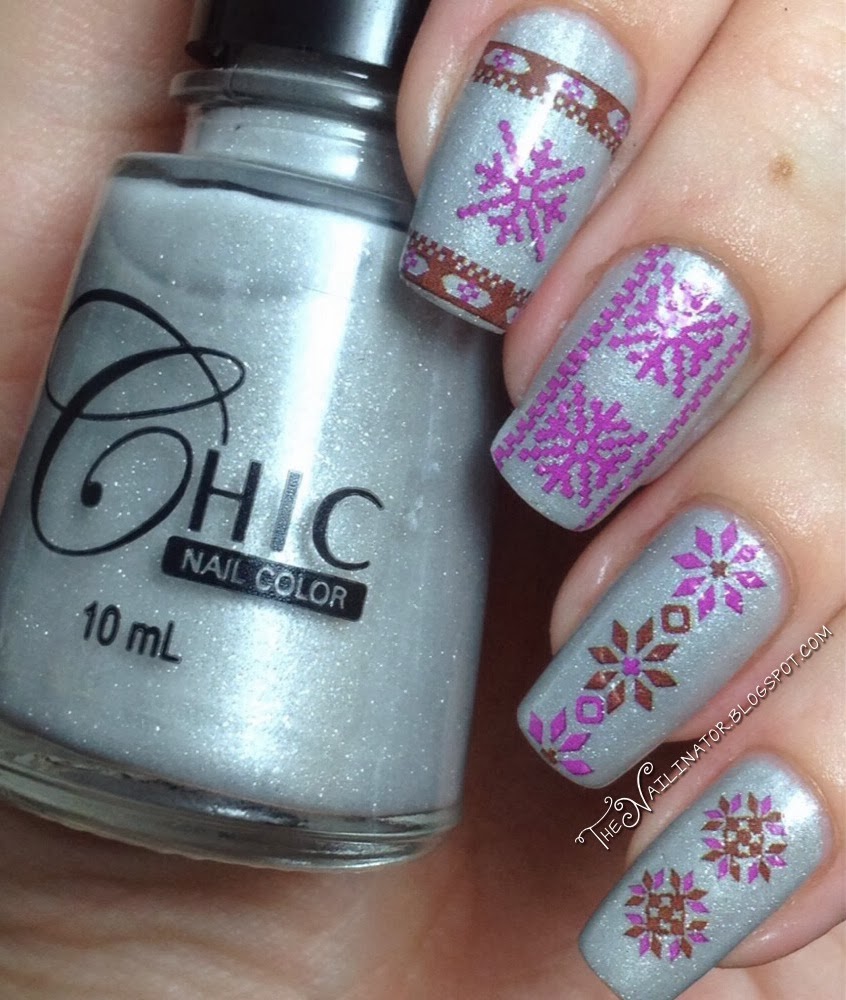
The selection is great and this design looks amazing on my nails.
Check out Pretty Nifty Thrifty on Facebook or on their Instagram account to see all they have to offer. It’s not just decals. I saw just the other day that they also sell nail foil glue which I haven’t been able to find anywhere! Must. Buy. Some. Soon!

Have you tried these decals before? Let me know if you have any questions about this product.

Have a fantastic day!
Hugs,
Rach

15 Aug

L.A. Girl 3D Effects Electric Coral with JR17 Stamping

Hi ladies!
I am thrilled to announce that I have found the perfect orange polish for me! By “the perfect orange”, I really mean that it’s the only orange I have actually been brave enough to try on my nails.

L.A. Girl Electric Coral with tribal stamping

Surprisingly, I LOVE it! This is three thin (and super quick drying) coats of L.A. Girl Electric Coral with some quick stamping with my JR-17 stamping plate (click to see image and pricing) that Meann of My Online Shop sent me a while back. Stamping is a very easy way to add some flair to any manicure. This plate has some really cool and fun tribal prints, and this orange is a perfect base for them IMHO. The black on orange was really eye catching.

L.A. Girl Electric Coral swatch

I have mentioned before how great the L.A. Girl 3D Effect polishes are. I love the colors, the speedy dry time, the awesome holo sparkle, and the easy cleanup. Now that I know, I also have to add that they have great customer service. I ordered several polishes from them while I was in Texas and received one with a bent brush. I noticed the messed-up brush just a week before we left to come back home to the Philippines. So I contacted them and sent them a photo of the brush, and they sent me a replacement within just a couple of days. I appreciate them making and extra effort for speed considering I was on a time crunch. It’s the little things, people!

Things are going well for us. Our school year is off to a great start, and my house is slowly getting back to being organized. I hope all is well with you too. Thanks for reading. Have a fantastic day and don’t forget to make someone smile!

Hugs!
Rach

16 Apr

Girl Stuff Soirée (with Wild Berries)

Hi gals!
I feel sad that I haven’t been able to post as much as usual lately. I’ve been nursing a cough/cold for 2 weeks now, and we have been preparing for our trip to Texas. We leave in the morning, and while I am not looking forward to the long trip, I am looking forward to being with our family and friends there.

I’m so thrilled to finally have Girl Stuff Soirée in my collection. It’s been on my lemming list since I saw it in December. I finally ordered it a couple of weeks ago, and of course, I had to use it immediately. It’s a teal jelly base loaded with teal, green, purple and gold glitter. There is also a splash of holo in it that is lovely. I applied 2 coats and enjoyed the sparkly, textured finish for a couple of days. Then I applied top coat and loved it even more. The glitter really sparkles like crazy with top coat. It needed two coats to make it smooth.

Girl Stuff Soirée with Wild Berries and top coat

For my accent nail, I placed striping tape on the nail and then added one coat of Wild Berries (which Girl Stuff sent me as a bonus from their new Summer Collection. Thanks again, Girl Stuff!) and peeled off the tape before it could dry. Wild Berries is a pinkish purple that is very flattering.

Girl Stuff Soirée swatch


Here is a shot of Soirée on its own, without topcoat. Both Soirée and Wild Berry dried quickly and were easy to use. Girl Stuff polishes are 3 free too so that is great! Check out their FB page or Instagram to see more of their pretty polishes.

I think you will see Wild Berries again soon as it made in into my luggage for the trek across the globe. Believe it or not, I’ve only packed a few polishes to bring. I am planning to pick up a few in the US, so I tried to limit myself to about 10. Success!

That’s all from me for now. I’m going to try to get a bit of sleep before we have to load up and head to the airport. I’m excited because the hubby bought me an awesome “Greatest Hits of the 1950’s” album for me for the trip in honor of our anniversary which is also today. Nine years baby! Woohoo! Next time you hear from me, I should be in Texas enjoying some Mexican food, Dr. Pepper, and shopping (with coupons!) at Kohl’s!

I hope you have a fabulous day!
Hugs,
Rach

05 Mar

Dry Brush Nail Art and Stamping with JR17

Some products used were sent to me for my honest review.
All opinions are my own. 🙂

Hello!
It’s late in the evening and I have been up working on a crazy jigsaw puzzle my sister gave me as a gift. TWO THOUSAND pieces! Seriously? The person who thought of making a puzzle over 1000 pieces has a very sick mind. Rant over!


I thought I’d make a quick post for you to share these fun nails I did last weekend. I received two of the new JR Stamping plates from My Online Shop for review. Thanks again, Meann! I picked JR17 and JR2 because I don’t have anything quite like them. I decided to start with an accent nail mani.

I used 4 colors for my base and dry brushing. All of these were sent to me by the very lovely and talented Jacqui of Craftynail. (Thanks again, Jax!) I started with 3 coats of OPI My Vampire is Buff and then used the dry brush technique by Chalkboard Nails and The Lacquerologist to add strokes of OPI Suzi Says Feng Shui, My Paprika is Hotter Than Yours and Sinful Colors Pull Over. I used 2 coats of Suzi Says Feng Shui for the accent nail and stamped an image my son picked out for me from JR17. The little mess up you see with the stamp was total user error. I was trying to hard to center the stamp on the nail and ended up accidentally touching it on a part and then moving it a bit. Oops! But the plate worked perfectly. I played around with several of the stamps on this plate and they all looked great. I’m still working the kinks out of my stamping to my nails skills. Any tips on perfect centering would be very welcome. 😉

You can get your own JR Stamping plates along with awesome stampers and accessories at My Online Shop. They are on Instagram too.

I hope you are having a great week.
Hugs,
Rach

26 Dec

Review of Chic Shadow Crystal and Blooming Nail Cebu Water Decals

Merry Christmas!

I hope you had a wonderful day filled with much love and laughter and that you got to spend it with people that you love. We enjoyed a Skype date with my hubby’s folks in Texas and we enjoyed a lovely lunch with my parents and siblings here in Cebu. Among other yummy things, we had some awesome mashed potatoes for lunch. Mr. Nailinator found this recipe from the Pioneer Woman. The secret ingredient? Cream cheese! Best mashed potatoes I have ever eaten!

On to the nails… I planned to post this a couple of nights ago but I got hit with a bad migraine and it just didn’t happen. I was too busy yesterday preparing for guests today and just hanging out with the kids and Mr. Nailinator, so I’m posting it now.
Chic Shadow Crystal with "ugly sweater" water decals

Sometimes a girl needs some nail art that is easy and super speedy. This was just that. I applied my polish ahead of time (I’ll talk more about the polish in a bit) and had planned on doing a lovely free handed design, but due to time constraints (seriously, I’ve got two very active kids and a household to run) I chose to use the Hot016 Christmas themed water decals (should have taken a picture) that I purchased from Blooming Nail Cebu a while back. It doesn’t really get much easier than water decals, gals. The Blooming Nail decals are great quality. They are so easy to work with. They have vibrant images, and they are thick enough that I was able to use my tweezers to position them, mumble under my breath at my lousy attempt at centering the design, and reposition it several times. Then I applied topcoat to seal it and smooth it out. I forgot to make sure the decal was completely dry before I placed it on my ring finger, thus you can see I experienced a bit of bubbling. Hopefully the next time I do decals I won’t forget that step and they will all be smooth.

Chic Shadow Crystal swatch

The polish I used as my base is Chic Shadow Crystal (PHP 34.75/US$ 0.78). It is one of the 5 shades in their Grainy Collection. The polishes in their Grainy Collection dry to what I would describe as a slightly textured semi-matte finish. This is two thin coats of Shadow Crystal over one coat of San San Cloudy Gray. I think Shadow Crystal would need 4 coats for it to be opaque on it’s own so I decided to use undies again. I really love this polish. It dries fast and I love the finish and the little sparkles. It reminds me again of glistening snow except with a grayish silvery tint. I received several compliments when I wore the polish on it’s own. If you look closely at the pictures with the decals, you will see that there is no visible tip wear. I had already been wearing it without topcoat for 2 full days when I added the decals so it wears quite well also. Cleanup was very easy for me. A few sparklies were left behind, but they came off easily when I washed my hands. This is another perfect holiday shade in my opinion.

I’m still getting used to doing actual reviews on polishes. I would really appreciate if you would tell me if there is any lacking information in this review that you would like me to include in future review posts. Or feel free to tell me what I did right. 😉

Mr. Nailinator convinced me to take the plunge and file my nails to a sort of pointy almond shape so the next time we meet I will be sporting a different look. I’ve had a lot of positive feedback so I hope you all love them too.

Christmas Lantern - Merry Christmas to you!

I’m singing off for bed now. Again, I hope you had/are having a very merry Christmas. May God bless you and yours.

Hugs,
Rachael

%d bloggers like this: