18 Mar

Review of China Glaze Winter Holly – St. Patrick’s Day Worthy Shade

All products used were purchased by me. 
All opinions are mine. 🙂

Hi!
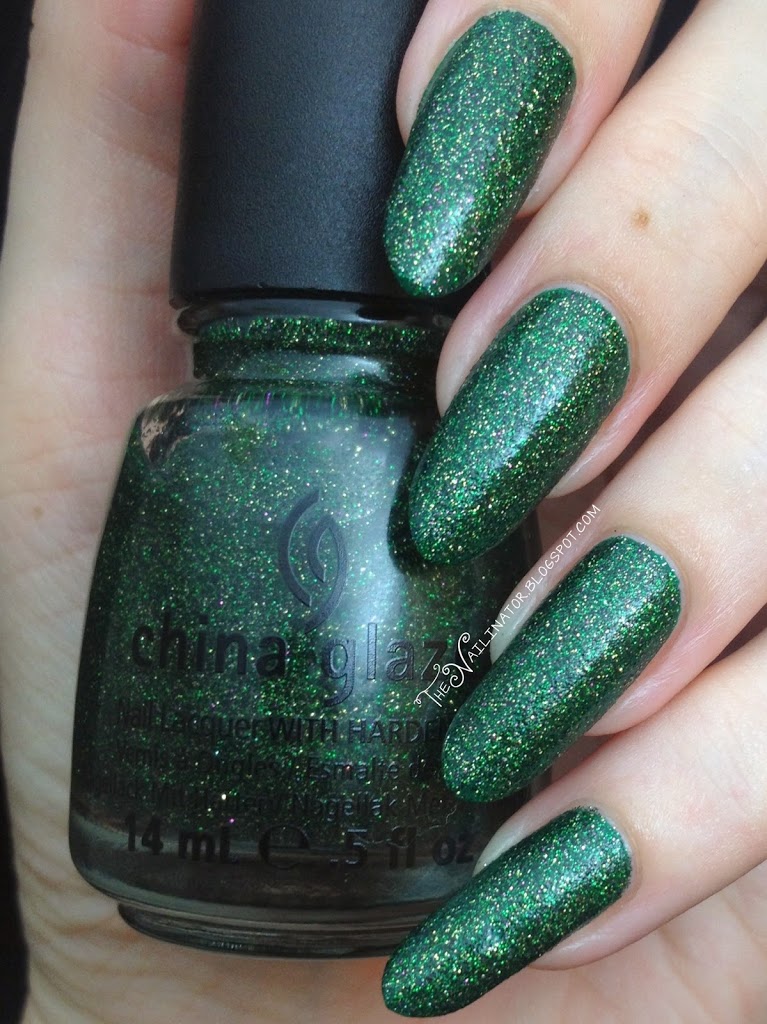
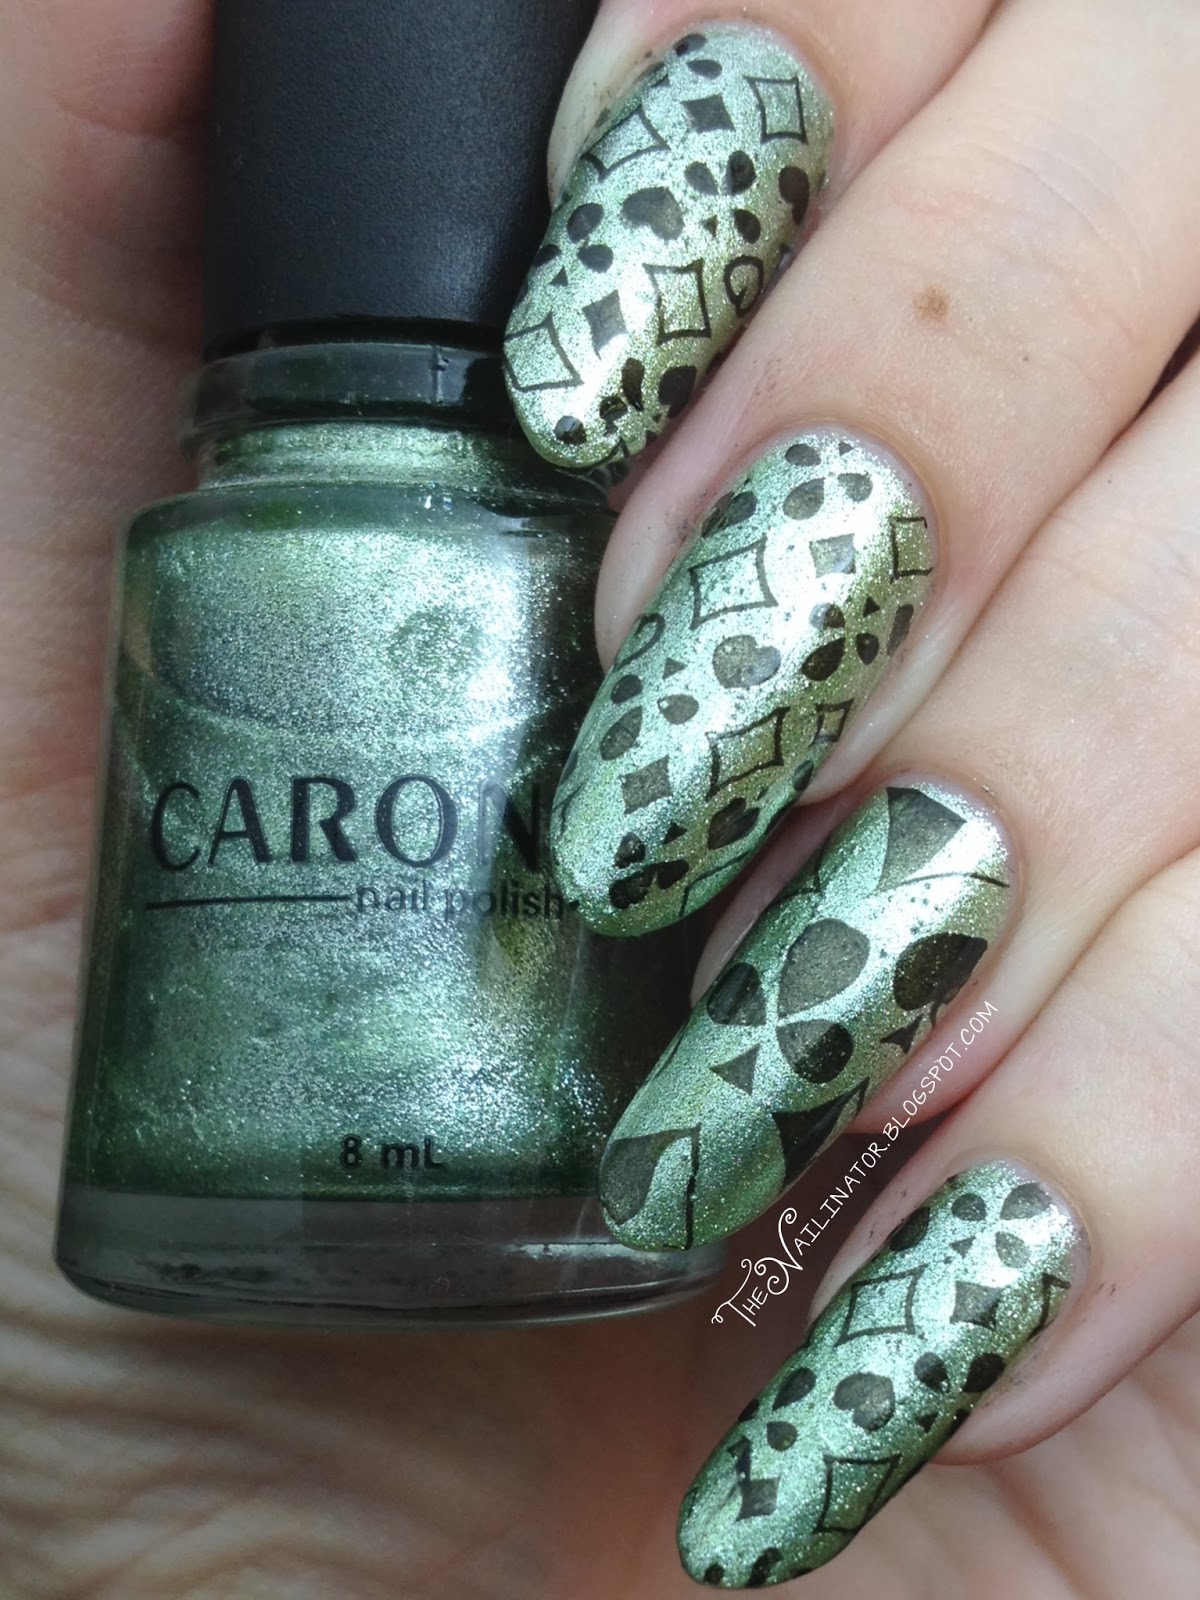
I don’t celebrate the holiday, but I’ve got a St. Patty’s Day worthy mani to share with you today. I started with one coat of Shisem F610 (Dark Forest Green) which I purchased at Blooming Nail Cebu. I then added 2 coats of China Glaze Winter Holly which my sweet hubby spoiled me with a couple of months go. It is a mixture of gold, green and purple glitter (with a bit of a holo sparkle) suspended in a clear base.
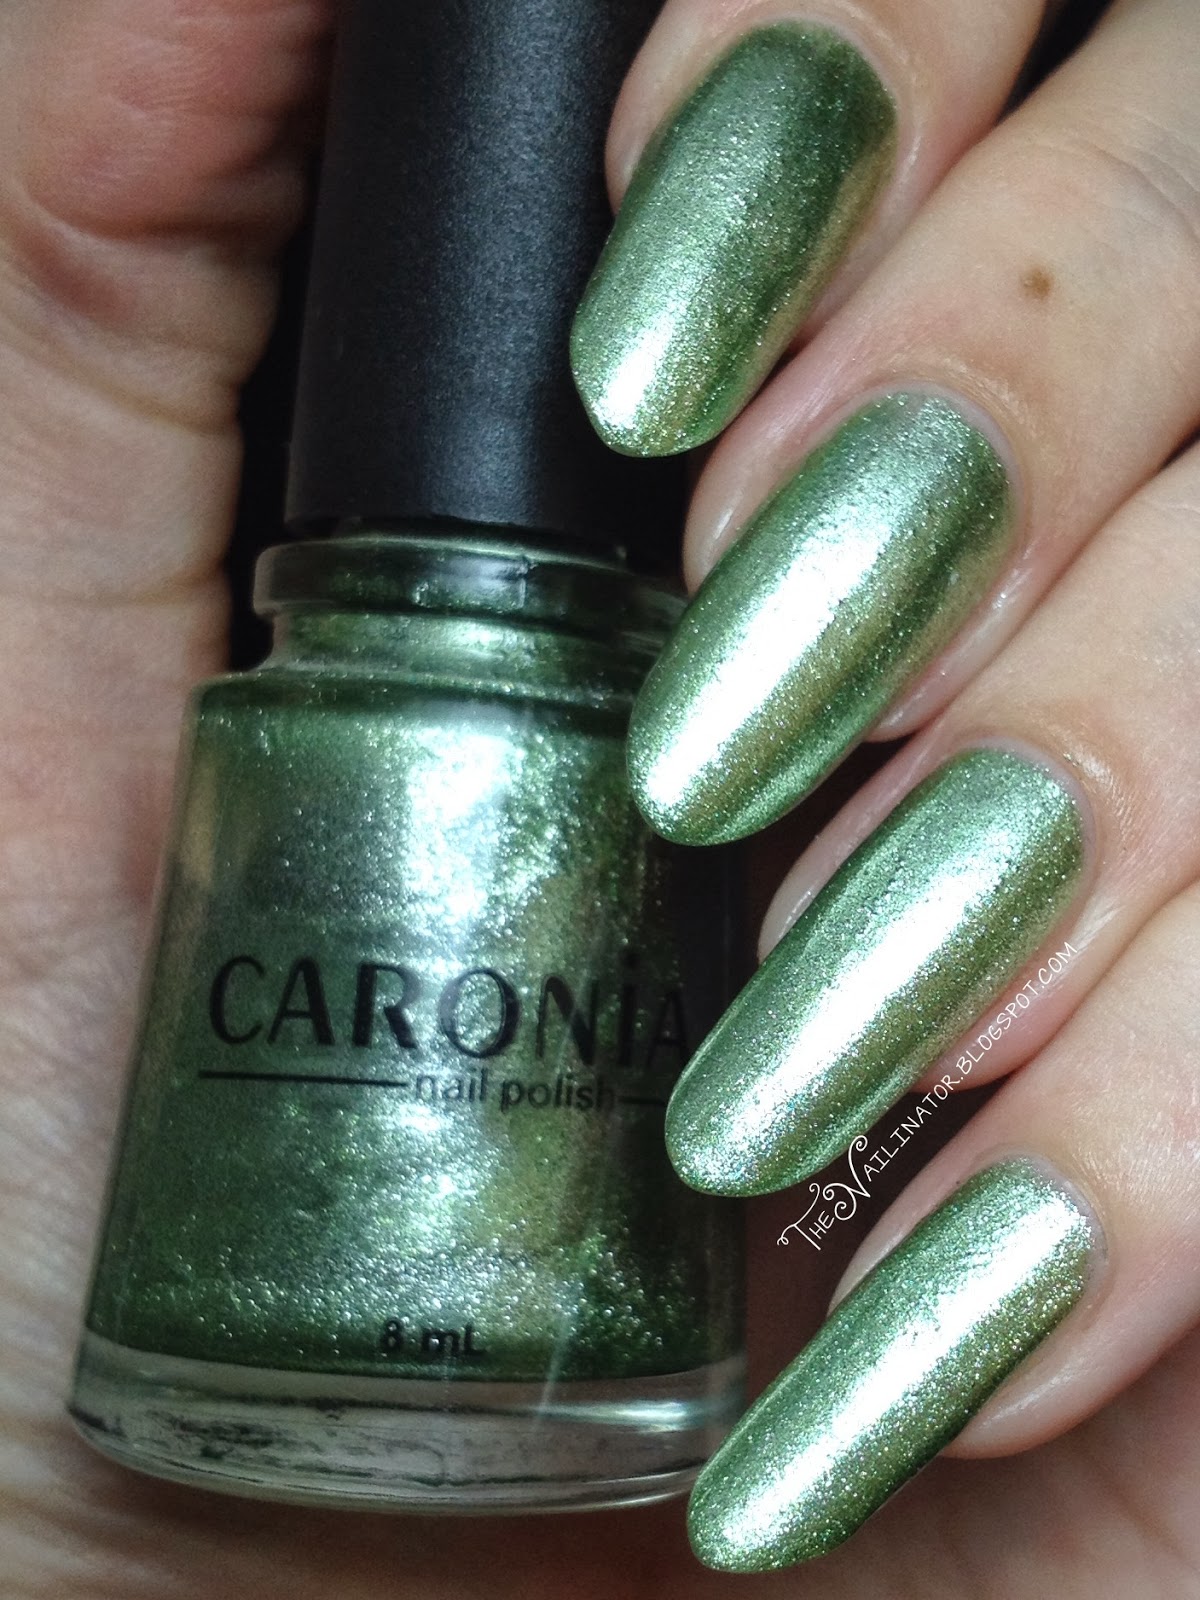
Without topcoat

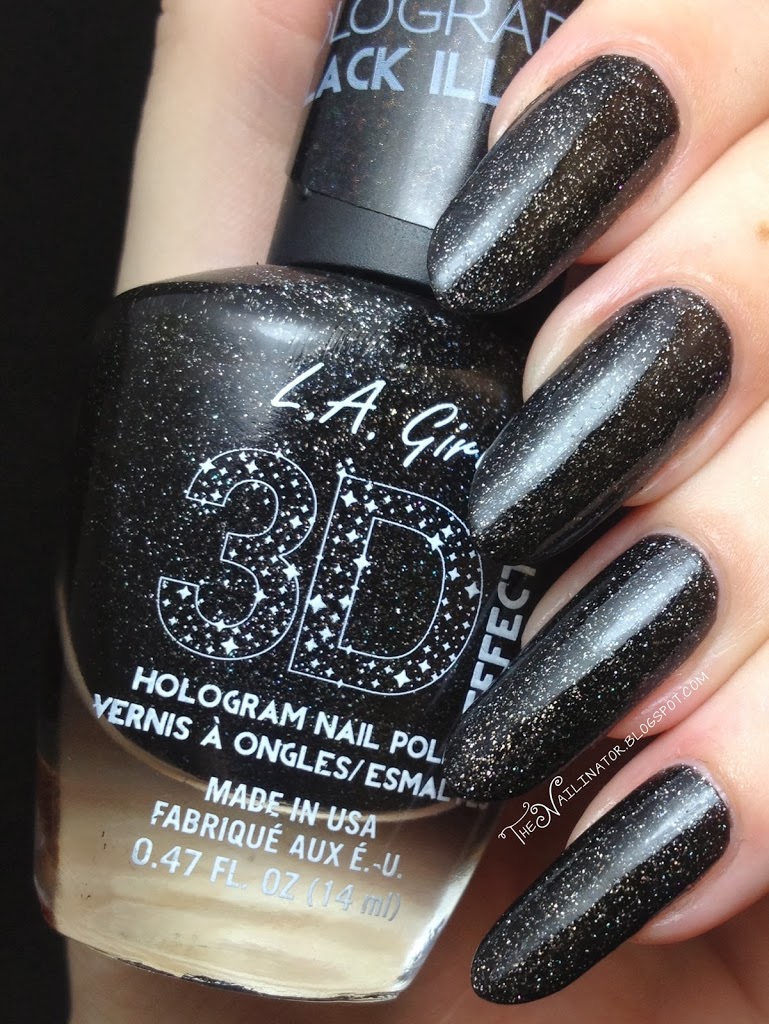
On it’s own, Winter Holly dries the same way that CG I’m Not Lion does. It’s a grainy or sandy finish. I like polishes like this because you really get two finishes in one. You can choose between the grainy, somewhat matte finish on it’s own, and the super glittery and shiny finish after applying topcoat. I’ve included a few extra shots to show how it looks with top coat.

With one coat of top coat
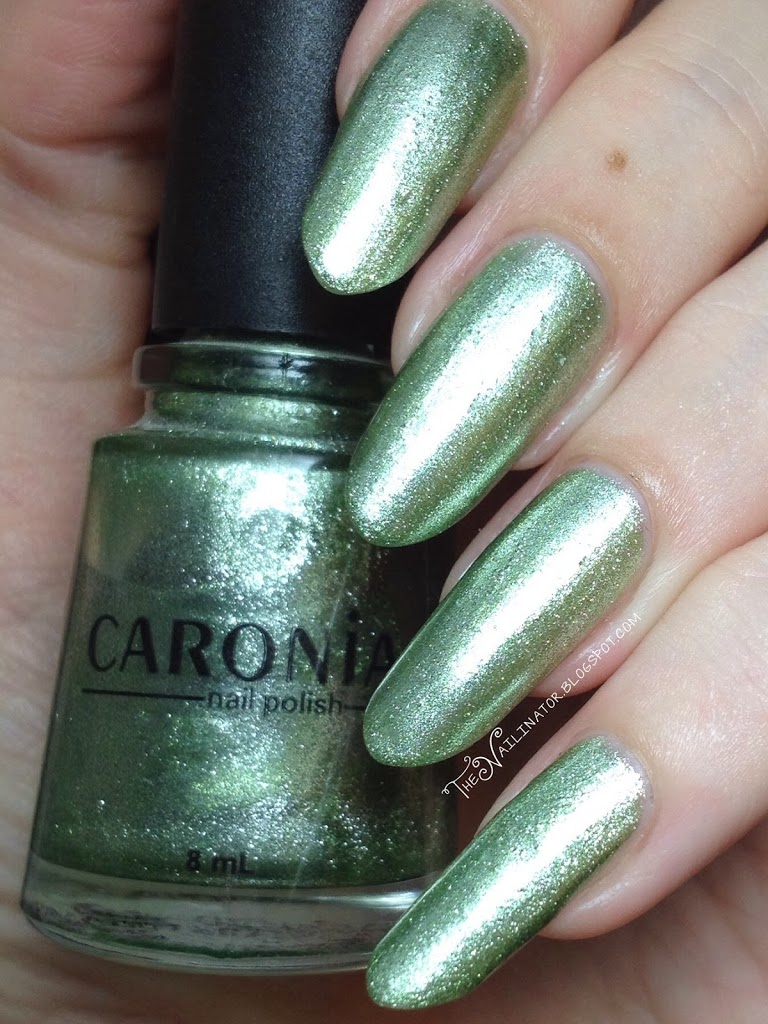
With two coats of top coat
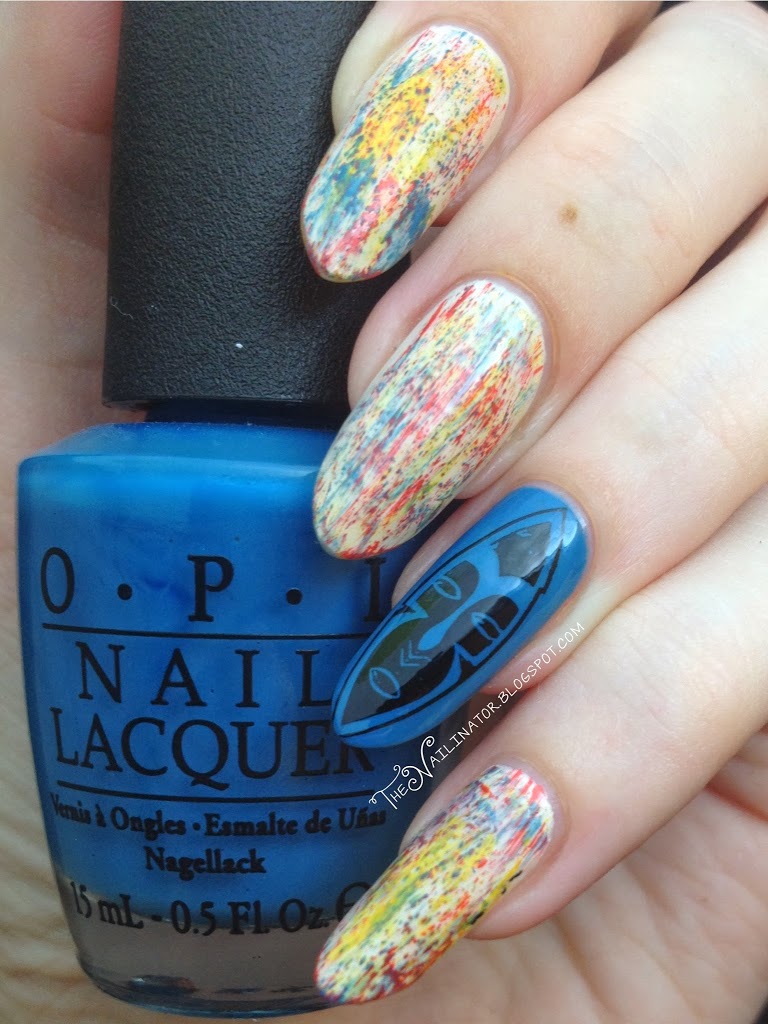
With 3 coats of top coat and in brighter light. You can see the depth.

I am really happy with this polish. It is so pretty. It was hard to remove in the manner that is typical for a glitter polish. I was kicking myself for not remembering to use my glue base for easy glitter removal. I won’t forget next time (fingers crossed). Also, as you can see, I added some gold studs which I also purchased from Blooming Nail Cebu.

Well, that’s all for me for tonight. I hope you have a great week!
Hugs,
Rach

14 Mar

Nebula Nails with L.A. Girl 3D Effects Black Illusion

All products used were purchased by me.
All opinions are my own. 🙂
 

Hi Ladies,

I’m sharing a look that I’ve featured before (In fact I’ve done a tutorial for it too.) but I’ve gone with an all green theme this time. Behold…

Nebula nails over L.A. Girl 3D Effects Black Illusion

Aren’t they pretty? I think Galaxy/Nebula nails are in my top 3 favorite looks for nail art. I love them more each time I do them. I’ve seen some pastel versions of nebula nails floating around and I’m planning to try that soon. I try mix it up a bit each time I do them. This time, as I mentioned, I’ve gone with an all green look and I’ve used L.A. Girl 3D Effects in Black Illusion as my base. LOVE! I swatched it before but I’ve swatched it again and it looks great with my newer nail shape. Every time I wear these 3D Effects polishes I’m reminded that I absolutely NEED the others in the collection! They look amazing and dry super fast too. L.A. Girl Cosmetics, I’ll probably be placing an order in April/May.

L.A. Girl 3d Effects Black Illusion swatch

If you love these then why not check out my tutorial. It’s pretty easy to do and doesn’t require much precision. Indeed, I had 3 cups of coffee and an hour of sleep the night before and I was shaking like crazy when I did these. Ha! You can totally do it!!

I hope you have a stellar day. (See what I did there?)
Hugs,
Rach

08 Mar

Caronia Lounge with Pueen Stamping

All products used were purchased by me.
All opinions are my own. 🙂

Just a quick post tonight as I’ve got to get up early to walk/jog with several friends. I’ve got a simple and easy look to share today that would be great to sport on St. Patrick’s Day to avoid getting pinched! I’m submitting it for the “Stamping” theme for the N.A.I.L. – March theme.

Caronia Lounge with Pueen Stamping
I started with 3 easy coats of Caronia Lounge which is a gorgeous light green foil. I love this shade on me. Then I stamped two designs from the Pueen34 from the Pueen Love Elements set. I know FOUR-leaf clovers are typically what you see in designs for this holiday, but I went with these three-leaf designs for 2 reasons:

  1. Not everybody gets to find a four-leaf clover so this is way more realistic! Haha!
  2. I didn’t have any stamps with 4 leaf clovers and I had my heart set on stamping. 😉
I ended up with these playing card themed nails with lots of clovers to show off. I received several compliments on this look. The stamping stands out well on the light green base.
Caronia Lounge swatch

Isn’t it a lovely color?

I hope you have a great weekend. I’ve had a fun one so far!
Hugs,
Rach
05 Mar

Dry Brush Nail Art and Stamping with JR17

Some products used were sent to me for my honest review.
All opinions are my own. 🙂

Hello!
It’s late in the evening and I have been up working on a crazy jigsaw puzzle my sister gave me as a gift. TWO THOUSAND pieces! Seriously? The person who thought of making a puzzle over 1000 pieces has a very sick mind. Rant over!


I thought I’d make a quick post for you to share these fun nails I did last weekend. I received two of the new JR Stamping plates from My Online Shop for review. Thanks again, Meann! I picked JR17 and JR2 because I don’t have anything quite like them. I decided to start with an accent nail mani.

I used 4 colors for my base and dry brushing. All of these were sent to me by the very lovely and talented Jacqui of Craftynail. (Thanks again, Jax!) I started with 3 coats of OPI My Vampire is Buff and then used the dry brush technique by Chalkboard Nails and The Lacquerologist to add strokes of OPI Suzi Says Feng Shui, My Paprika is Hotter Than Yours and Sinful Colors Pull Over. I used 2 coats of Suzi Says Feng Shui for the accent nail and stamped an image my son picked out for me from JR17. The little mess up you see with the stamp was total user error. I was trying to hard to center the stamp on the nail and ended up accidentally touching it on a part and then moving it a bit. Oops! But the plate worked perfectly. I played around with several of the stamps on this plate and they all looked great. I’m still working the kinks out of my stamping to my nails skills. Any tips on perfect centering would be very welcome. 😉

You can get your own JR Stamping plates along with awesome stampers and accessories at My Online Shop. They are on Instagram too.

I hope you are having a great week.
Hugs,
Rach

%d bloggers like this: